A Photographer's Field Guide to San Francisco
San Francisco is one of the most rewarding cities in the world to photograph, not because it offers a single defining landmark, but because of how dramatically it changes from one neighborhood to the next. Within the span of a few miles, the character of the city shifts from dense urban corridors and historic streets to open waterfront, modern architecture, and sweeping views shaped by fog, elevation, and coastal light.
This guide focuses on several areas that consistently offer strong photographic opportunities: Chinatown, North Beach, the Embarcadero, and the southern approaches to the Golden Gate Bridge. Each location offers its own distinct visual identity, from historic streets and dense urban environments to open waterfront and iconic coastal views. Of course there are a whole lot more but if you focus on these, you’ll be guaranteed to come away with some beautiful shots of “The City.”

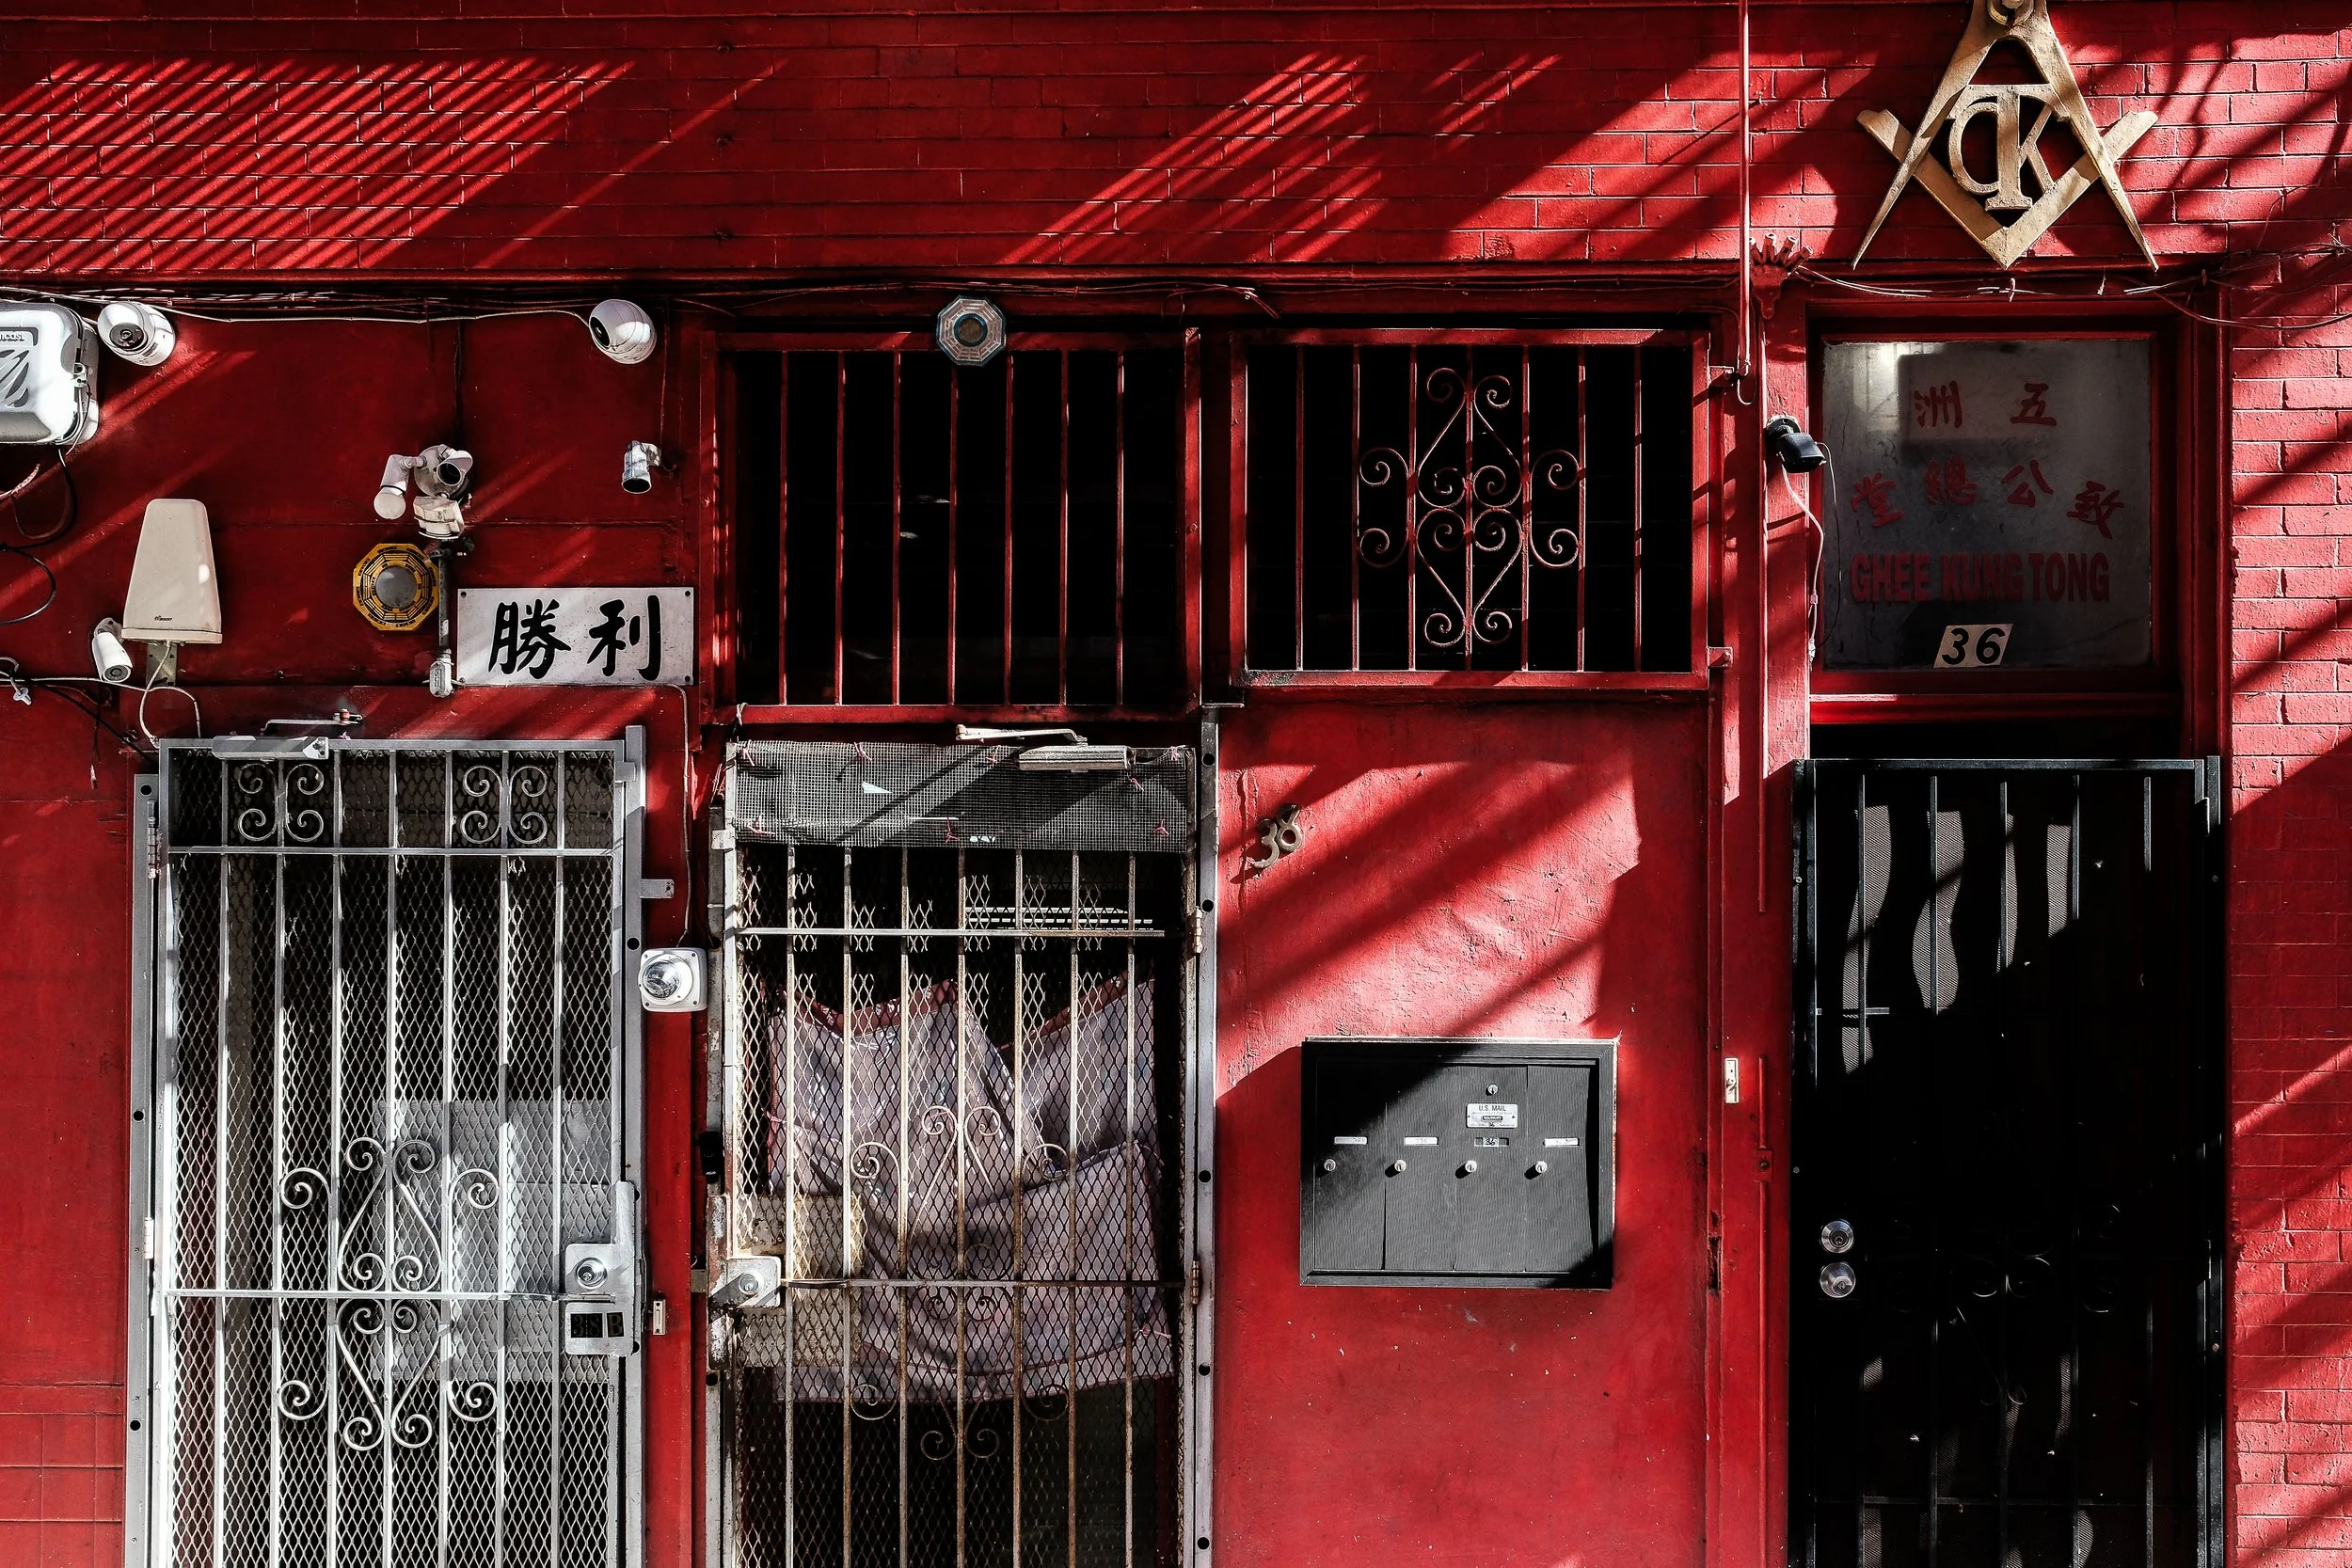
Chinatown
When I head into San Francisco's Chinatown, the big mirrorless kit stays home. This is street photography territory, and for that I put on my street shooter hat and grab my Fuji X100VI. It's compact, it's quiet, and it doesn't announce itself the way a larger rig with a zoom lens does. In a neighborhood this alive and active, being able to blend in matters a lot.
Now, here's something most visitors don't realize: Chinatown has two completely different personalities depending on which street you're on.
Grant Avenue: The Tourist Side
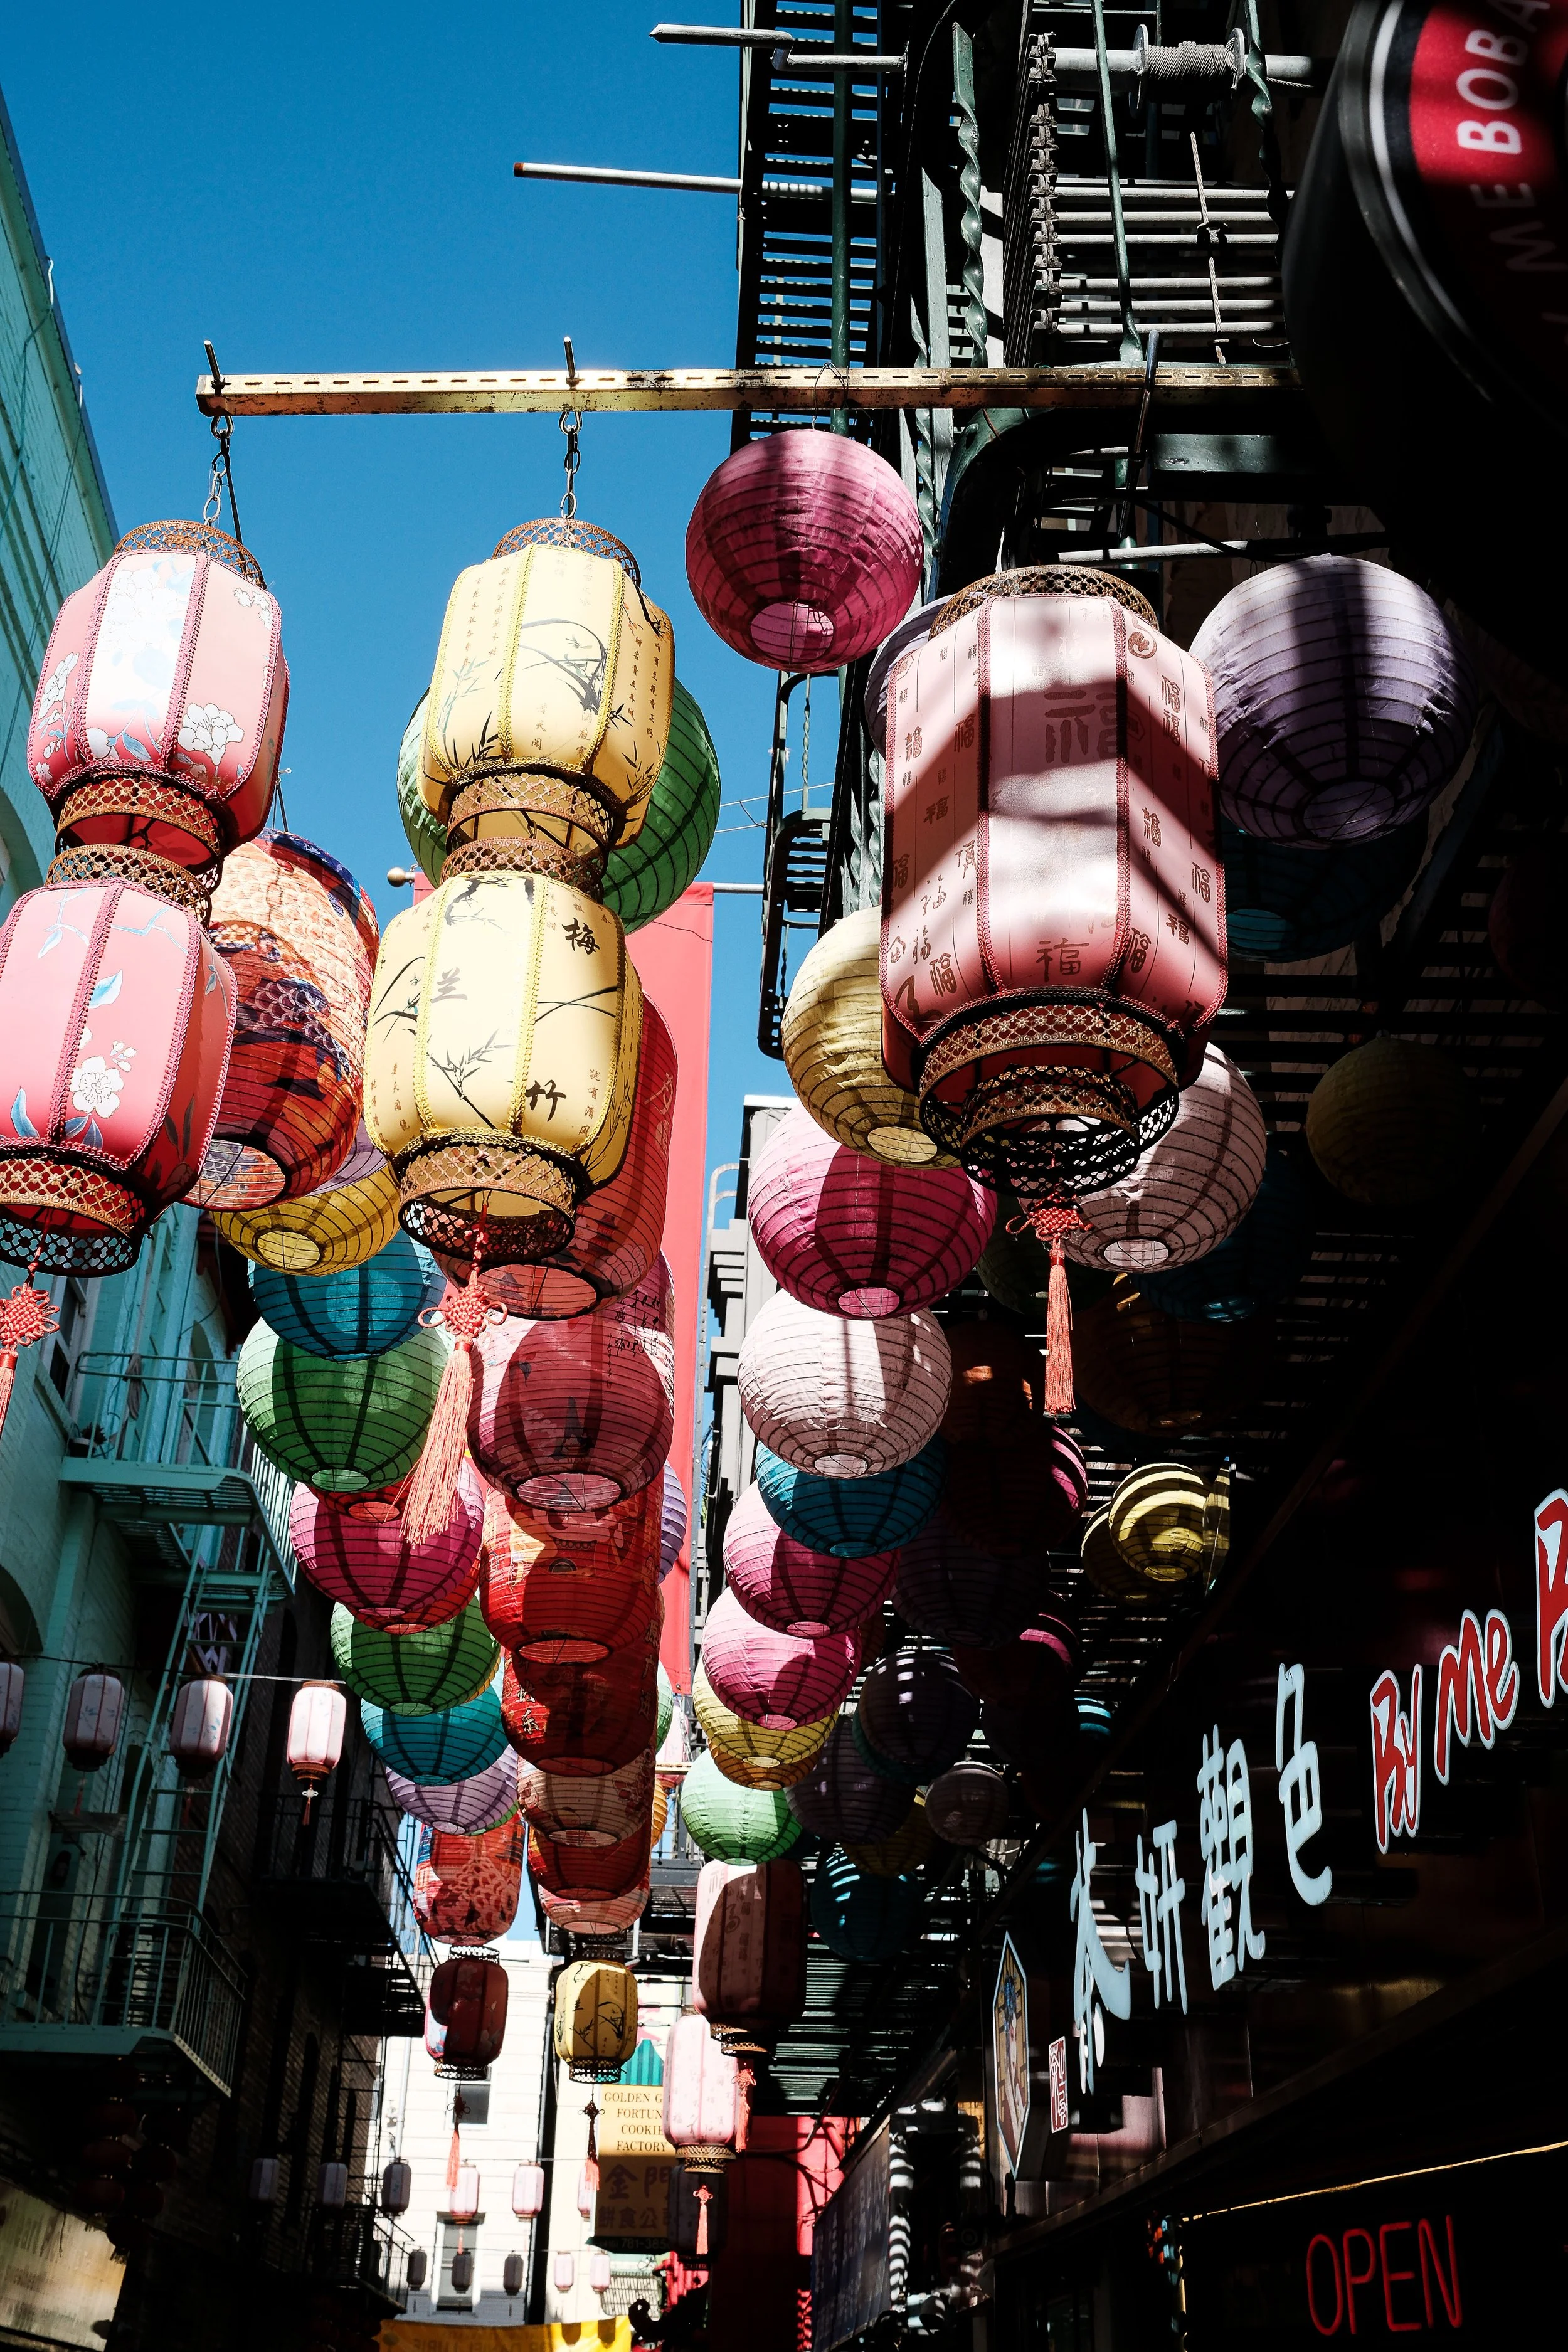
Grant Avenue is the front door. Dragon gates, souvenir shops, red lanterns strung overhead. It's busy, it's colorful, and it photographs well because, honestly, it's designed to. You're not going to stumble onto anything hidden here, but that doesn't mean it's not worth shooting. The overhead lanterns on a foggy morning or in the early evening when the lanterns light up, make for a great shot, and the ornate building facades give you strong graphic elements to work with.
Stockton Street: Where the Neighborhood Actually Lives and Shops
Hike (yes, it’s a good hill) a block up to Stockton and you're in a completely different world. This is where residents shop for groceries, where vendors have their produce stacked up on the sidewalk, where the street sounds like a working neighborhood and not a theme park. It's louder, and more crowded. But it's also where the real “street” photographs are hiding.
For those of you who aren't familiar with the X100VI, this is where it earns its keep. The small form factor lets you move through the crowd without attracting unwanted attention. The 28mm (35mm equivalent focal length) is perfect for this kind of work. Close enough to feel intimate, wide enough to give context.
Don't Skip the Alleys
Here's the thing most people miss entirely: the best photography in Chinatown is in the alleys, and most visitors walk right past them.
Waverly Place has a reputation as the one of the most photogenic alleys in Chinatown, and that reputation is well earned. The tong association buildings have these incredible painted balconies stacked three and four stories up, and on a clear day the color against the sky is outstanding. The alley is narrow so you're shooting up a lot, but the X100VI handles this beautifully.
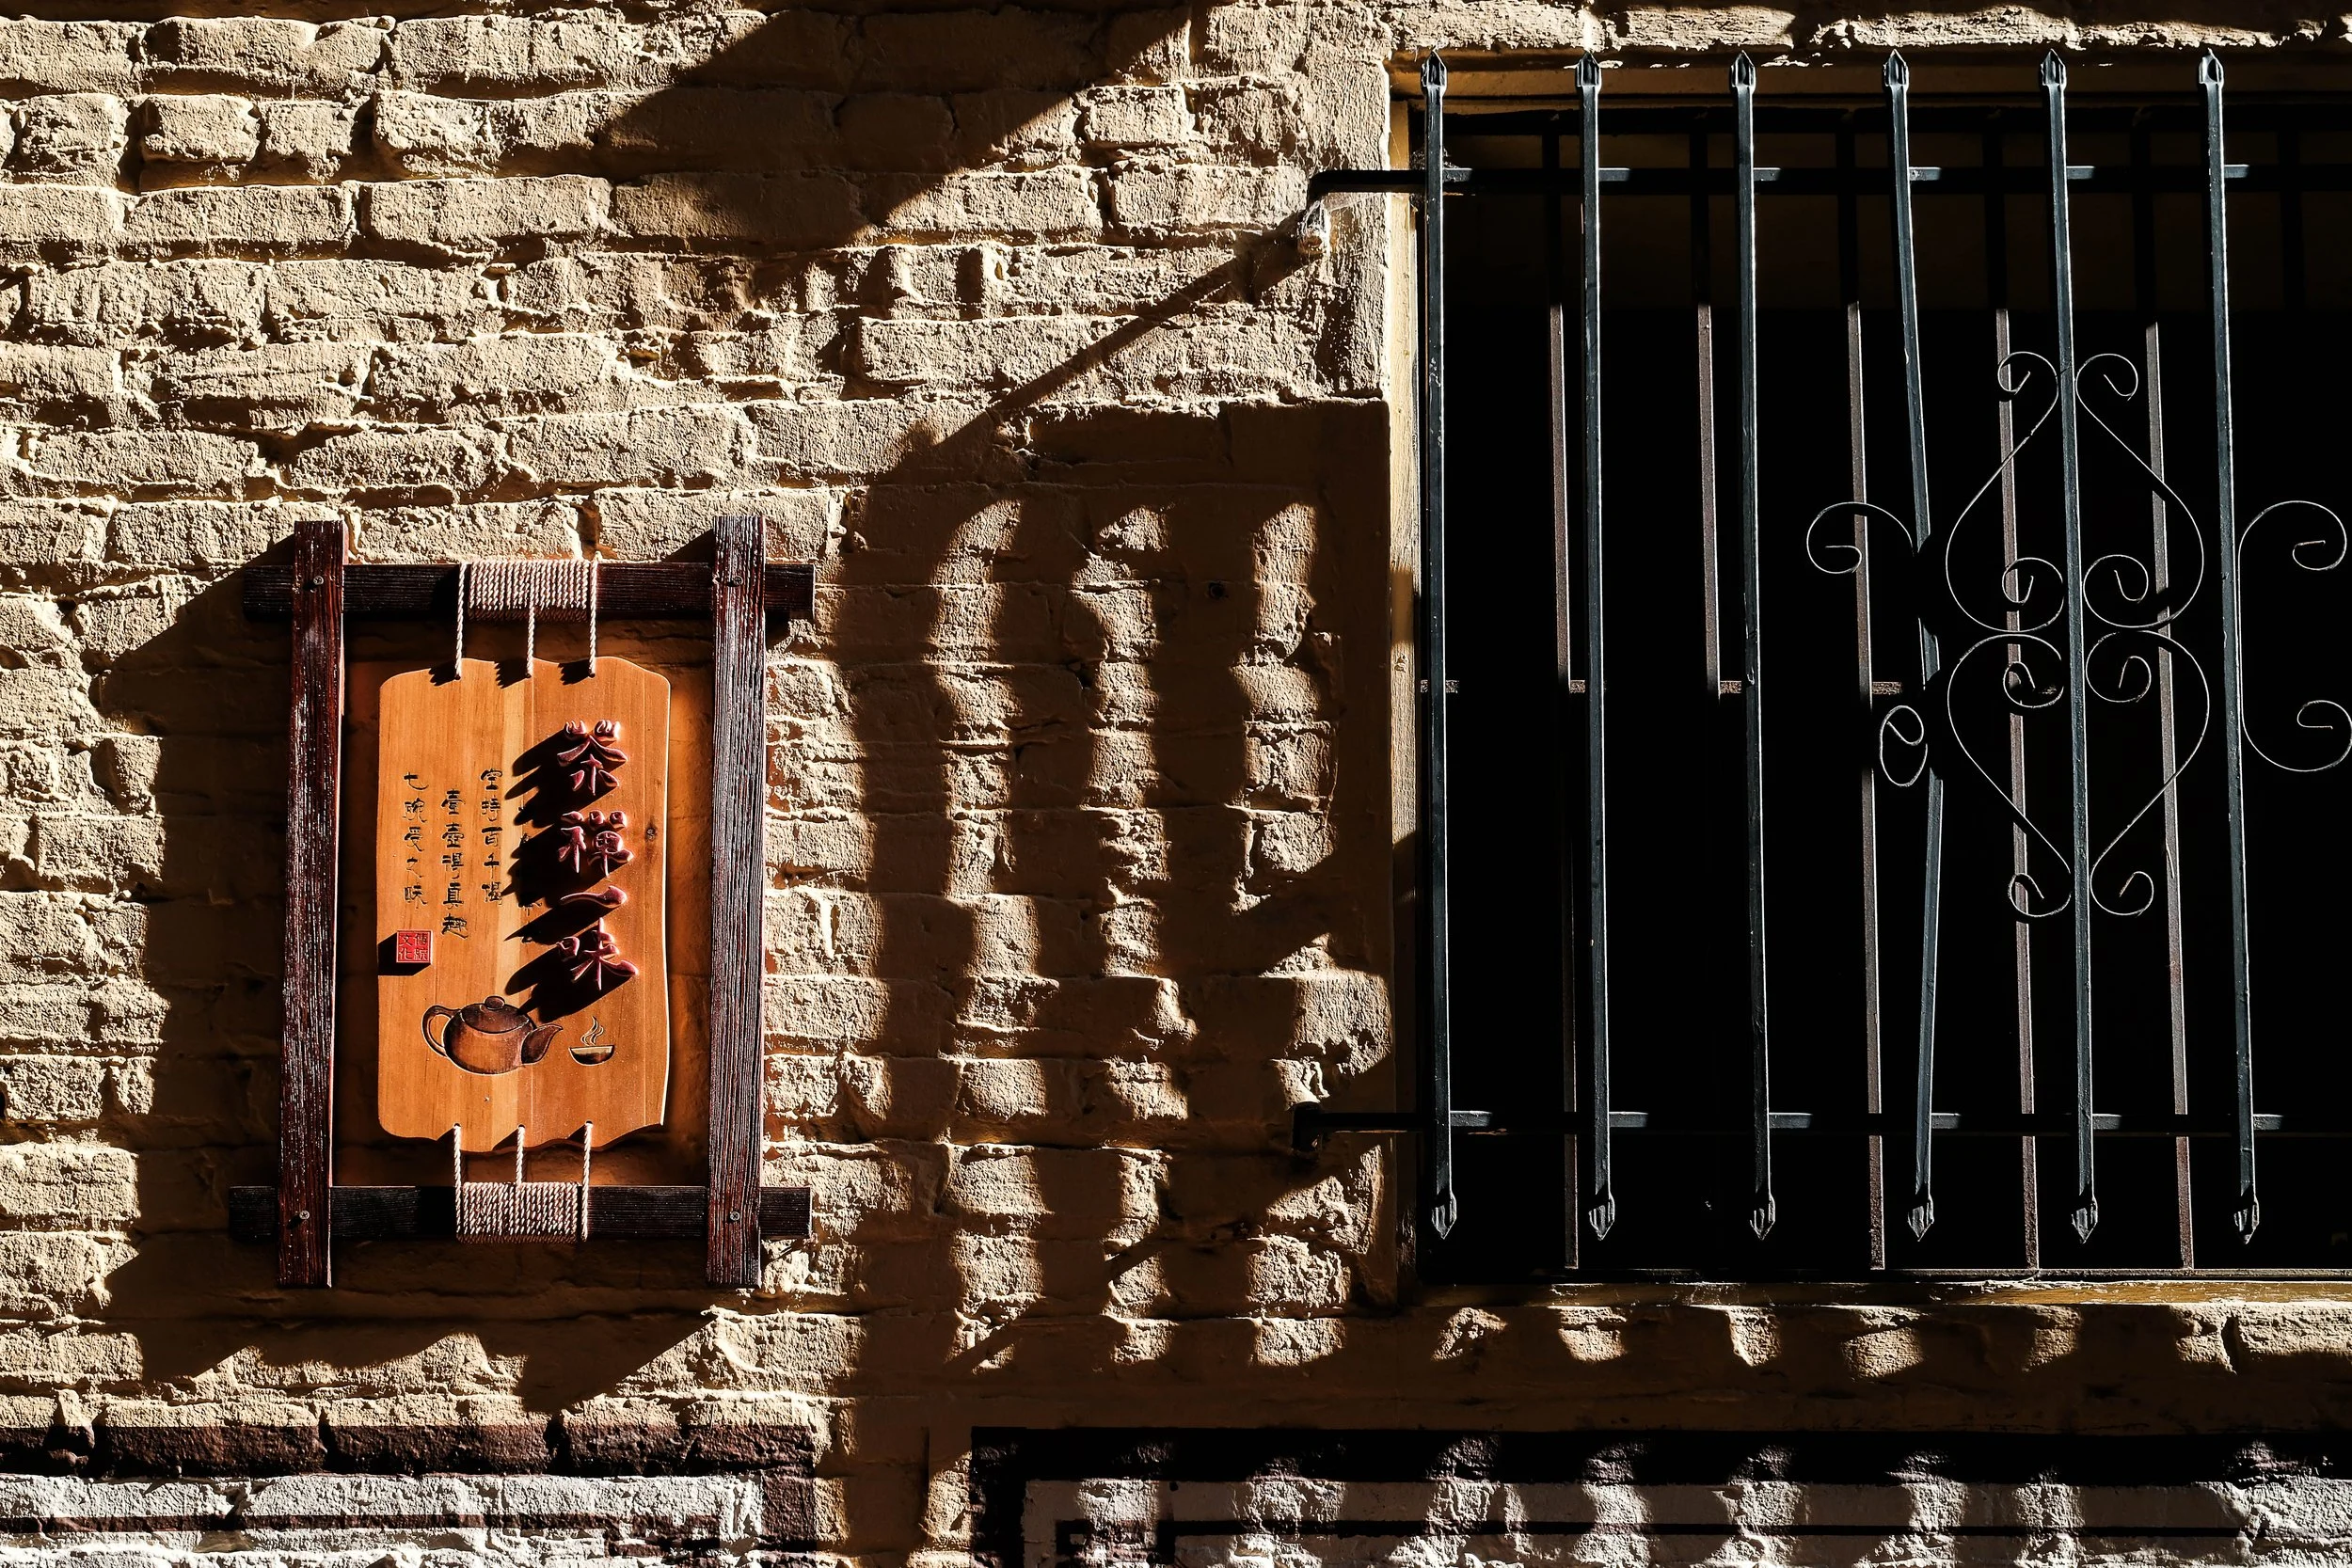
Ross Alley is shorter and a little grittier. The Golden Gate Fortune Cookie Factory is here, and if you've never watched fortune cookies being made on an old hand-operated press, it's worth a stop. The alley itself has great texture and some nice shadow play in the afternoon when the light cuts in at a low angle.
Oh, and don't stop there. Spofford Alley and Commercial Street are also worth wandering. Some of them dead-end, some connect back to Grant or Stockton, but all of them feel like a layer of the neighborhood that most visitors never find. Be curious. Turn down the side street just to see where it goes.
Timing and Light
Look, I know a lot of photography guides will tell you to get up at dawn. And they're not wrong. But I have a job, and the reality is I'm heading into Chinatown after work. Turns out, early evening has plenty going for it.
The streets are still buzzing with activity. Vendors are wrapping up their day, restaurants are filling up, and the neighborhood has a different energy than it does in the tourist rush of midday. The light on Grant Avenue gets warm and directional as the sun drops, and those red lanterns overhead begin to glow. On Waverly Place, that same low-angle light hits those painted balconies at exactly the right angle. It doesn't last long, maybe 20-30 minutes of really good light, so be ready when it happens.
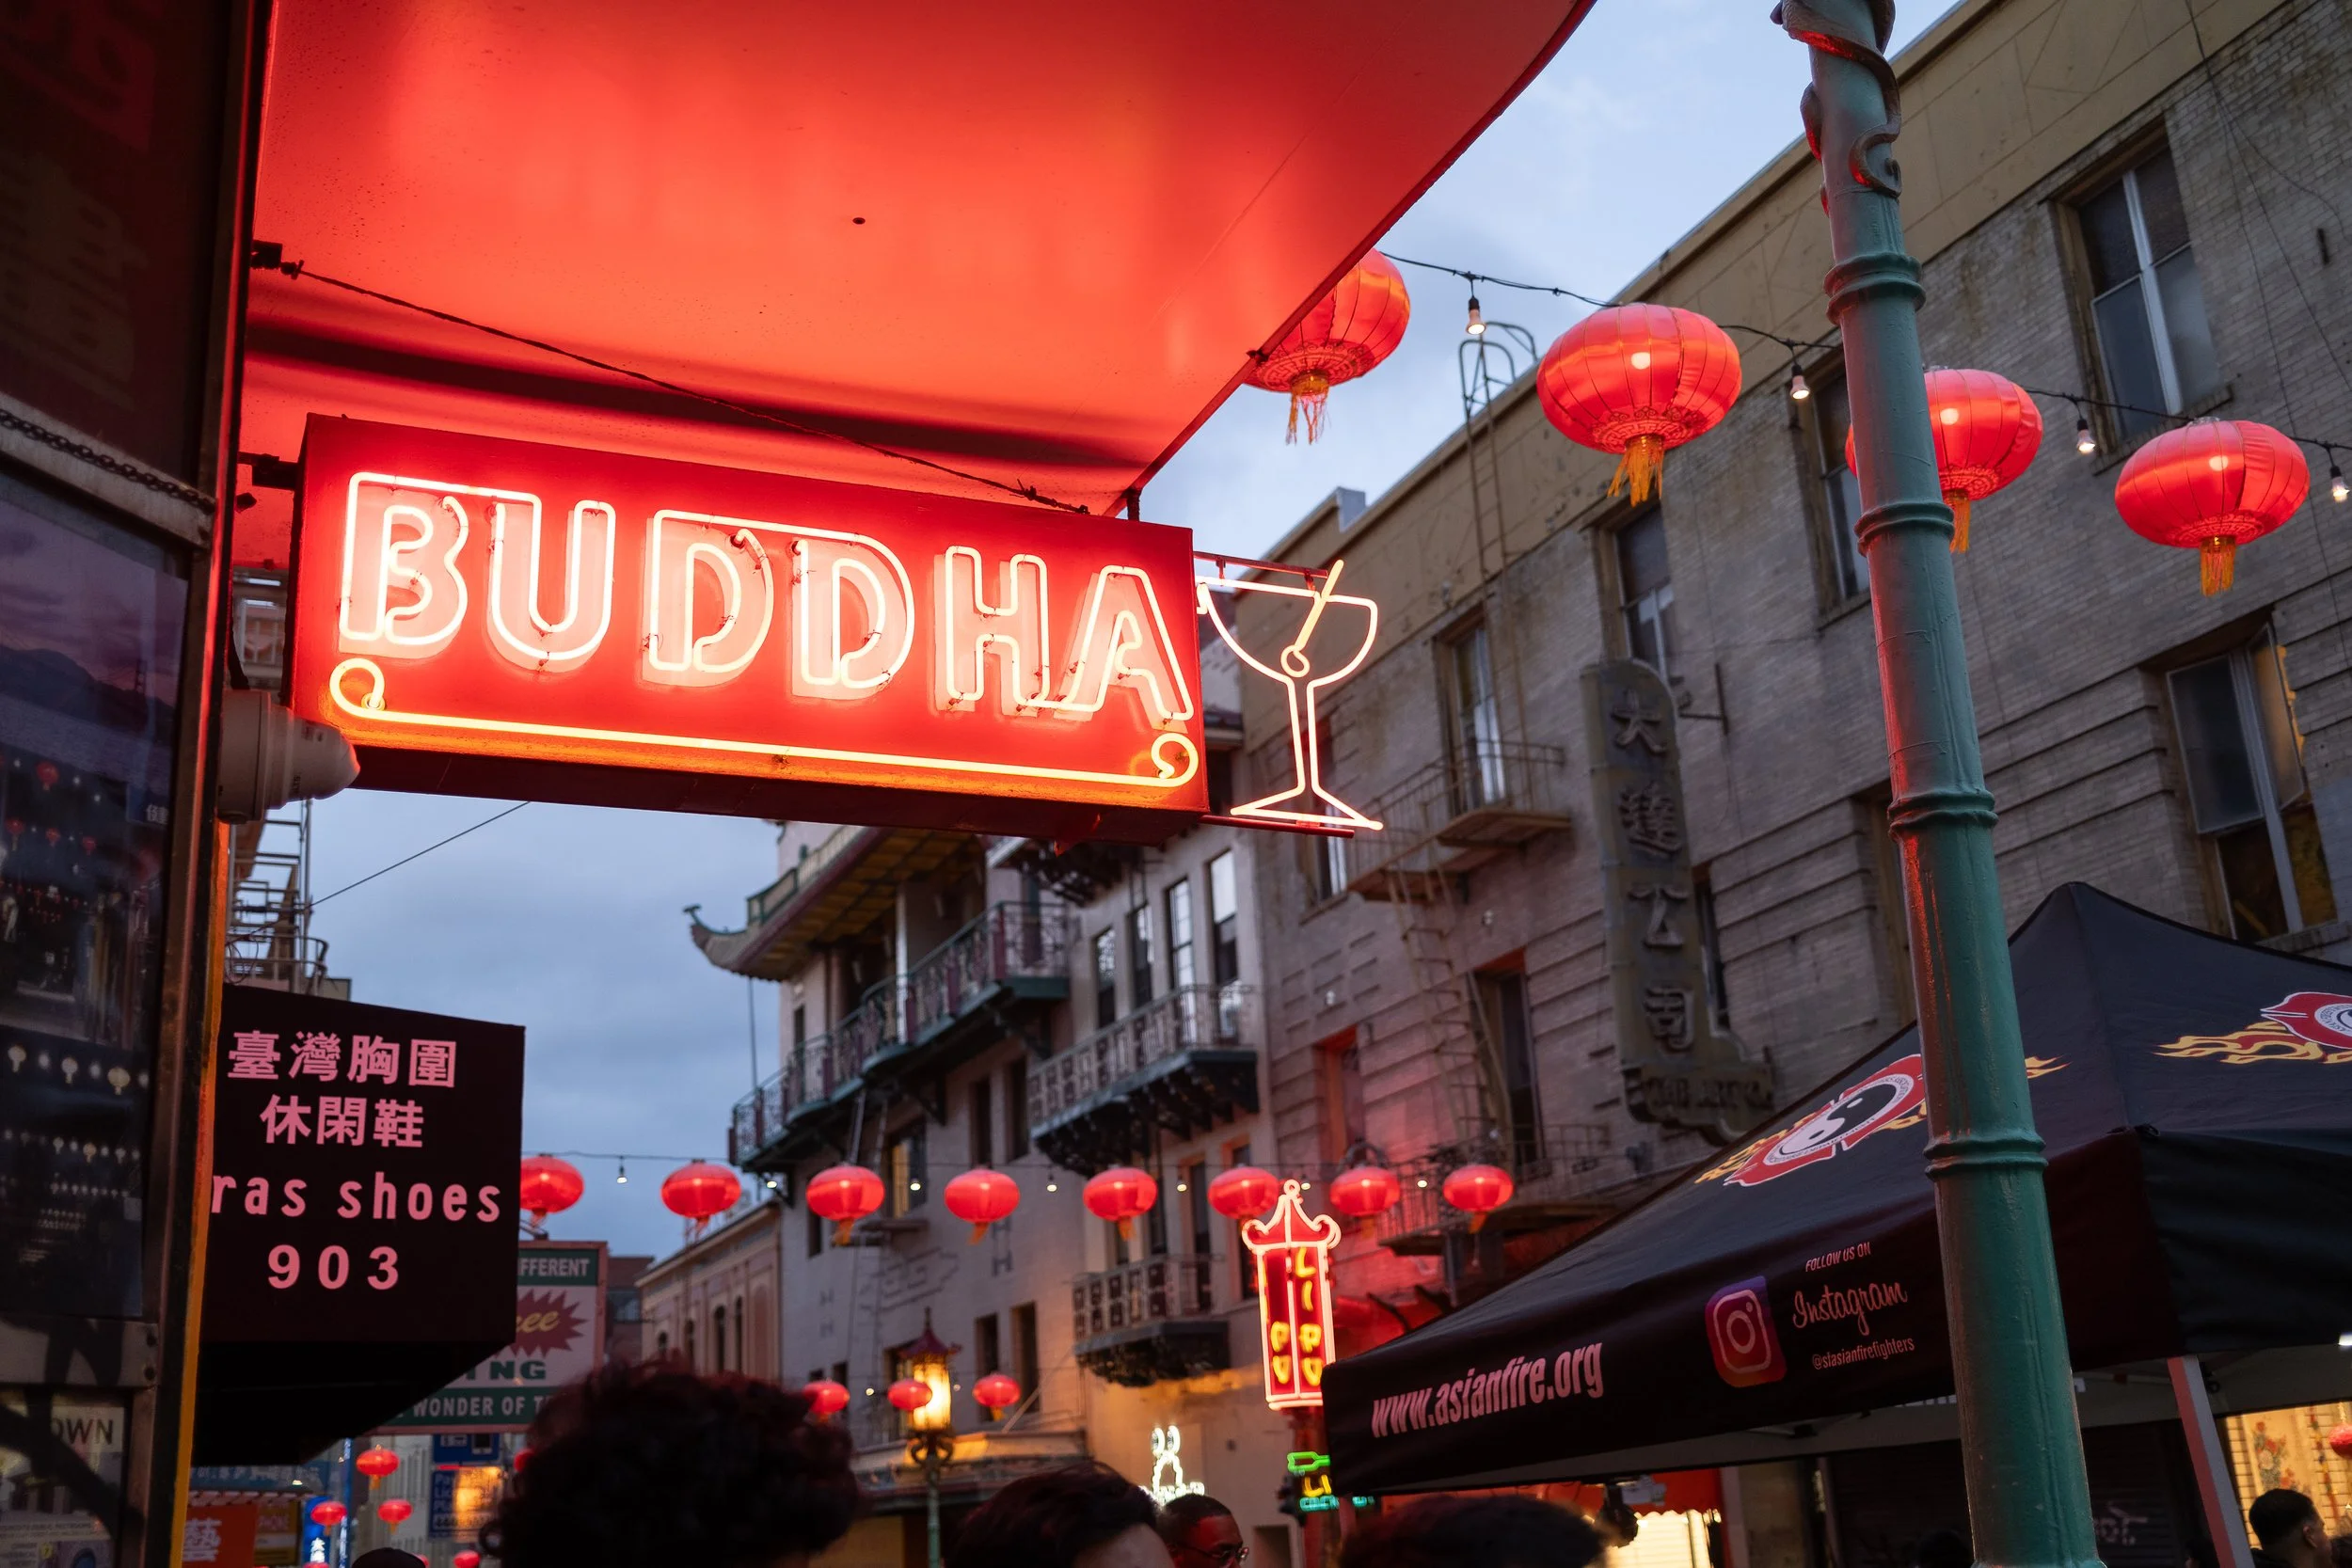
As it gets darker, Chinatown shifts into evening mode and the neon signs, restaurant lights, and street lanterns create a completely different shooting environment. The X100VI handles low light remarkably well, and the IBIS means you can hand-hold at slower shutter speeds without your shots going soft. This is also when the neighborhood starts to feel a little more intimate and less like a tourist attraction, which I personally think makes for better street photography anyway.
What to Bring
For me it's the X100VI and nothing else. If you're bringing a larger kit, keep it simple. A 23mm or 35mm prime makes more sense here than a zoom. You're working close, you're working fast, and what you need is something that lets you react quickly without making people around you feel like subjects in a documentary. One last thing: be respectful.
Chinatown rewards the photographer who slows down, wanders without a rigid plan, and pays attention to what's happening at street level. Leave the itinerary behind and just walk. The photographs will find you.

North Beach
North Beach is one of those neighborhoods that just keeps giving. Every block along the main drag has something worth stopping for, and if you take the time to look back over your shoulder every now and then, you'll get some of the best shots of the walk. This guide takes you up Columbus Avenue, over to Washington Square, up to Coit Tower, and back down through a few streets that most people skip right past.
I bring two kits for this one depending on my mood. Sometimes it's just the Fuji X100VI if I want to keep it simple and move fast. Other times I'll pair my X-T5 with a medium zoom, either the XF 16-55mm f/2.8, the XF 16-80mm f/4, or the XF 70-300mm if I know I want reach for specific shots. More on that below.
Start on Columbus Avenue
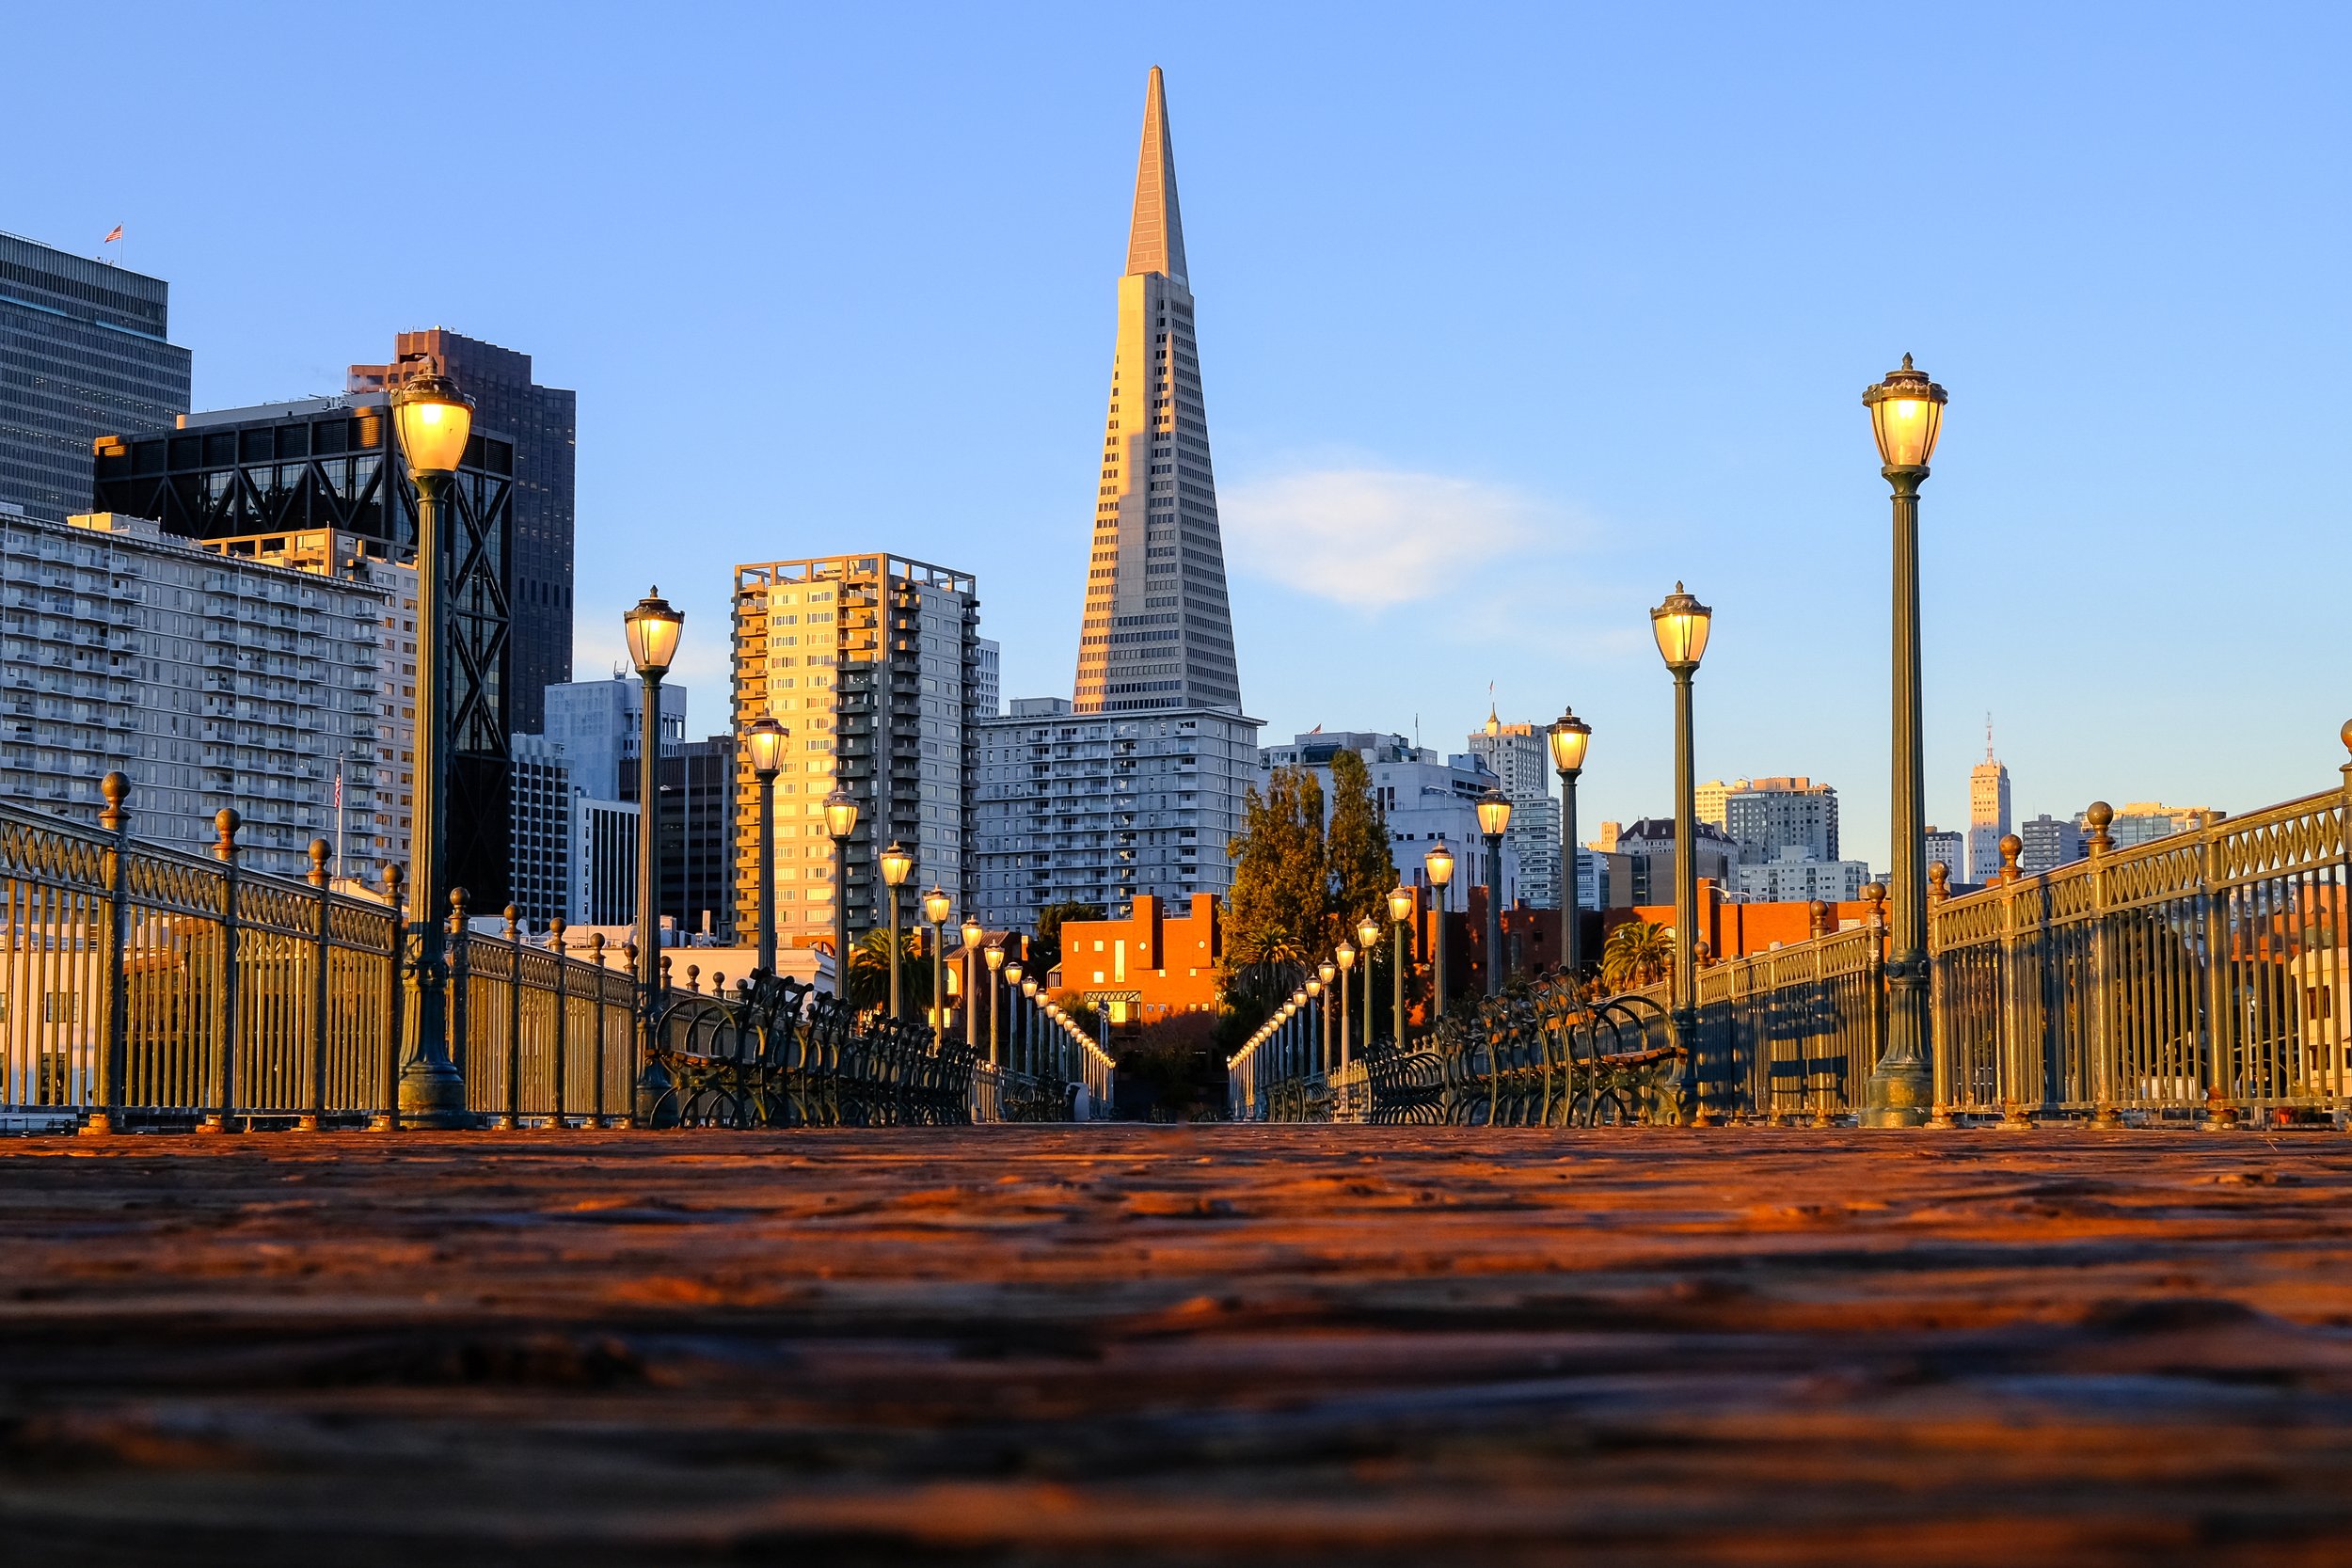
Columbus, starting on the corner of Columbus and Broadway, is the main artery of North Beach, and it rewards the photographer who takes it slow. The storefronts, the signage, the people moving in and out of cafes and bookshops - it's all there. Don't just shoot forward. One of the best moves you can make on Columbus is to stop periodically and look back downtown toward the Financial District. The Transamerica Pyramid frames itself beautifully at the end of the street, and it gets better the further up Columbus you go.
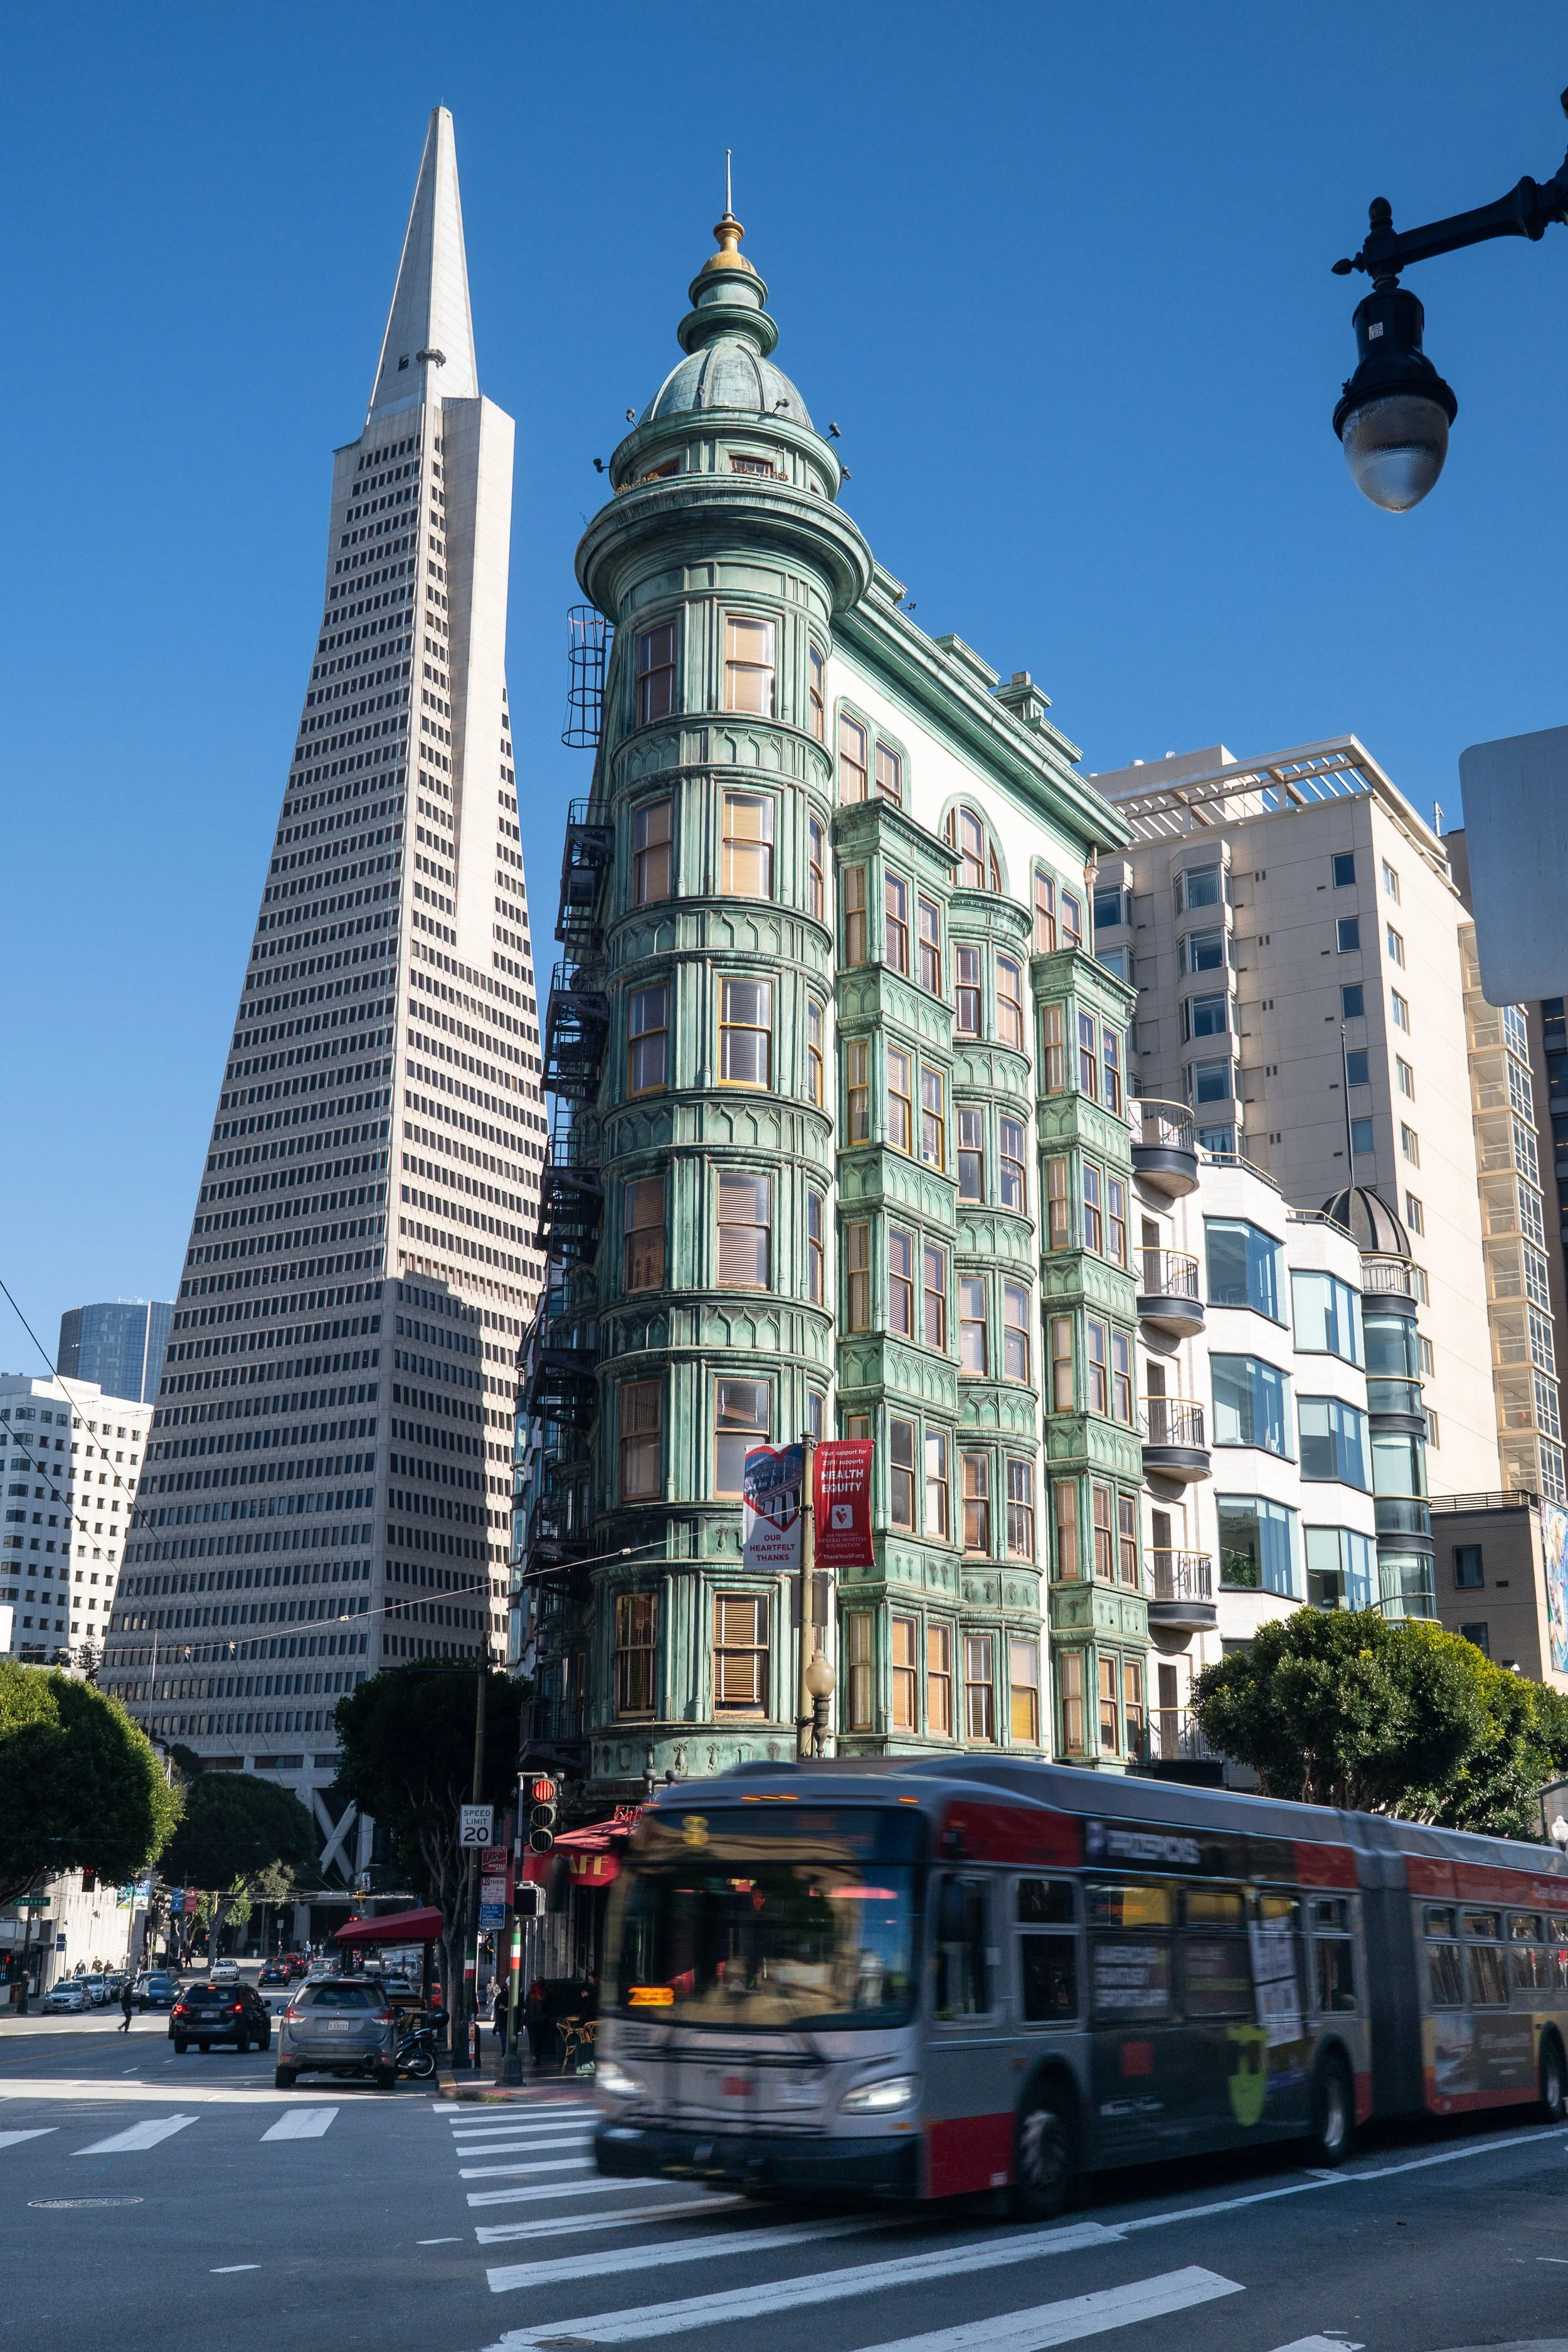
Along the way, keep an eye out for the Sentinel Building, also known as Columbus Tower, at the corner of Columbus, Kearny, and Jackson. This copper-green flatiron building survived the 1906 earthquake and has been owned by Francis Ford Coppola since the early 70s. It's a genuinely beautiful building and one of those SF landmarks that photographs well from almost any angle. The wedge shape means you get different compositions depending on which side you approach from.
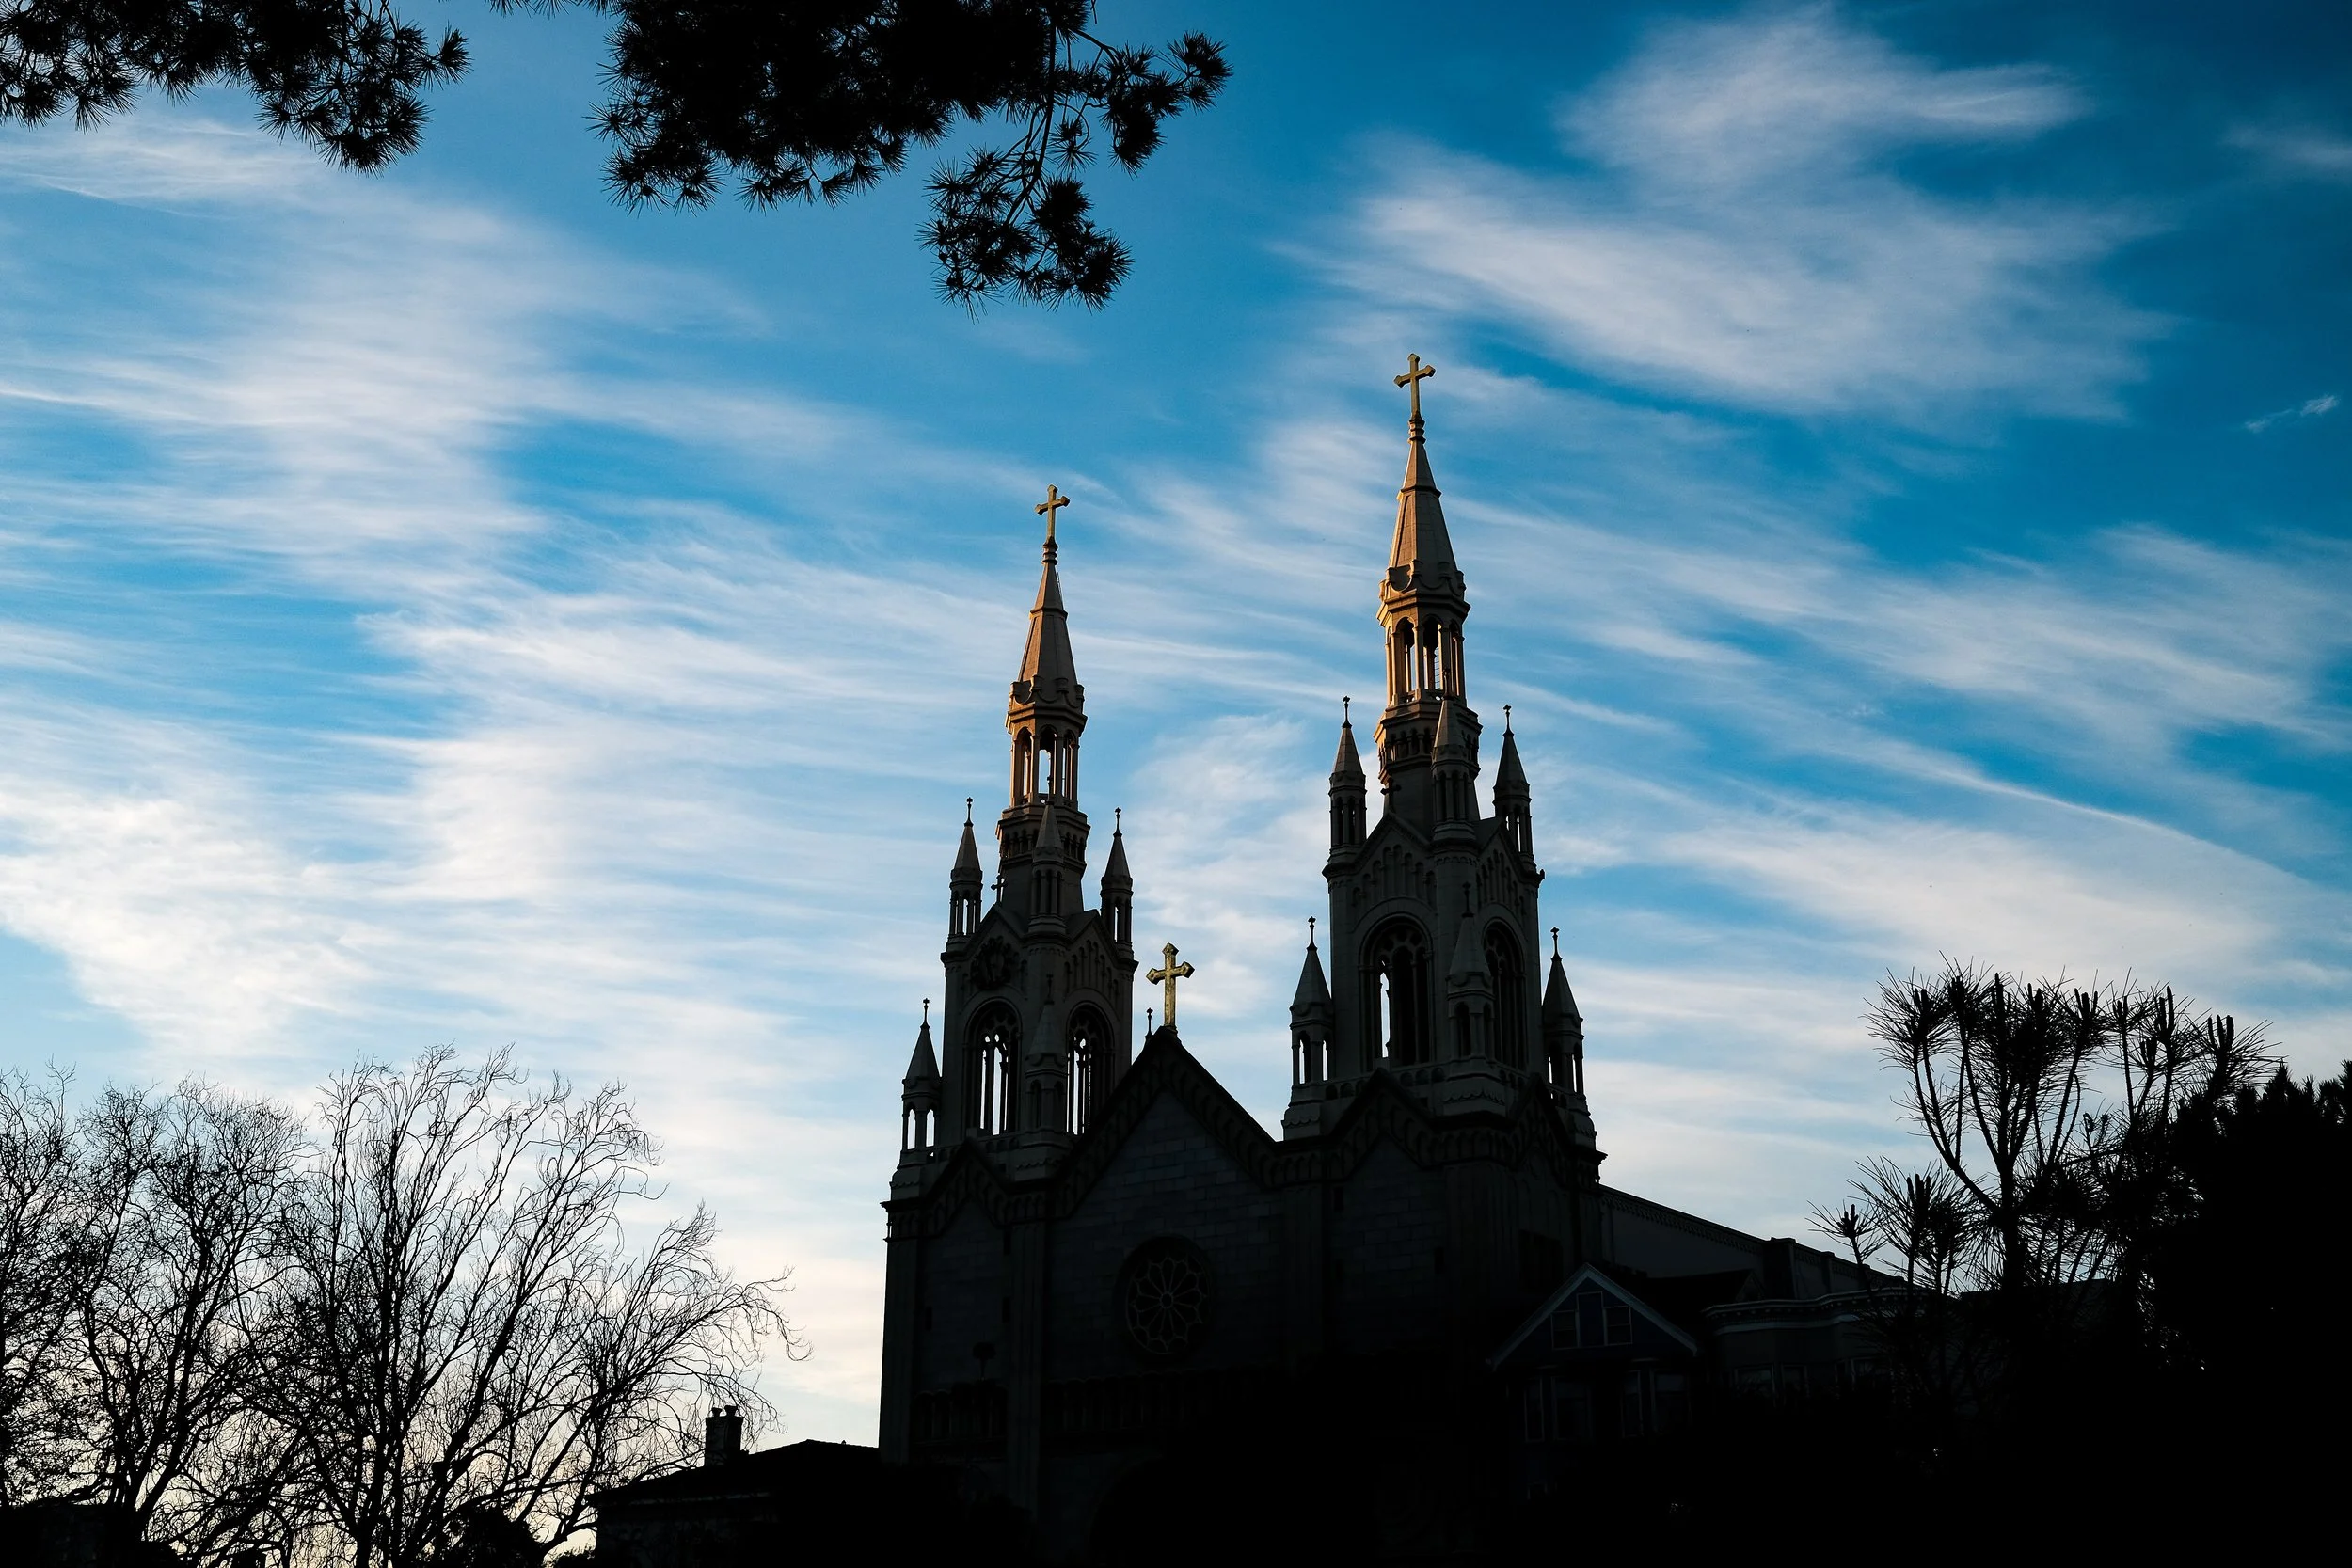
Saints Peter and Paul Church
Continue up Columbus toward Fishermans Wharf, and you'll eventually arrive at Washington Square, and directly across from it is Saints Peter and Paul Church. Those twin white spires reach 191 feet into the sky and they're a landmark for the neighborhood. Known as the Italian Cathedral of the West, the church has been here since 1924 and it's been in more than a few movies over the years (if you're a Dirty Harry fan, you'll recognize it).
For photography, the church is best shot from Washington Square across the street, where you can get the full facade and the spires against the sky. Morning light can make this shot genuinely special. That said, it photographs well at any time of day. Check the sun position before you go if you want clean front-lit shots on the facade.
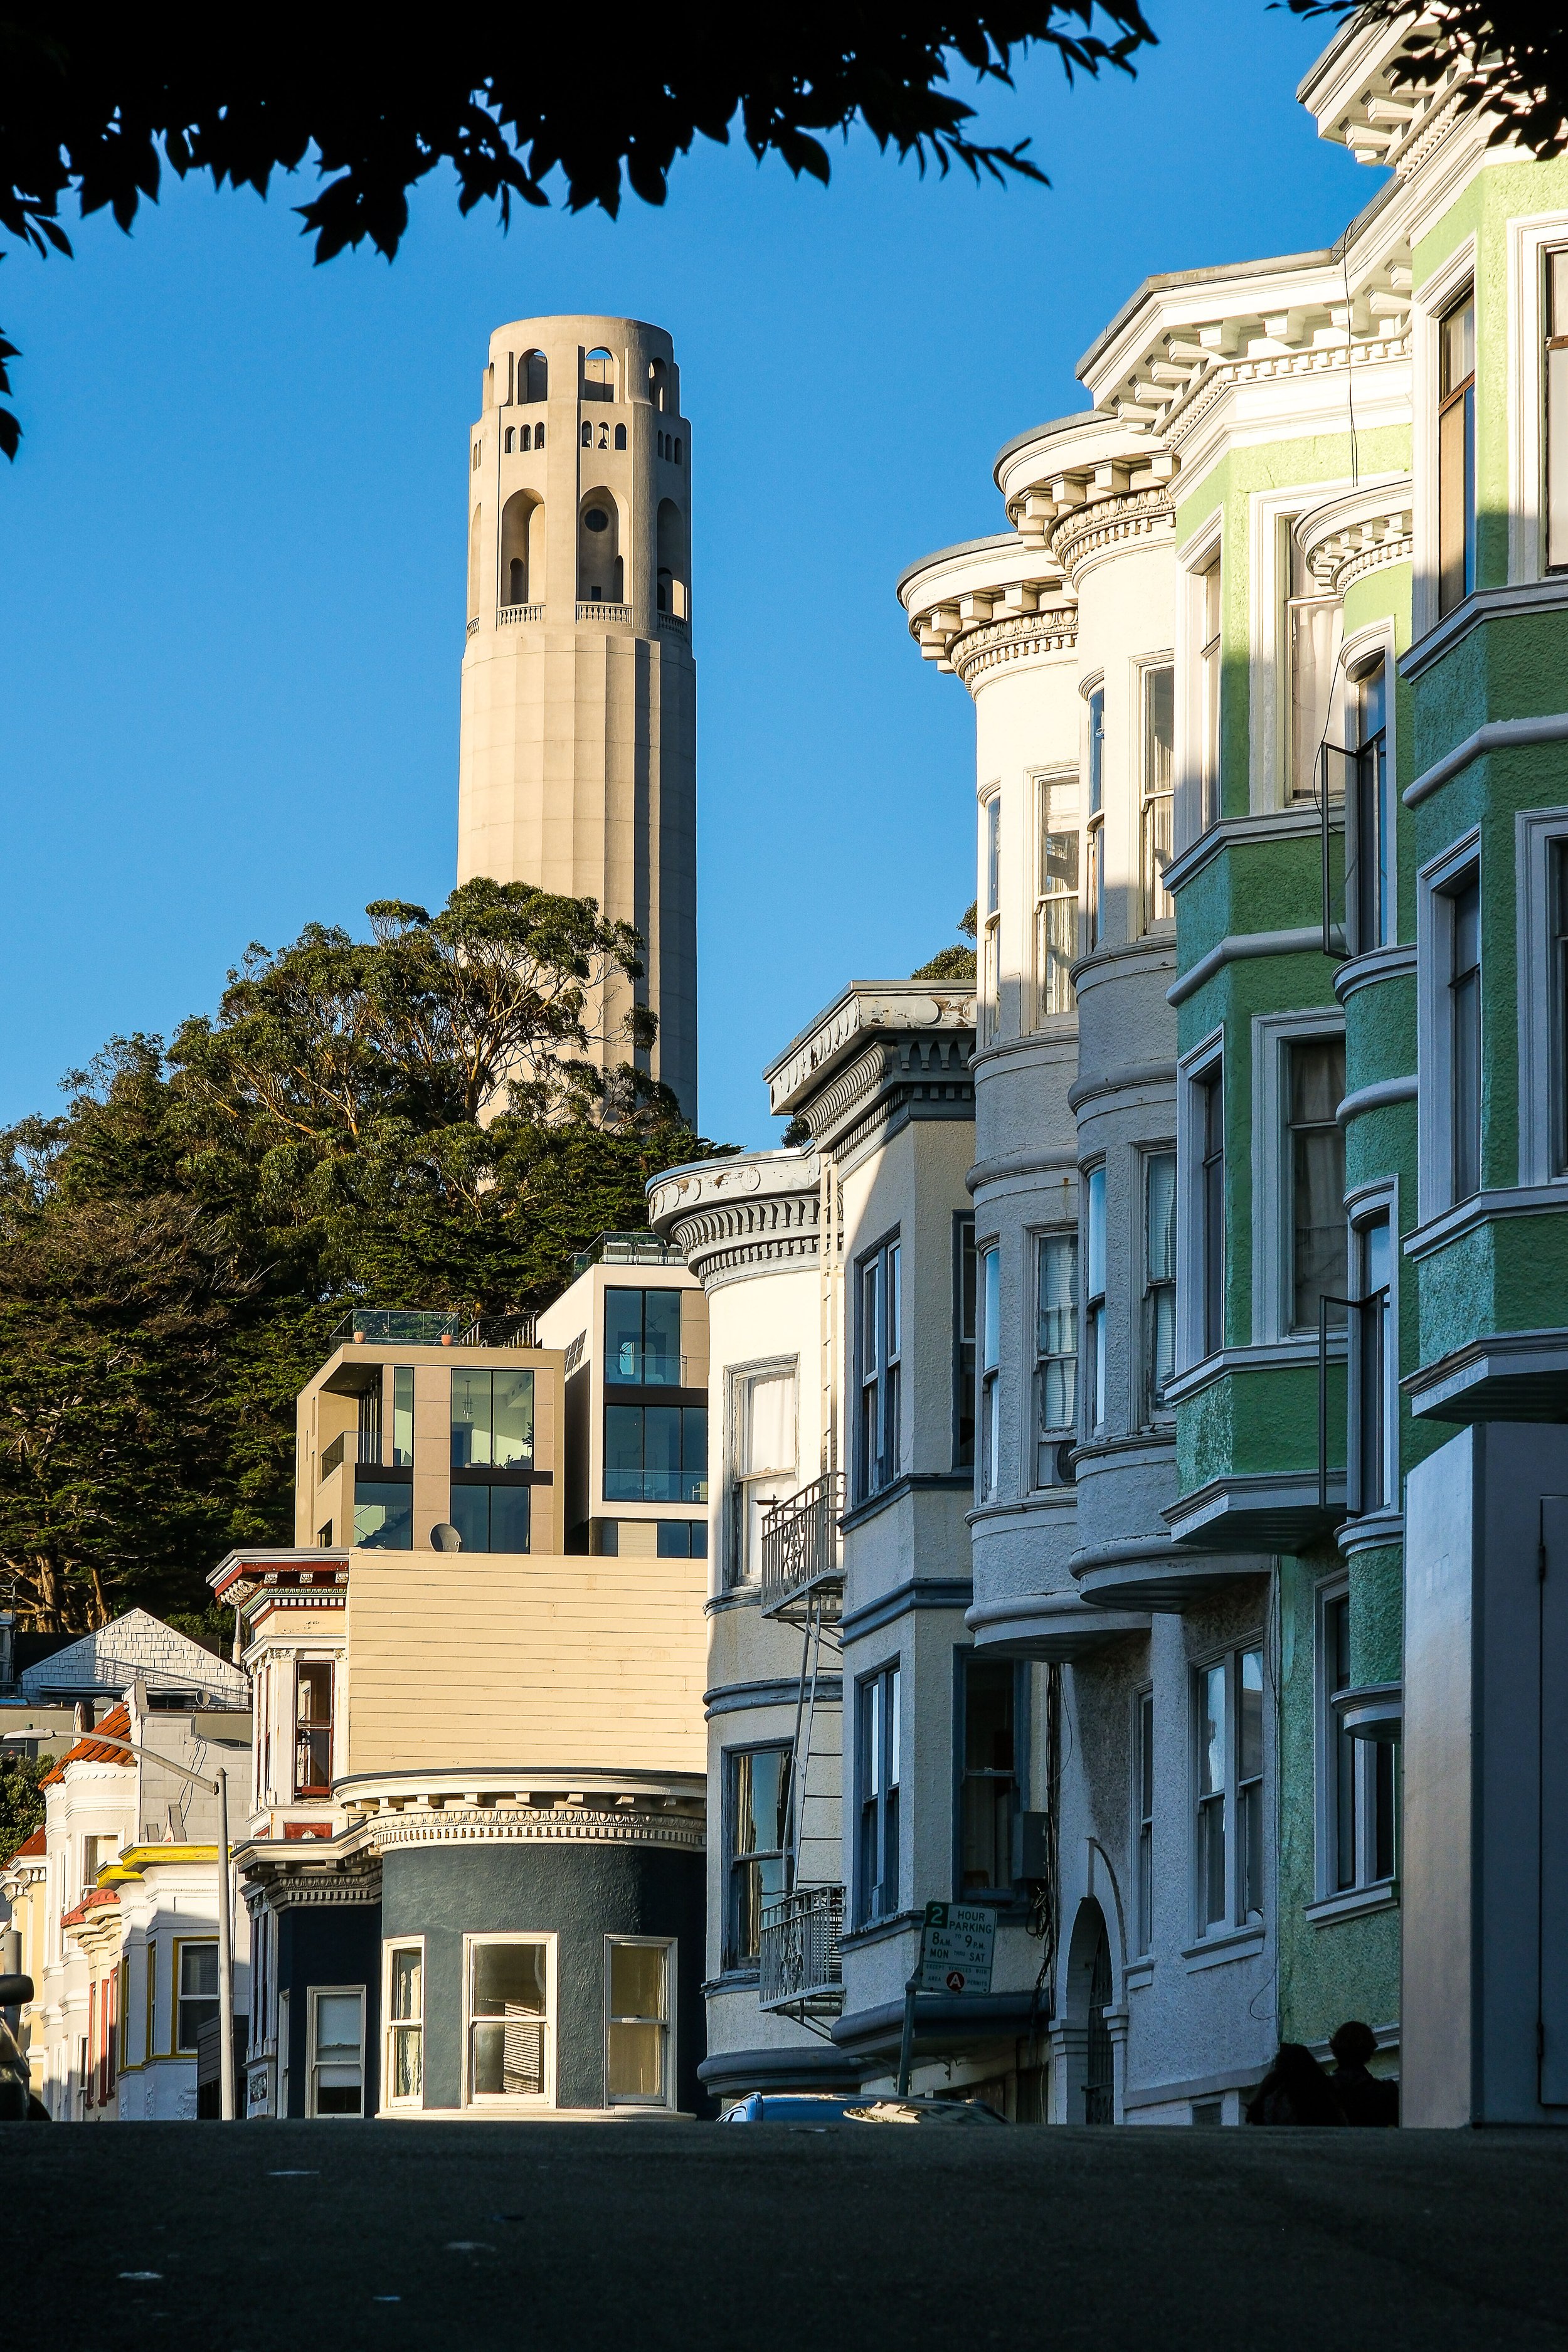
Up Filbert Street towards Coit Tower
From Washington Square, head up Filbert Street toward Coit Tower. This is the climb, and I'll be honest with you: it's a workout. But the payoff is there. As you make your way up, you start getting views back over the neighborhood and the bay that are worth stopping for. Don't wait until you're at the top to start shooting.
Coit Tower itself is a 210-foot white concrete column sitting at the top of Telegraph Hill and it's been part of the San Francisco skyline since 1933. As a photography subject, it's at its best when you have something in the foreground to give it context such as the rooftops of North Beach, a flowering tree on the hillside, or the wild parrots that actually live on Telegraph Hill. From the top, on a clear day, you get 360-degree views that include Alcatraz, both bridges, and the Financial District. It's worth the elevator ticket.
Back Down Grant Avenue
Once you've had your fill at Coit Tower, head back down and make your way to Grant Avenue. Now here's a shot that most people don't know to look for. If you've brought your zoom this is specifically where the 70-300 earns its keep. Look back toward Chinatown you’ll see the red lanterns strung across the street compress beautifully with a longer focal length. At 200-300mm you can stack those lanterns in a way that looks completely different from what you'd see with a wide angle. It's one of those shots that surprises people because they don't expect it from this direction.
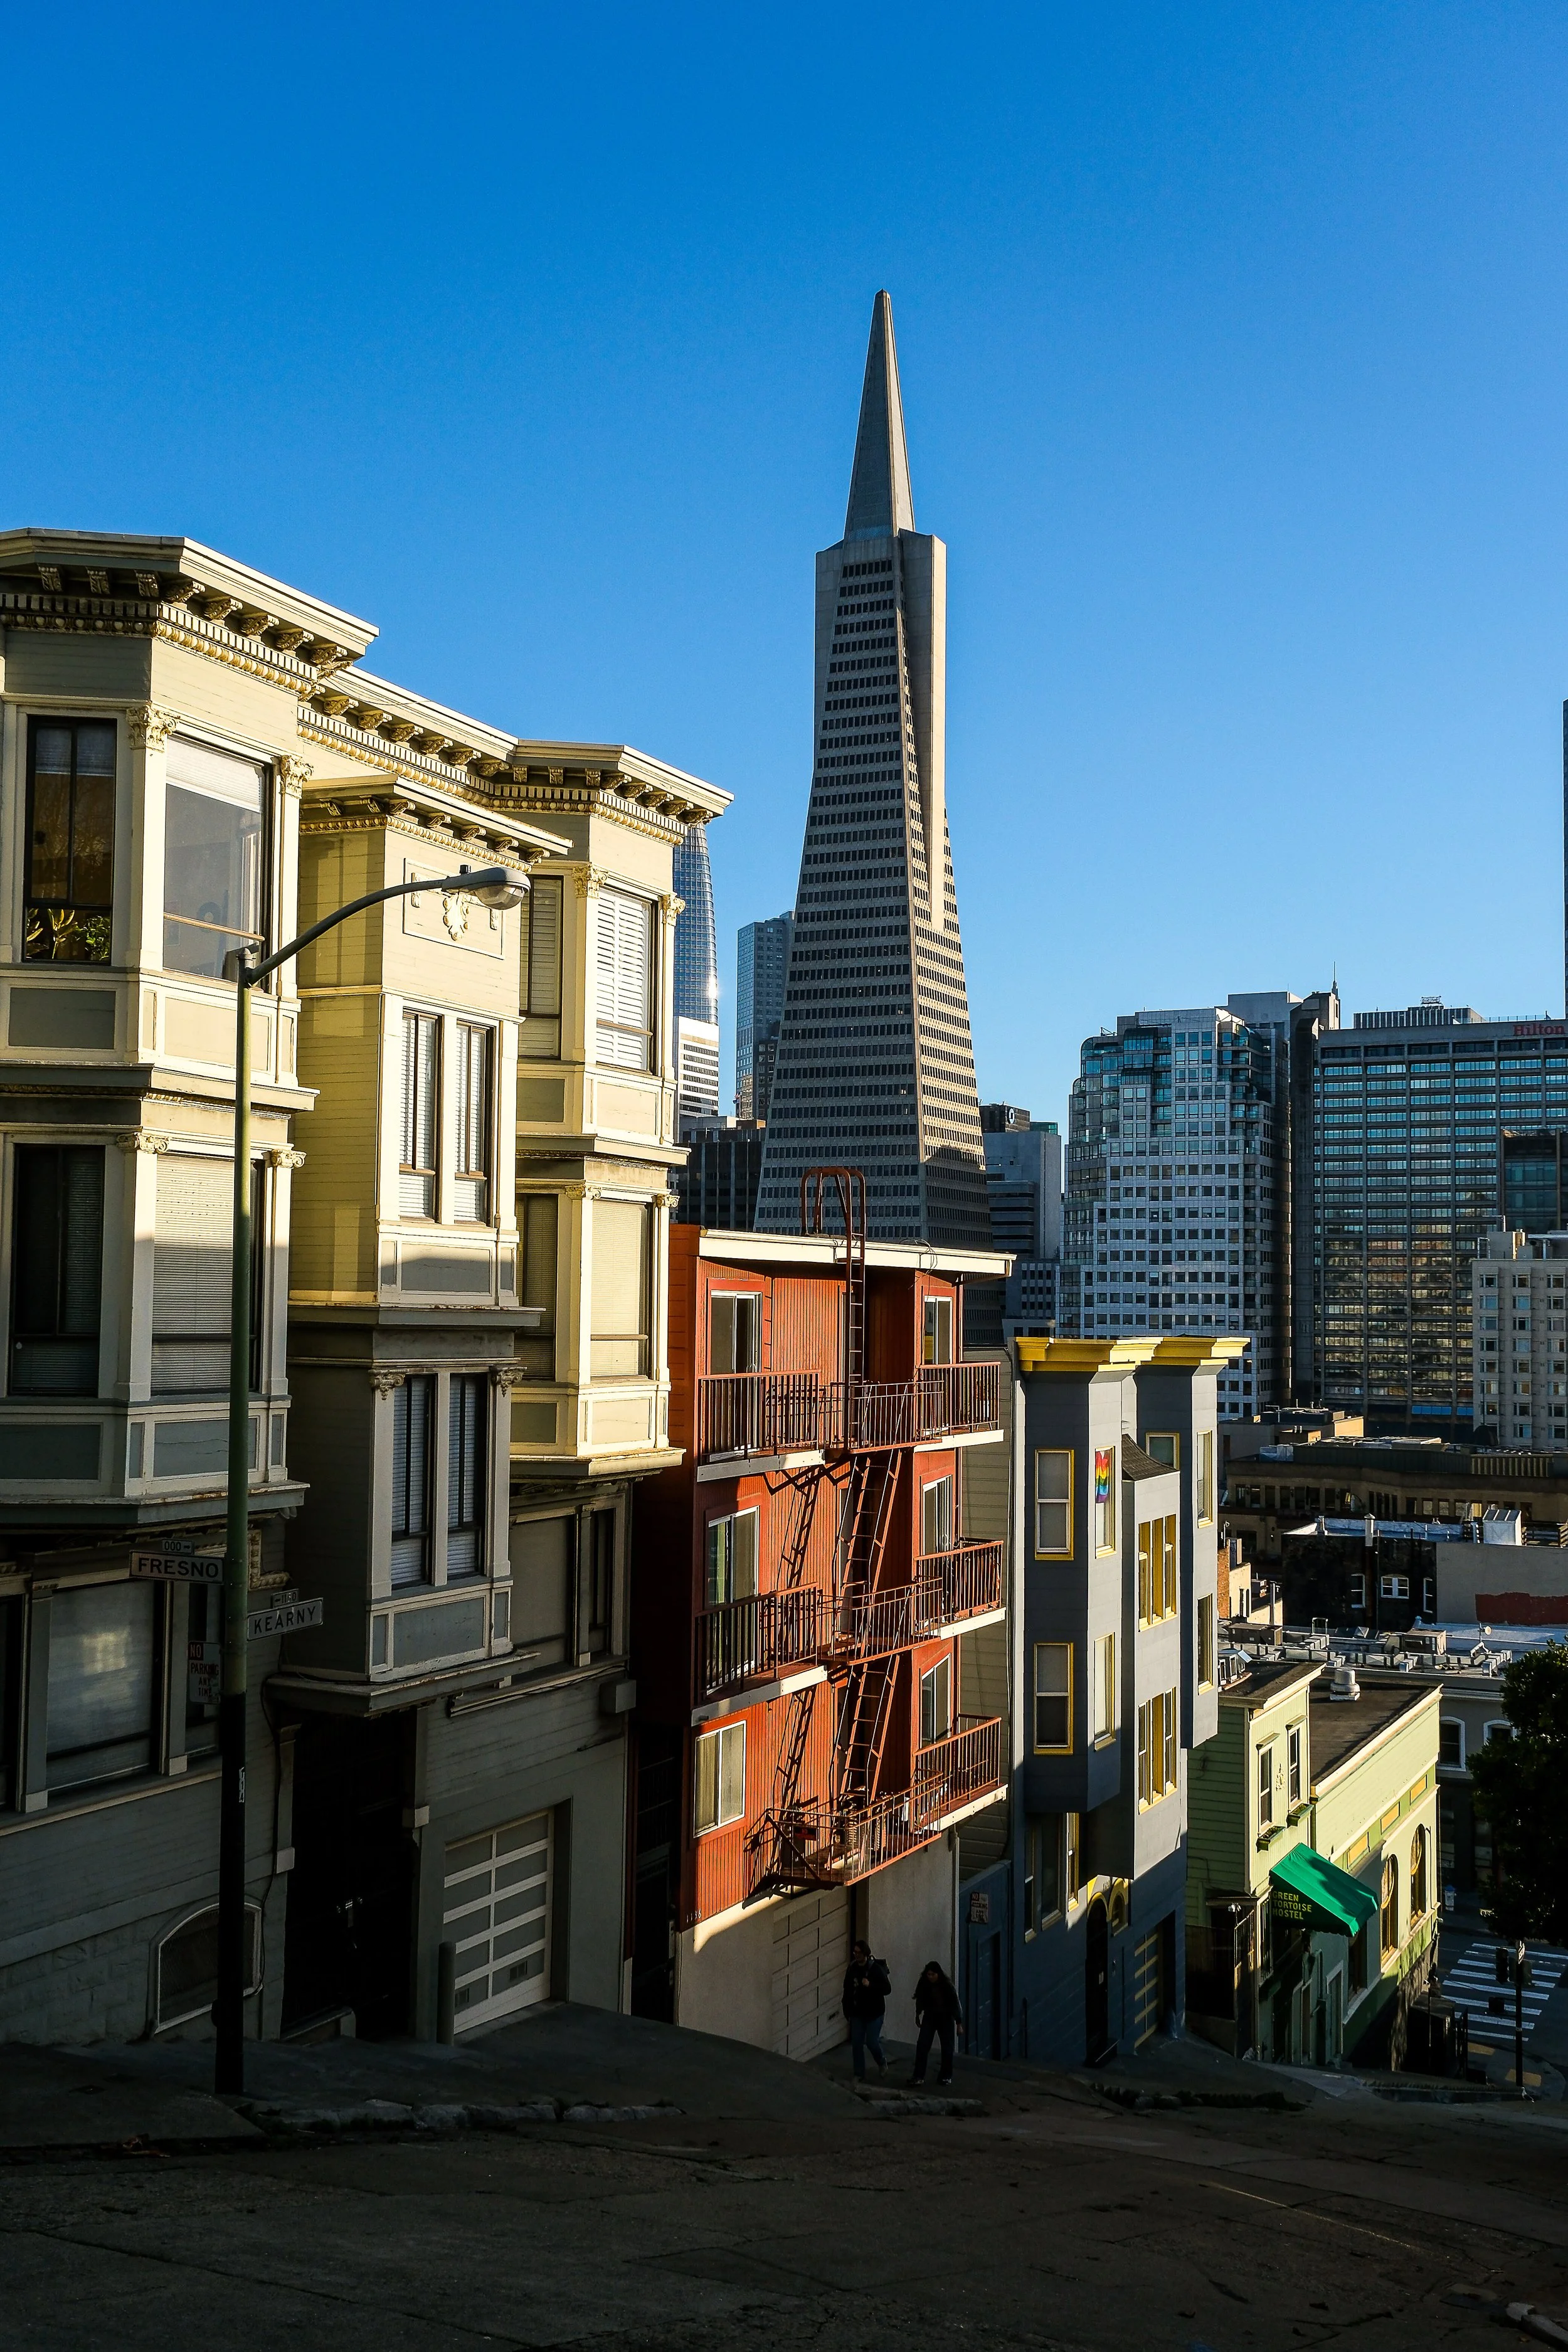
The Vallejo Street Shot
Here's my favorite hidden gem of this whole walk. As you head down Grant, make a left on Vallejo Street and walk up toward Kearny. When you hit Kearny, stop and look. What you get is a row of beautiful Edwardian buildings in the foreground with the Transamerica Pyramid rising in the background. It's a genuinely great composition and almost nobody talks about it. The Edwardians give you texture, color, and that distinctly San Francisco residential character, while the pyramid anchors the background and ties it back to the Financial District just a few blocks away.
The X100VI handles this shot just fine, but if you have the 16-55 or 16-80 on the X-T5, you'll have the flexibility to tighten or loosen the composition depending on where you're standing. Late afternoon light hits the Edwardians from the west and that warm light on those painted facades is something worth planning around.
What to Bring
The X100VI is a great choice if you want to move fast and travel light. It handles everything on this walk well, and its compact size means you're not lugging a bag around a neighborhood that involves some real elevation gain.
If you want more flexibility, the X-T5 with the XF 16-55mm f/2.8 is a workhorse combo that covers the church, the Columbus street scenes, and the Vallejo shot without breaking a sweat. The XF 16-80mm f/4 is a solid, lighter alternative if you'd rather not carry the extra weight of the 16-55, and the OIS is genuinely useful as the light gets lower.
The XF 70-300mm is worth tossing in the bag specifically for the Grant Avenue lantern shot and the Transamerica compression shots from Columbus. You won't use it constantly, but when you need it, you'll really be glad you have it.
North Beach is a neighborhood that rewards the photographer who takes their time. There's no need to rush through it. Stop for coffee at one of the cafes on Columbus, let the light change, and then keep walking. The photographs are there at every turn.
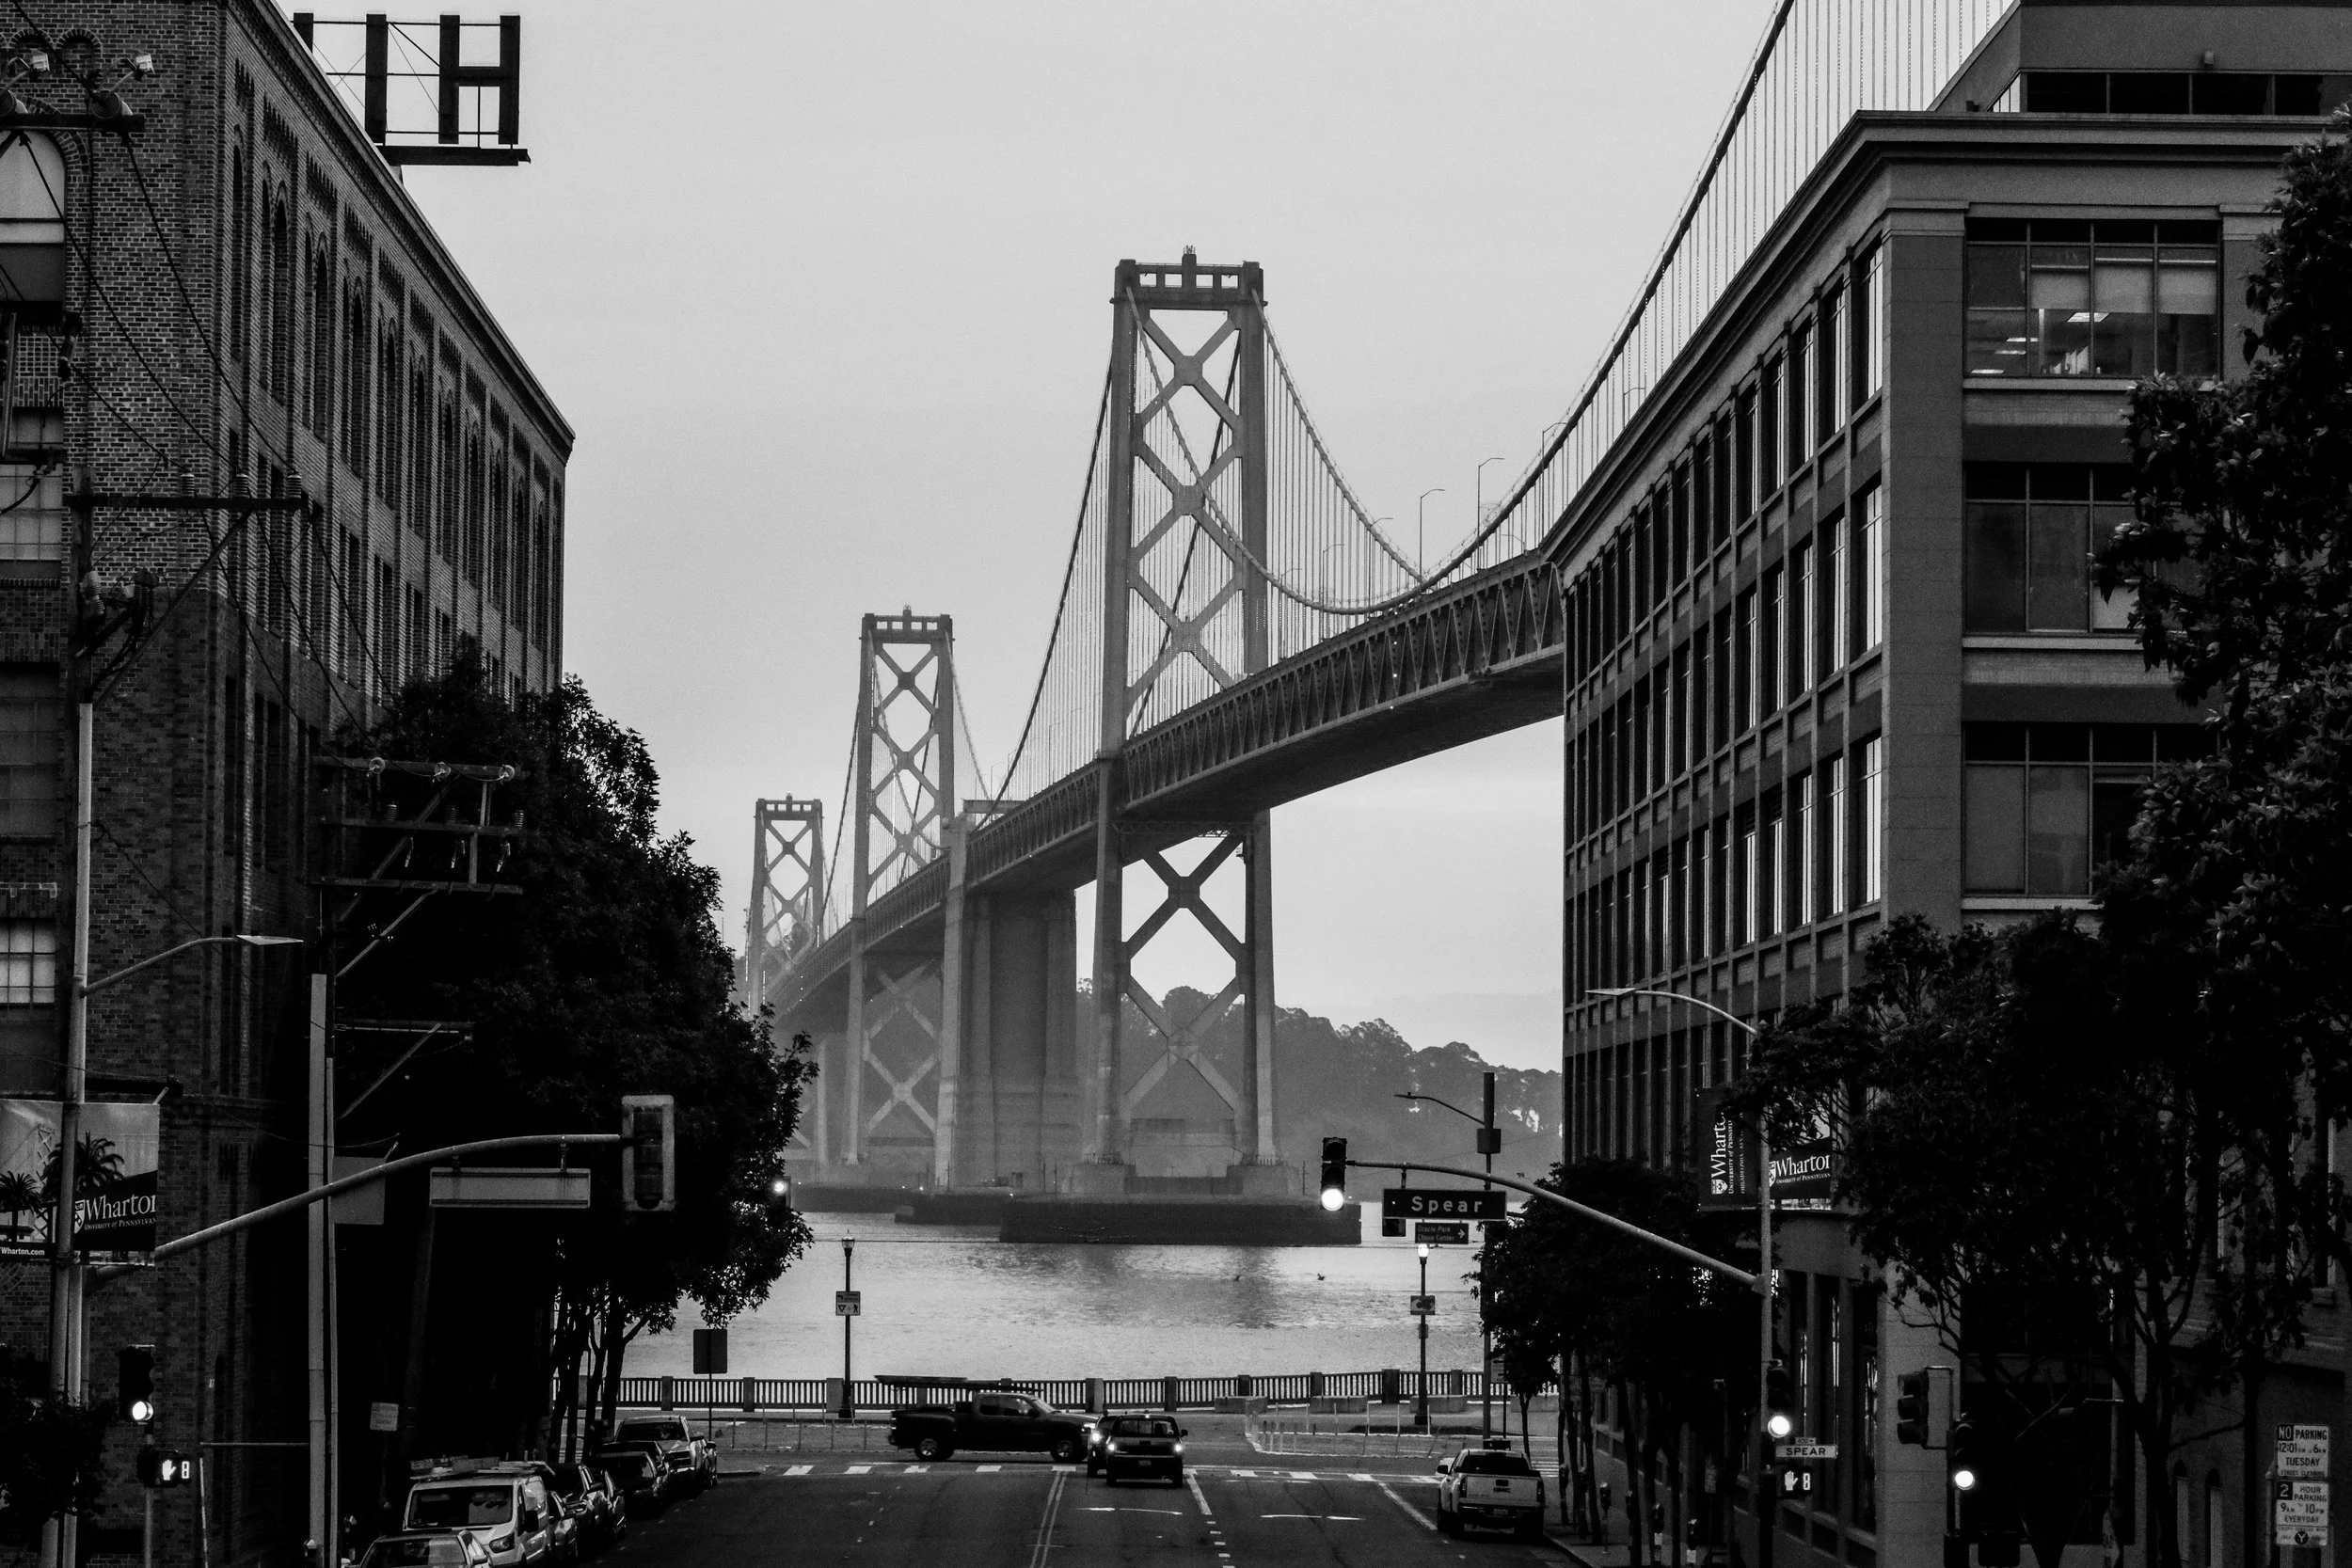
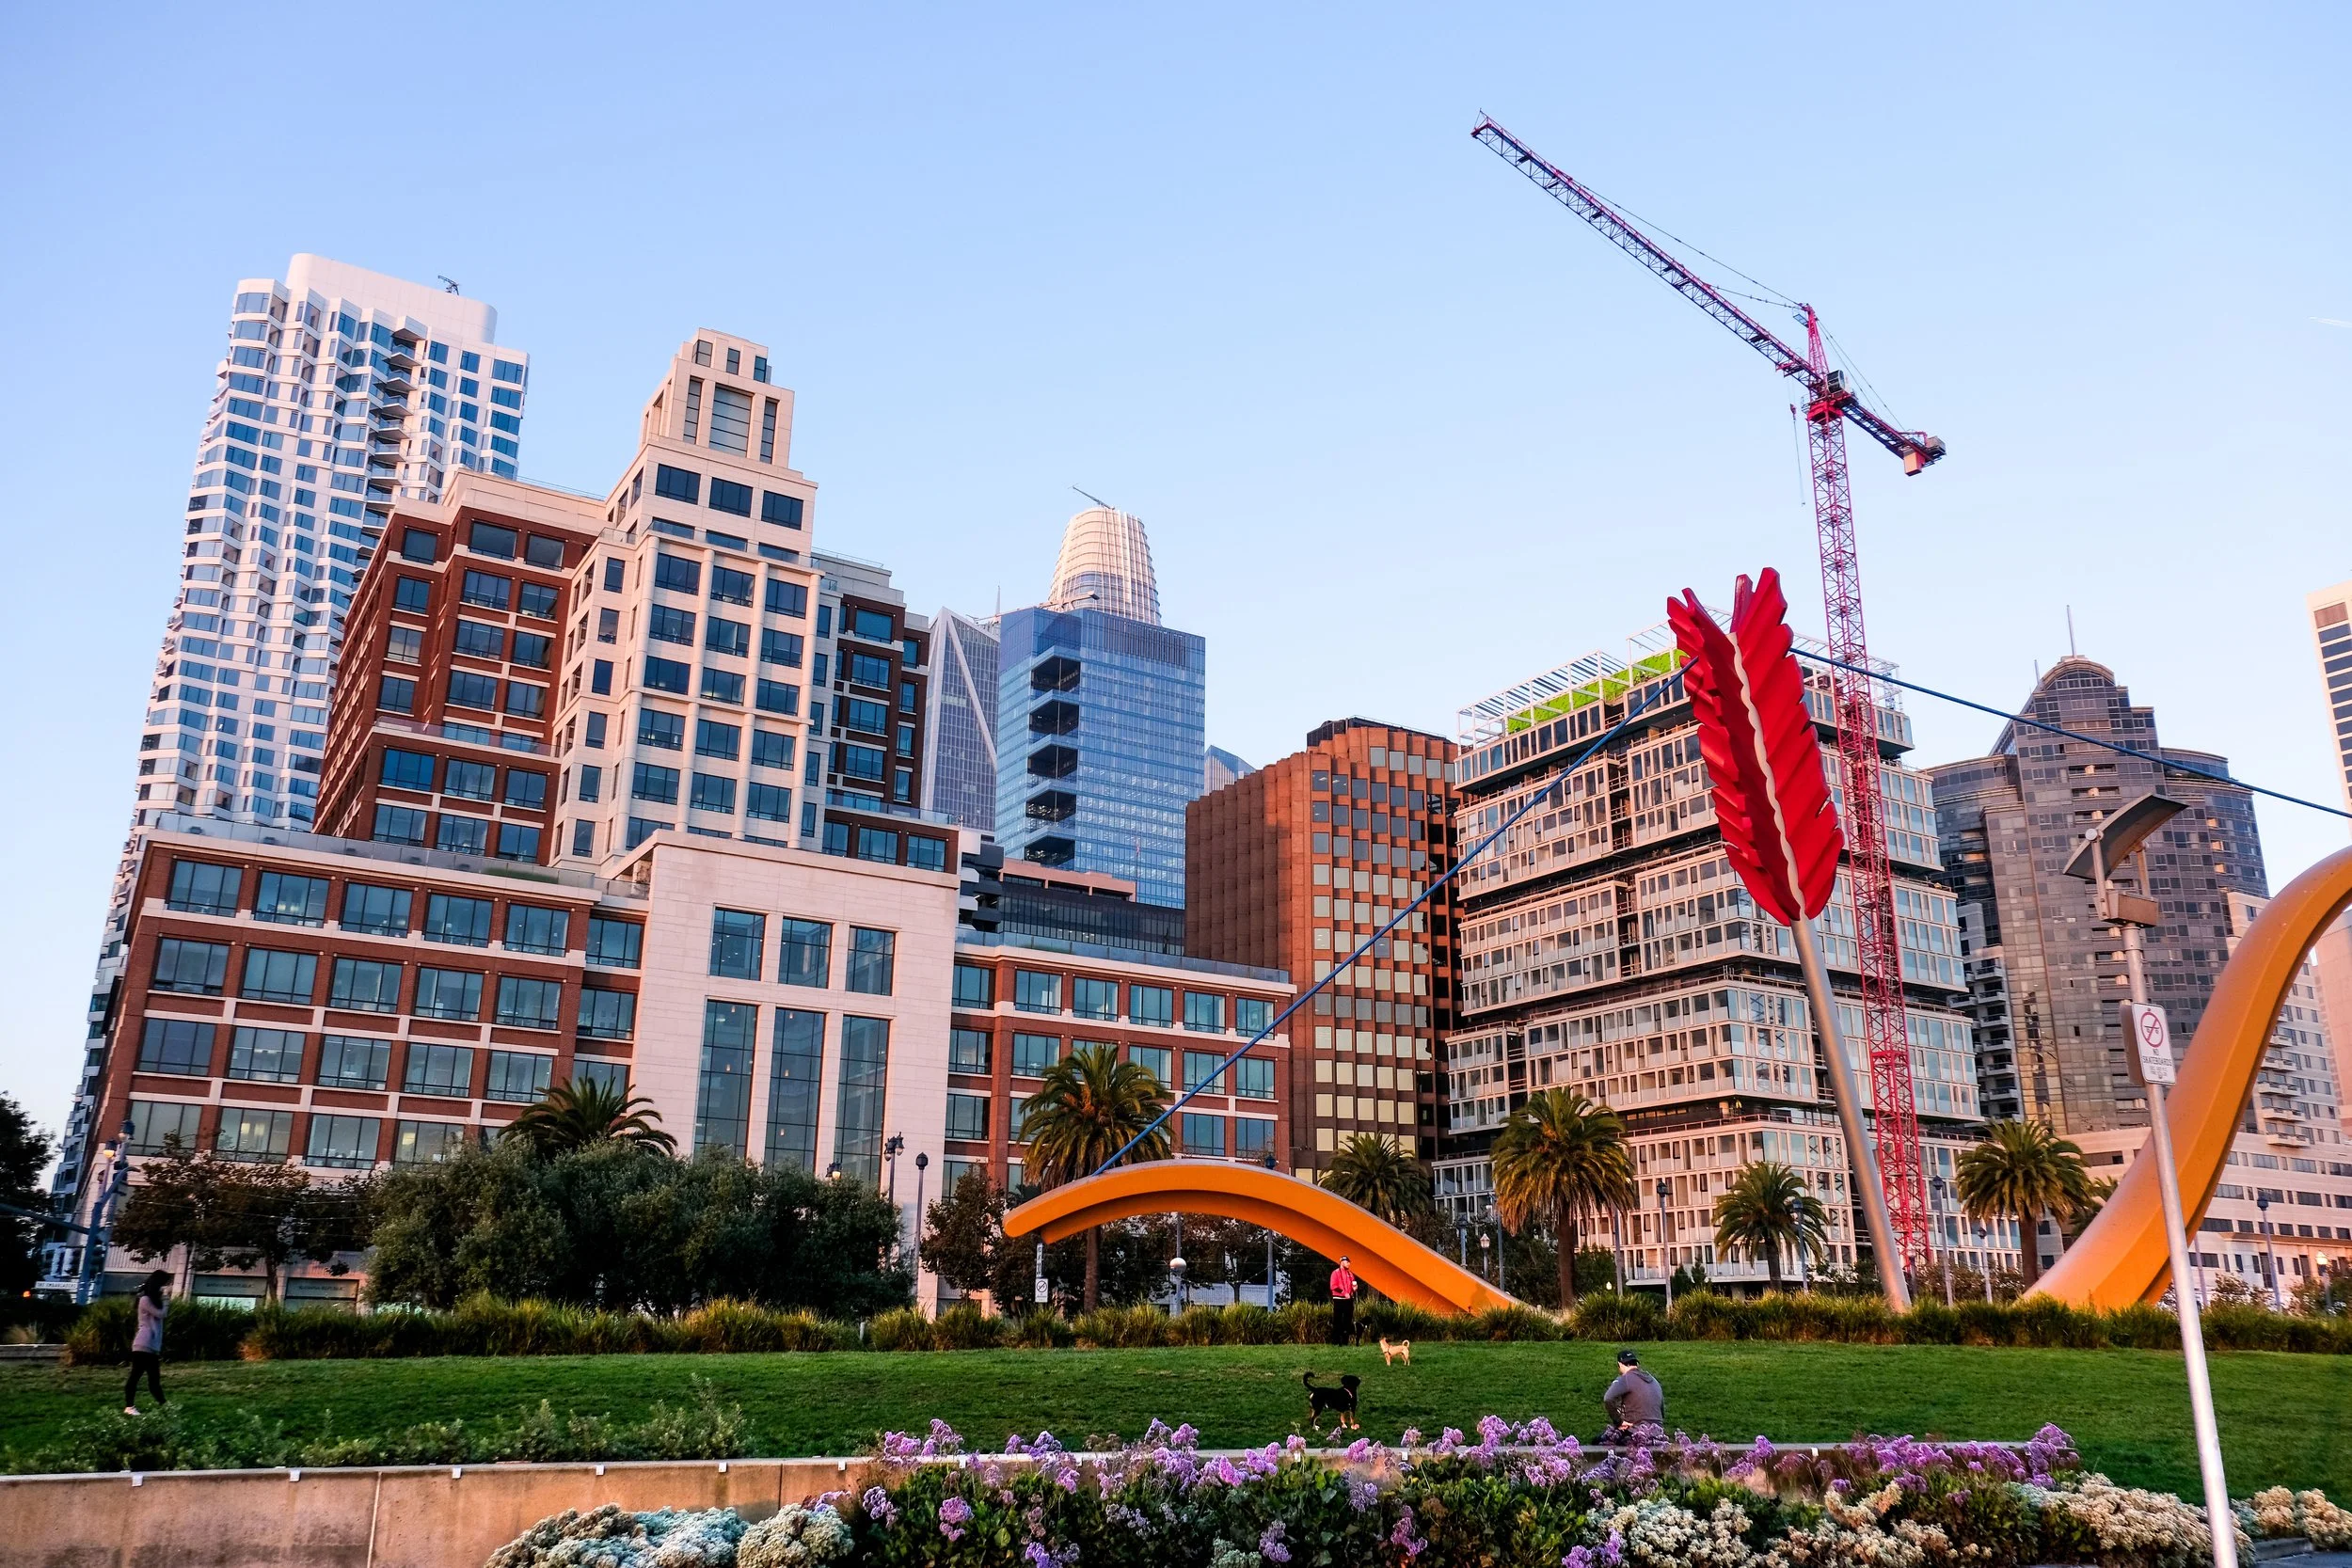
The Embarcadero and Ferry Building
The Embarcadero is one of those places in San Francisco that just keeps giving no matter what time of day or night you visit. You can spend a couple of hours there or half a day, and if the light cooperates, you'll come home with some great images This stretch of waterfront, from Harrison Street up through the Ferry Building and out onto the piers, offers everything from sweeping architecture shots to moody water reflections to the kind of golden hour light that makes you glad you got out of bed.
Harrison Street
Start at Harrison Street, just south of the main Ferry Building cluster, and work your way north toward the Ferry Building. From here you get a feel for the full sweep of the Embarcadero corridor, with the palm-lined boulevard, the F-line streetcars rolling past, and the Bay Bridge anchoring the view to the east. The bridge looks especially strong from this end of the waterfront, and if you arrive around sunrise, the light hits the eastern span in a way that's worth building a whole morning around. This is where the Fuji X-T5 with the 16-55mm f/2.8 earns its keep, letting you take in the wide scene while still having enough reach to isolate architectural details.
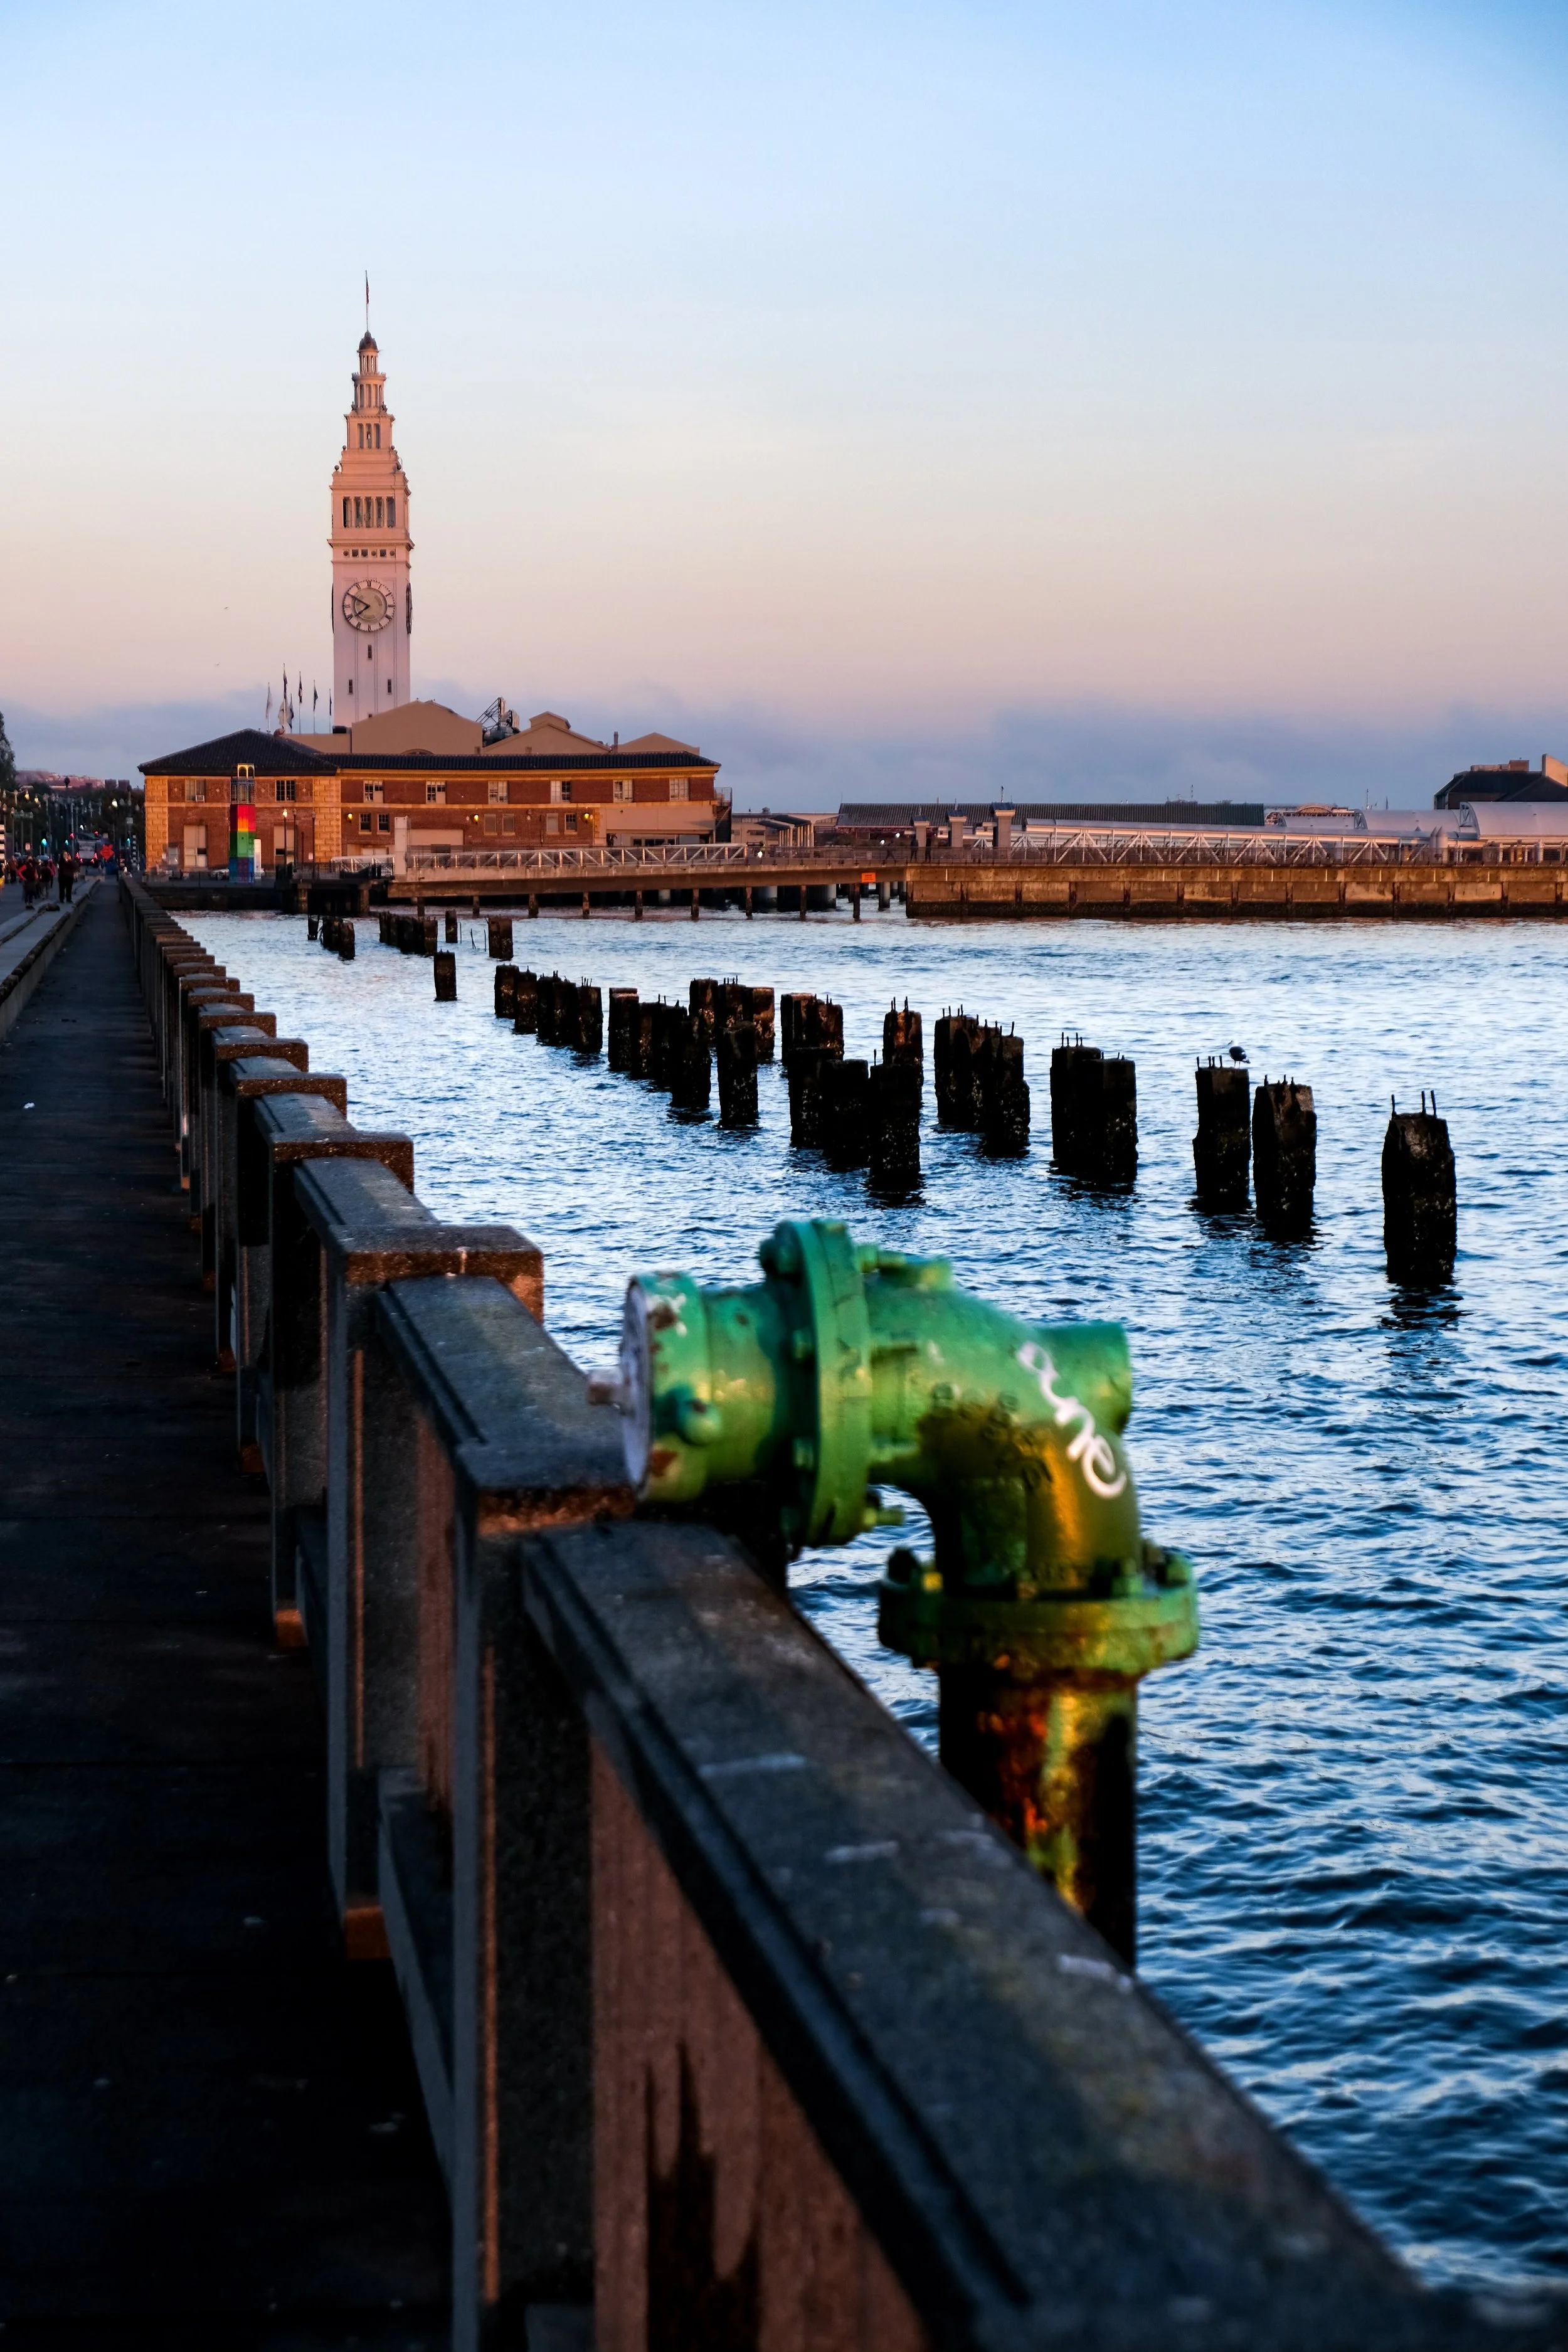
The Ferry Building
The Ferry Building is the centerpiece of this whole stretch, and it rewards you from multiple angles. The clock tower from across the Embarcadero is the obvious shot, but don't stop there. Walk the market side, look up at the arcade arches, and pay attention to how the light falls through the loggia at different times of day. Early morning on a weekday, before the farmers market crowd arrives, gives you relatively clean lines and quieter compositions. On a weekend morning, the market itself becomes the subject, full of color, texture, and character.
The X100VI shines here. It's unobtrusive, it fits in your jacket pocket between shots, and the 23mm focal length is just right for the tighter spaces and spontaneous moments the market produces. Nobody gives you a second look.
Pier 1 and Pier 3
Walking north from the Ferry Building, Piers 1 and 3 give you some of the best angles back toward the clock tower and south along the waterfront. Pier 1 has been beautifully restored and the architecture itself is photogenic, particularly at golden hour when the warm light catches the brick and timber. These piers are also a good vantage point for longer focal length work, using the XF 70-300mm to compress the distance and pull the Bay Bridge closer to the frame.
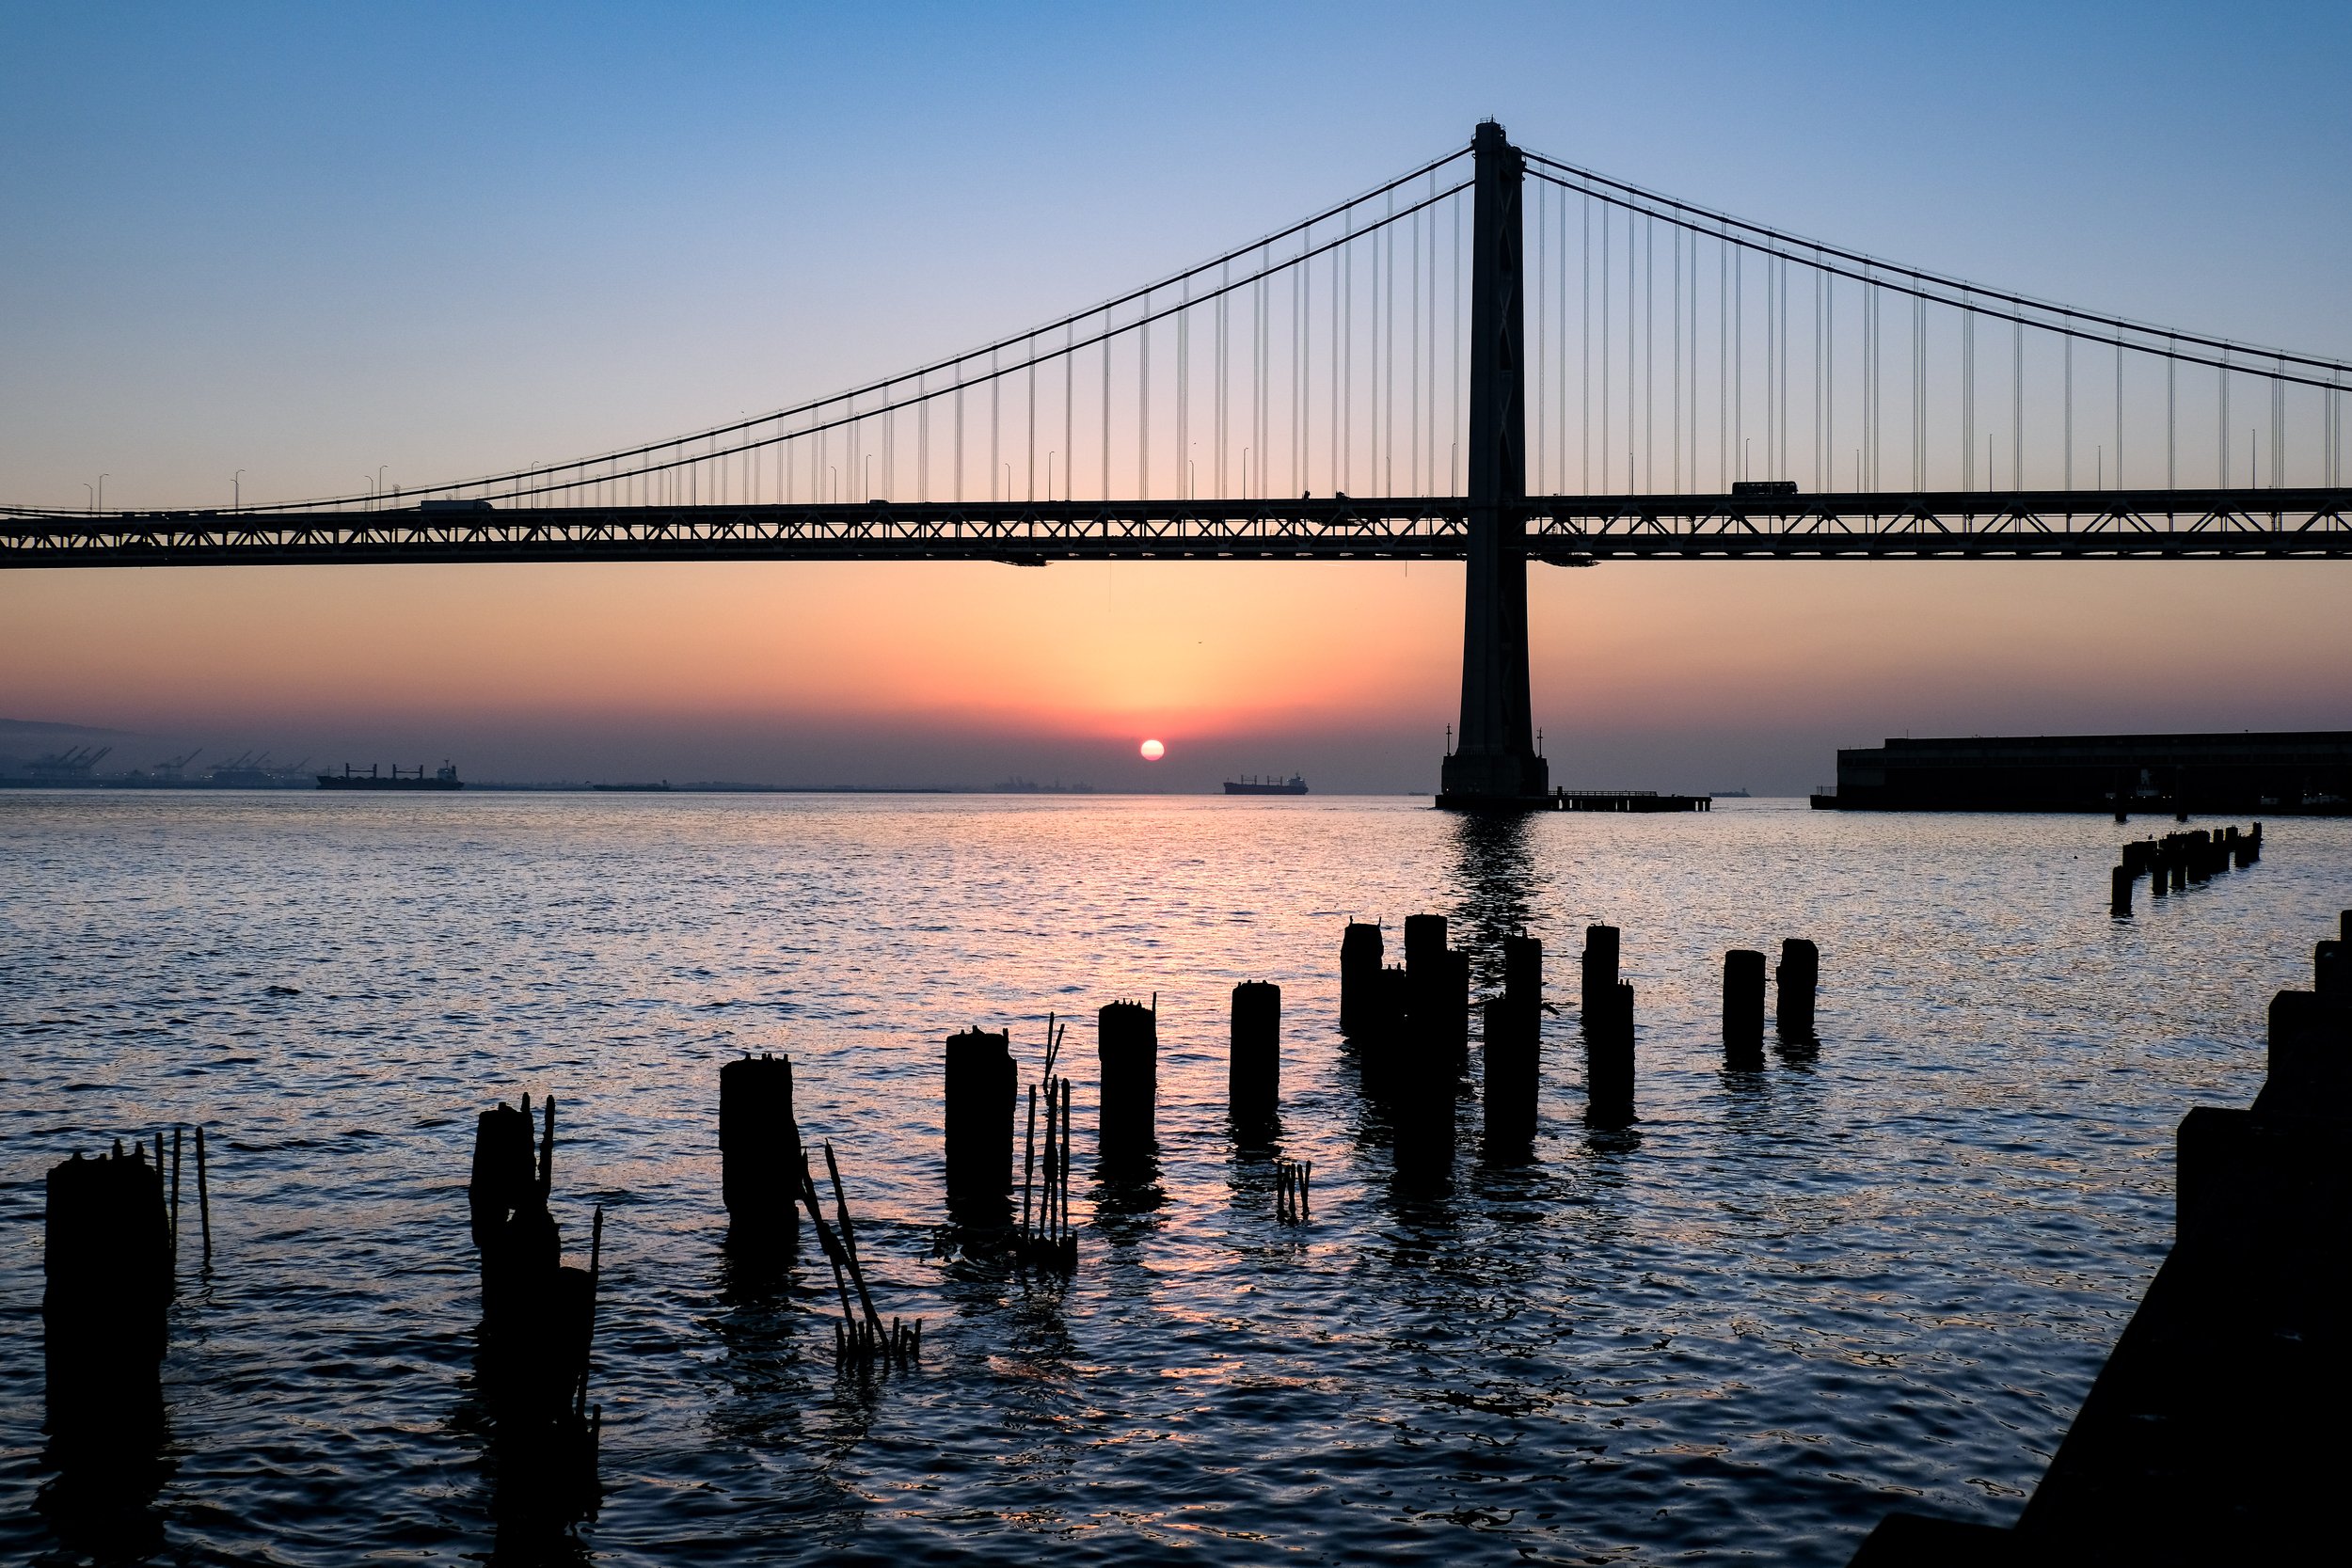
Pier 7
Pier 7 is a genuine gem and honestly one of the more underrated spots on this stretch. It's a public fishing pier that juts out into the Bay, which means you're shooting back toward the city with the water on all sides. The view of the Transamerica Pyramid from out here is compelling in a way you simply don't get from street level. The pyramid sits above the Financial District roofline and gives you a skyline composition that feels distinctly San Francisco.
For sunset, Pier 7 is outstanding. As the sun drops toward the western hills, you get beautiful warm light on the buildings and the Bridge, and if there's any atmospheric haze, it turns the whole scene luminous. Stay for twilight. There's a window about 20 to 30 minutes after the sun sets when the sky goes deep blue and the city lights come on, and everything balances out in a way that's almost impossible to replicate in post. This is tripod territory, obviously. Bring a remote shutter release if you have one.
Rincon Park and The Bow and Arrow
Just south of the Ferry Building at Rincon Park, the Bow and Arrow sculpture by Claes Oldenburg and Coosje van Bruggen is a great landmark to include in compositions looking back toward the Bay Bridge. But what I find more interesting is what's just off the waterfront nearby: the old wooden pilings standing in the water, remnants of the original industrial piers. These weathered pillars have real character, especially at low tide when they're fully exposed, and in the right light they make for a moody foreground element. The 70-300 is useful here too, letting you pick out individual pilings and compress them against the bridge in the background.
Light and Timing
Sunrise is the call if you want the Bay Bridge. The light comes from the east and wraps around the bridge structure beautifully in the first hour after dawn. Midday light on this stretch tends to be harsh and fairly flat, though fog can rescue it. Late afternoon into golden hour is when the Ferry Building facade really glows and the whole promenade takes on that warm, inviting quality. Twilight on Pier 7 is the most reliable evening payoff.
What to Bring
For a full day here I bring the X-T5 as my primary body, with both the XF 16-55mm f/2.8 for the wide environmental shots and the XF 70-300mm for compression and detail work. The X100VI comes along as a second body for street-level, candid, and tighter spaces where pulling out an interchangeable lens system feels like overkill. A tripod is worth the effort if you're planning to stay for twilight on Pier 7 or even take some water motion blur closer to the Bay Bridge.


Golden Gate Bridge South Side Photography Guide
The south side of the Golden Gate Bridge is one of the most photographed stretches of coastline in the world, and honestly, that reputation is fully earned. From Crissy Field all the way around to Marshall Beach, you have a sequence of locations that each give you a completely different relationship with the bridge, the Bay, and the light. You can spend a full day working this corridor and never feel like you've run out of angles.
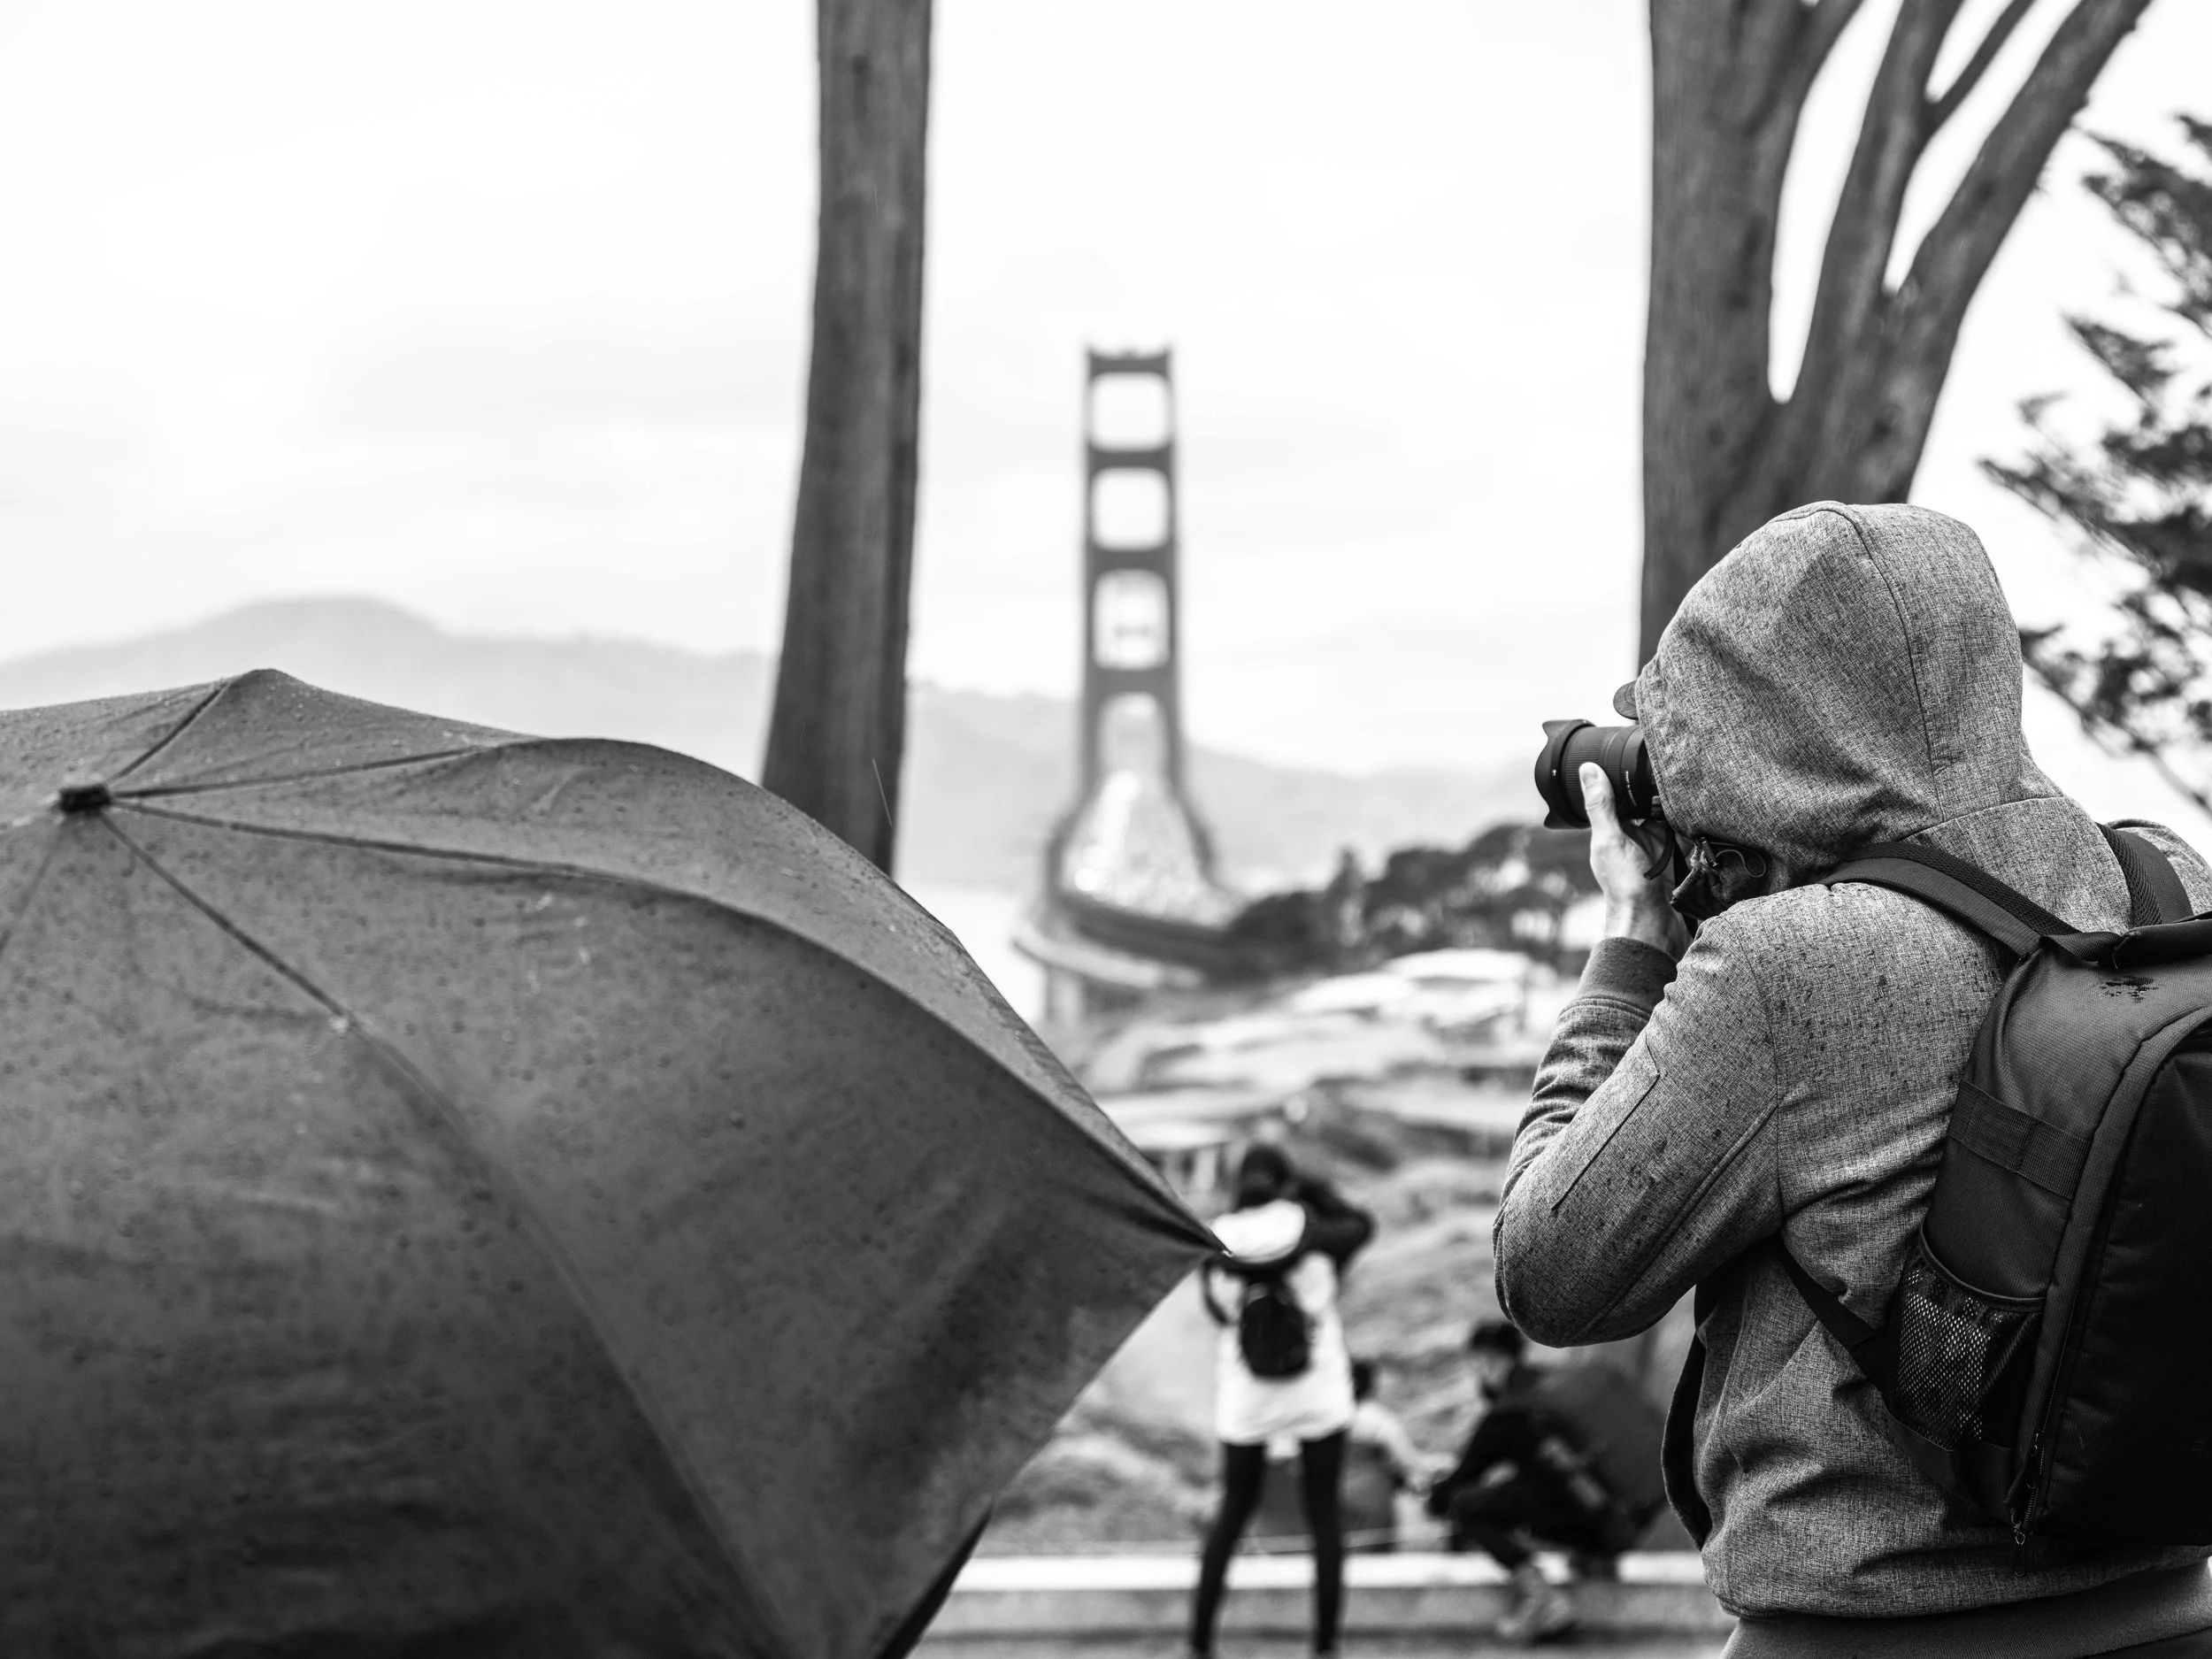
One thing to get out of the way right up front: fog is your enemy here. If there's a marine layer sitting on the Bay, the bridge disappears and you're left shooting at nothing. Before you load up the car, check the forecast. If it's a fog morning or a fog evening, hold off and come back another day. The light on a clear evening or a crisp clear morning is spectacular. Fog, not so much.
When to Go
Evening golden hour is the prime time for this stretch. The sun sets over the Pacific, to the northwest, which means it throws warm directional light directly onto the south face of the bridge. The towers go from their everyday International Orange to something closer to burnished copper, and the whole scene takes on that quality where you know every frame is going to work. Stay through twilight. That 20-minute window after the sun drops, when the sky goes deep blue and the bridge lights come on, is a completely different and equally worthwhile shot.
Early morning is also worth the effort, especially at Crissy Field and Marshall Beach. The light comes from the east and wraps around the bridge from behind, which gives you a more atmospheric, backlit quality. On a clear morning with calm water in the Crissy Field lagoon, you can get reflections that make the image feel twice as big as it is. Just know you're shooting into or across the light rather than with it, which is a different challenge but a rewarding one.
Crissy Field
Crissy Field is where I usually start. It gives you the long view down the shoreline toward the bridge, with the restored marsh and beach in the foreground. At the wide end of the XF 16-55mm f/2.8, you can pull in the full sweep of the waterfront with the bridge anchoring the far end of the frame. Walk the beach and work different foreground elements: wet sand, beach grass, the old pier remnants. The scene changes significantly depending on how much you move.
If the water is calm enough for reflections, get low. Really low. A few inches off the ground with the X-T5 tilting its screen toward you lets you exaggerate the foreground and pull the bridge into the upper third of the frame in a way that feels genuinely dramatic.
This is also a good spot to pull out the XF 10-24mm f/4 if you brought it. At 10mm on an APS-C sensor, the sky presses down on the frame and the landscape spreads wide. You feel the scale of the place in a way the 16-55 just cannot fully capture. If there are interesting clouds building over the Marin Headlands or the light is doing something dramatic, this is the lens that turns a good shot into a great one.
Marine Drive
Marine Drive runs along the water between Crissy Field and the base of the bridge, and it is worth slowing down and stopping along this stretch rather than just driving through. The views of the bridge from the roadside pull-outs get progressively more dramatic as you head west toward the base. The towers start to loom over you, and the compression you get with the XF 70-300mm at the longer end starts to get really interesting here. You can isolate the cables, fill the frame with the towers, or pull the bridge together with the Marin Headlands behind it in a way that feels stacked and dramatic.
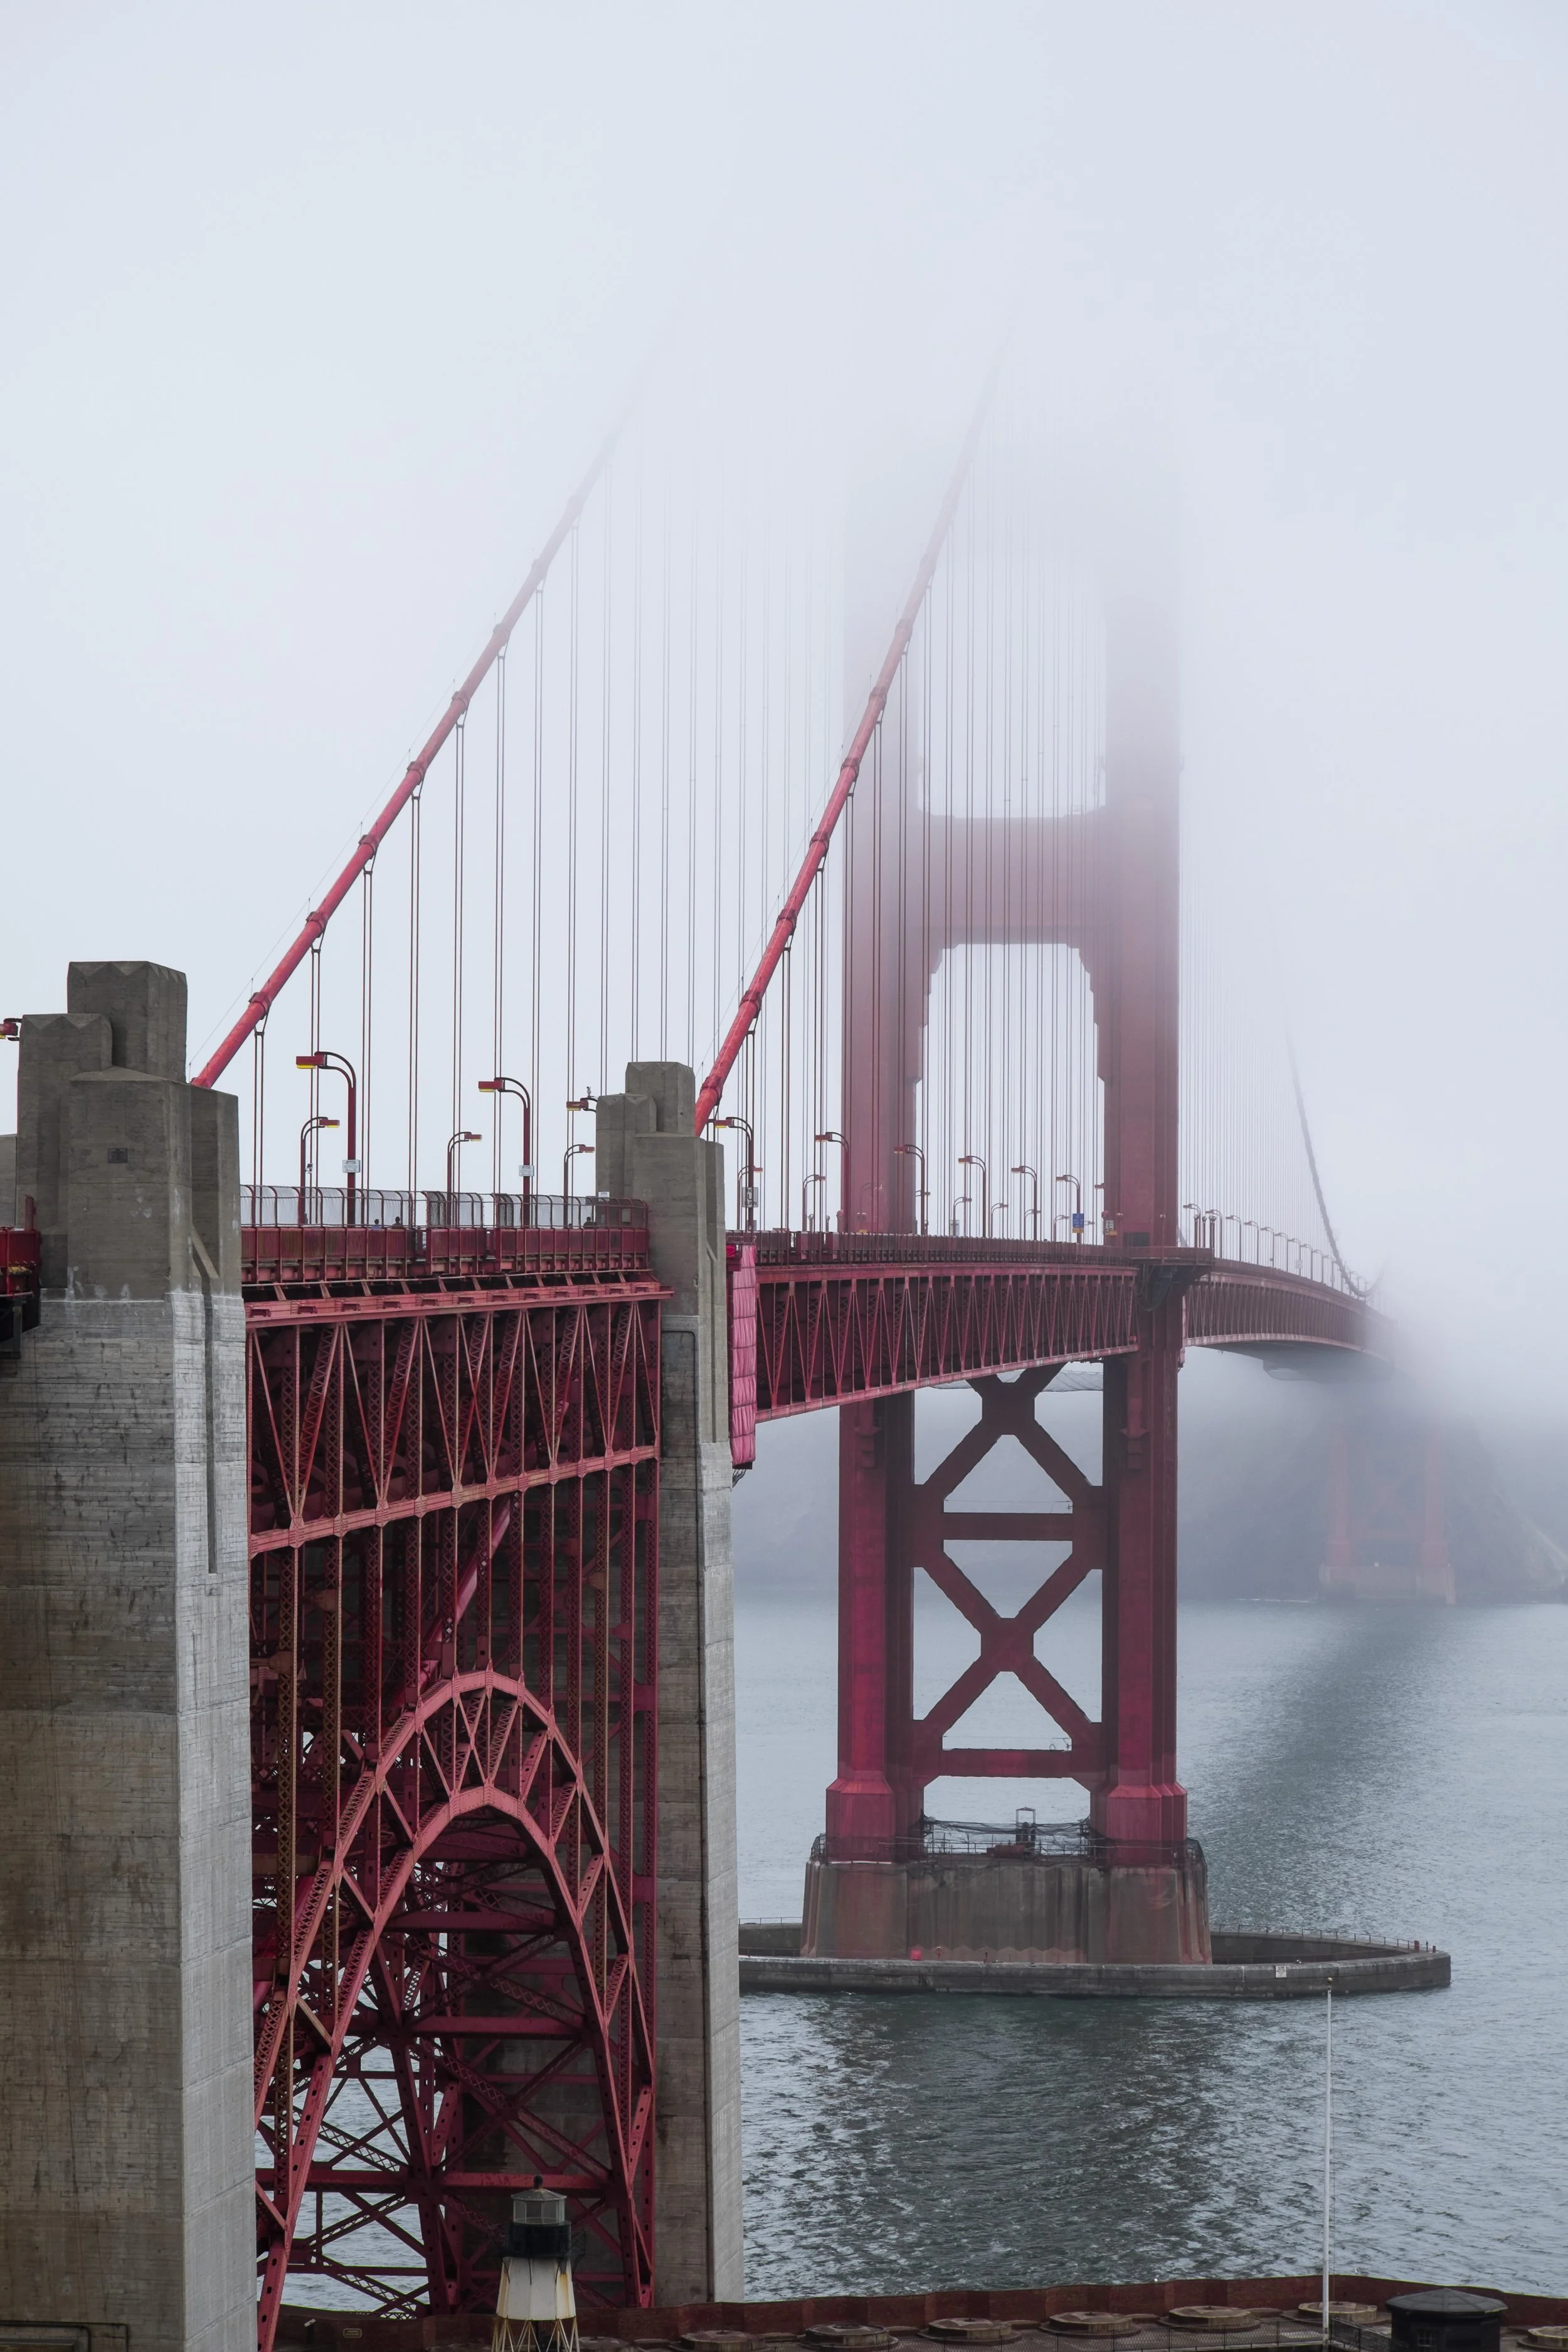
Fort Point National Historic Site
Fort Point sits directly under the south anchorage of the bridge, and there is no other location on this entire stretch that gives you quite this angle. Looking straight up at the underside of the roadway with the arch of the bridge framing the span above you is one of those compositions that never gets old. It requires a wide lens. The 16-55 at 16mm works well, and the 10-24 is even better if you want the full arch in the frame with room to breathe.
The brick fortification itself is also worth shooting on its own terms, particularly in the warm light of late afternoon when the facade takes on a deep reddish glow. The combination of the Civil War-era architecture against the 1930s engineering above it is genuinely striking, and it is the kind of image that makes people do a double-take.
Fort Point can get windy. Be ready for it.
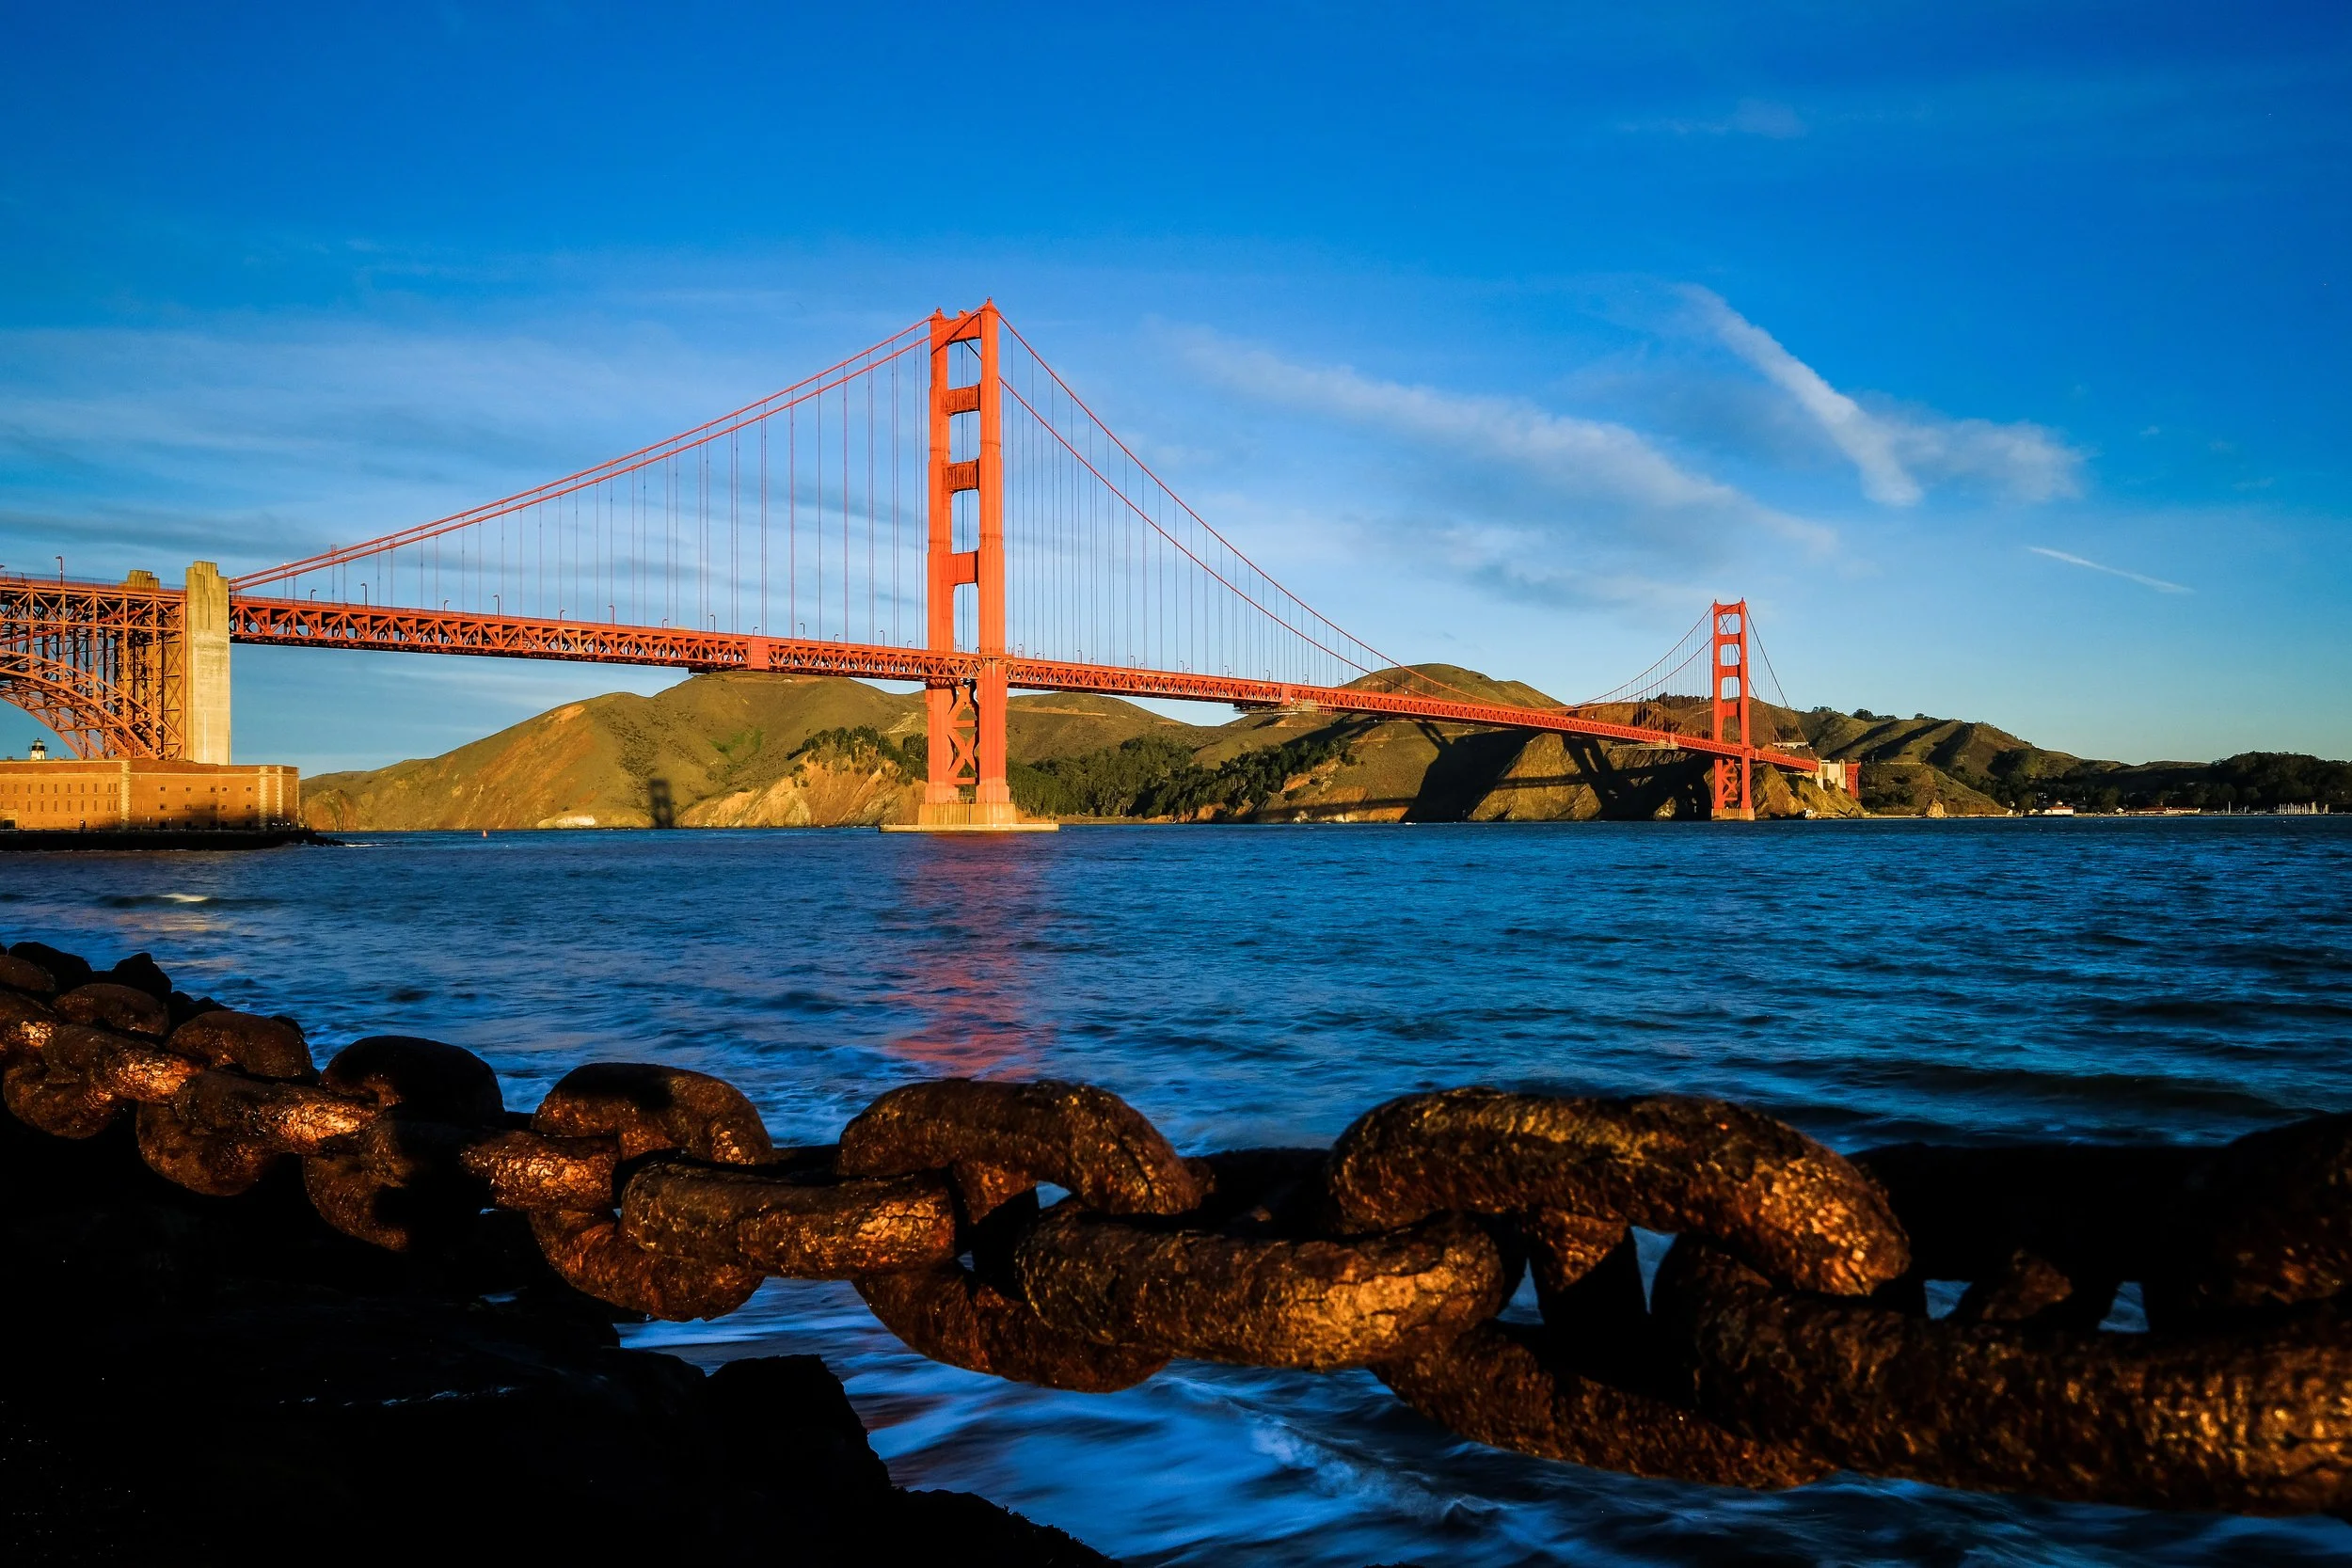
Golden Gate Bridge Vista Point (South)
The South Vista Point sits right at the toll plaza end of the bridge and gives you the classic straight-on view of the span. It is the most visited and most photographed spot in this entire guide, and for good reason. The shot is reliable. At golden hour the bridge glows, the water catches the light, and Marin sits dark and green in the background.
The 16-55 handles the wide establishing shots here. The 70-300 is where it gets more interesting, letting you compress the span and isolate the towers, or frame a single cable run against the sky. Shoot a few stops down from wide open if you want crisp detail across the full length of the bridge.
Golden Gate Overlook
The Golden Gate Overlook is a short walk up from the parking area near the bridge approach, and it puts you slightly above and back from the south end of the span. This higher vantage changes everything. You can see the curve of the roadway, the full height of both towers, and the water stretching out toward the Marin shore. At golden hour from up here, with the 16-55 at the wide end, the scene has real grandeur to it.
This is also a solid twilight location. Once the sun is down and the bridge lights are fully on, the scene holds up well into the blue hour.
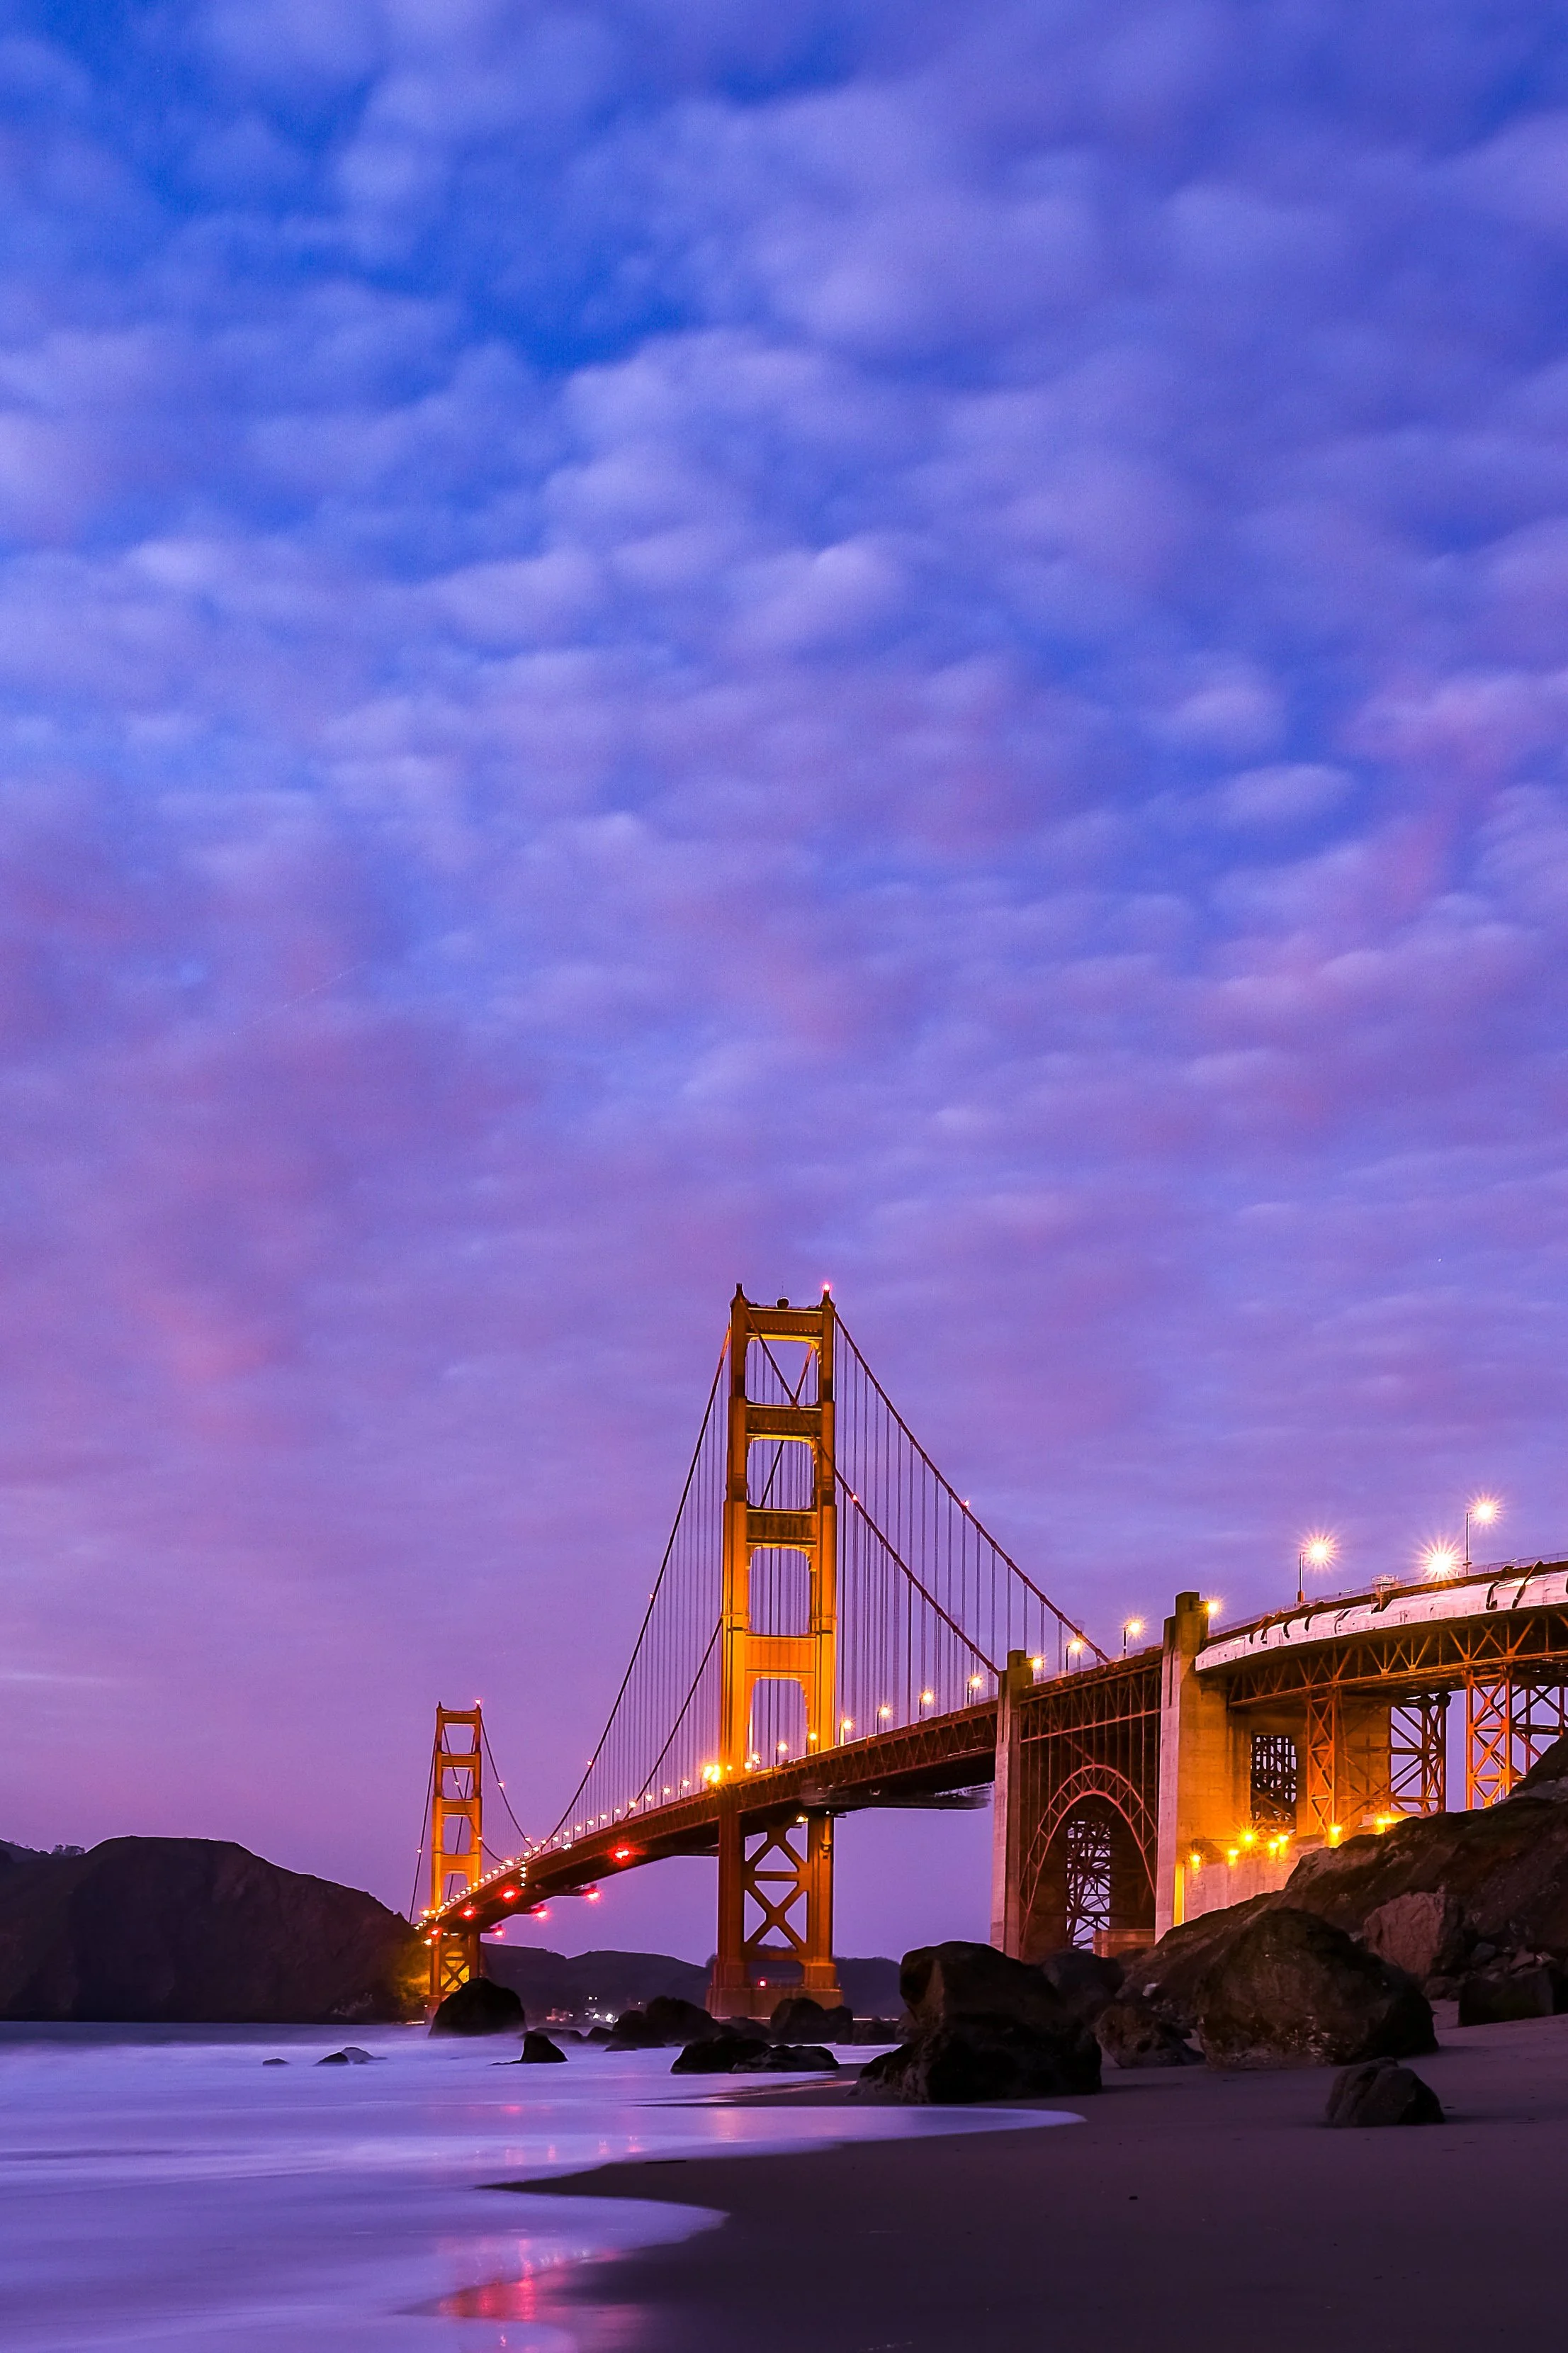
Marshall Beach
Marshall Beach requires a hike, about 15 to 20 minutes down a trail from the parking area near Lincoln Boulevard, and most people skip it for that reason. That is exactly why you should go. The view from Marshall Beach is one of the best angles on the Golden Gate Bridge you can get from the south side. You are looking up and across at the bridge from below, with the rocky shoreline in the foreground and the span filling the upper portion of the frame. At sunset this beach is exceptional. The light comes from behind and to the right, catching the bridge face-on, and the rocks in the foreground take on warm golden tones.
The hike back out in the dark is something to plan for. Bring a flashlight or make sure your phone is charged. It is absolutely worth it, but do not be that person scrambling up the trail in the pitch black.
What to Bring
The X-T5 is the right body for all of this. The XF 16-55mm f/2.8 covers the majority of what you need and handles the lower light of golden hour and twilight without having to push ISO hard. The XF 70-300mm earns its place in the bag for compression work along Marine Drive and at Vista Point. And if you are willing to carry one more lens, the XF 10-24mm f/4 gives you the ultra-wide capability that Fort Point and Crissy Field genuinely reward. A tripod is non-negotiable for twilight and anything after.
The wind at most of these locations is real, especially at Fort Point and Marshall Beach. Dress warmer than you think you need to and bring lens cloths because the salt air will find your glass.