Yosemite Photography Guide: A 3-Day Itinerary
Yosemite is one of those places that lives up to the hype, and then some. I visited June 17-19, 2024, with the goal of shooting as much of the park as I could in three days. I brought my Fujifilm X-T3 and X-S20, the XF 10-24mm for wide-angle work and the XF 70-300mm for pulling in detail. Michael Frye's Yosemite Photo Guide was essential for knowing where to be and when. Here's what I did, what worked, and what I'd recommend.
Where to Stay
I stayed at Curry Village in the canvas tent cabins. They're unheated and it gets down into the low 40s at night, so bring layers. That said, the location is hard to beat for quick access to shooting spots. The Pizza Deck and Bar 1899 on site are solid for a pre-shoot meal without having to go far.

Day 1: Glacier Point at Sunset
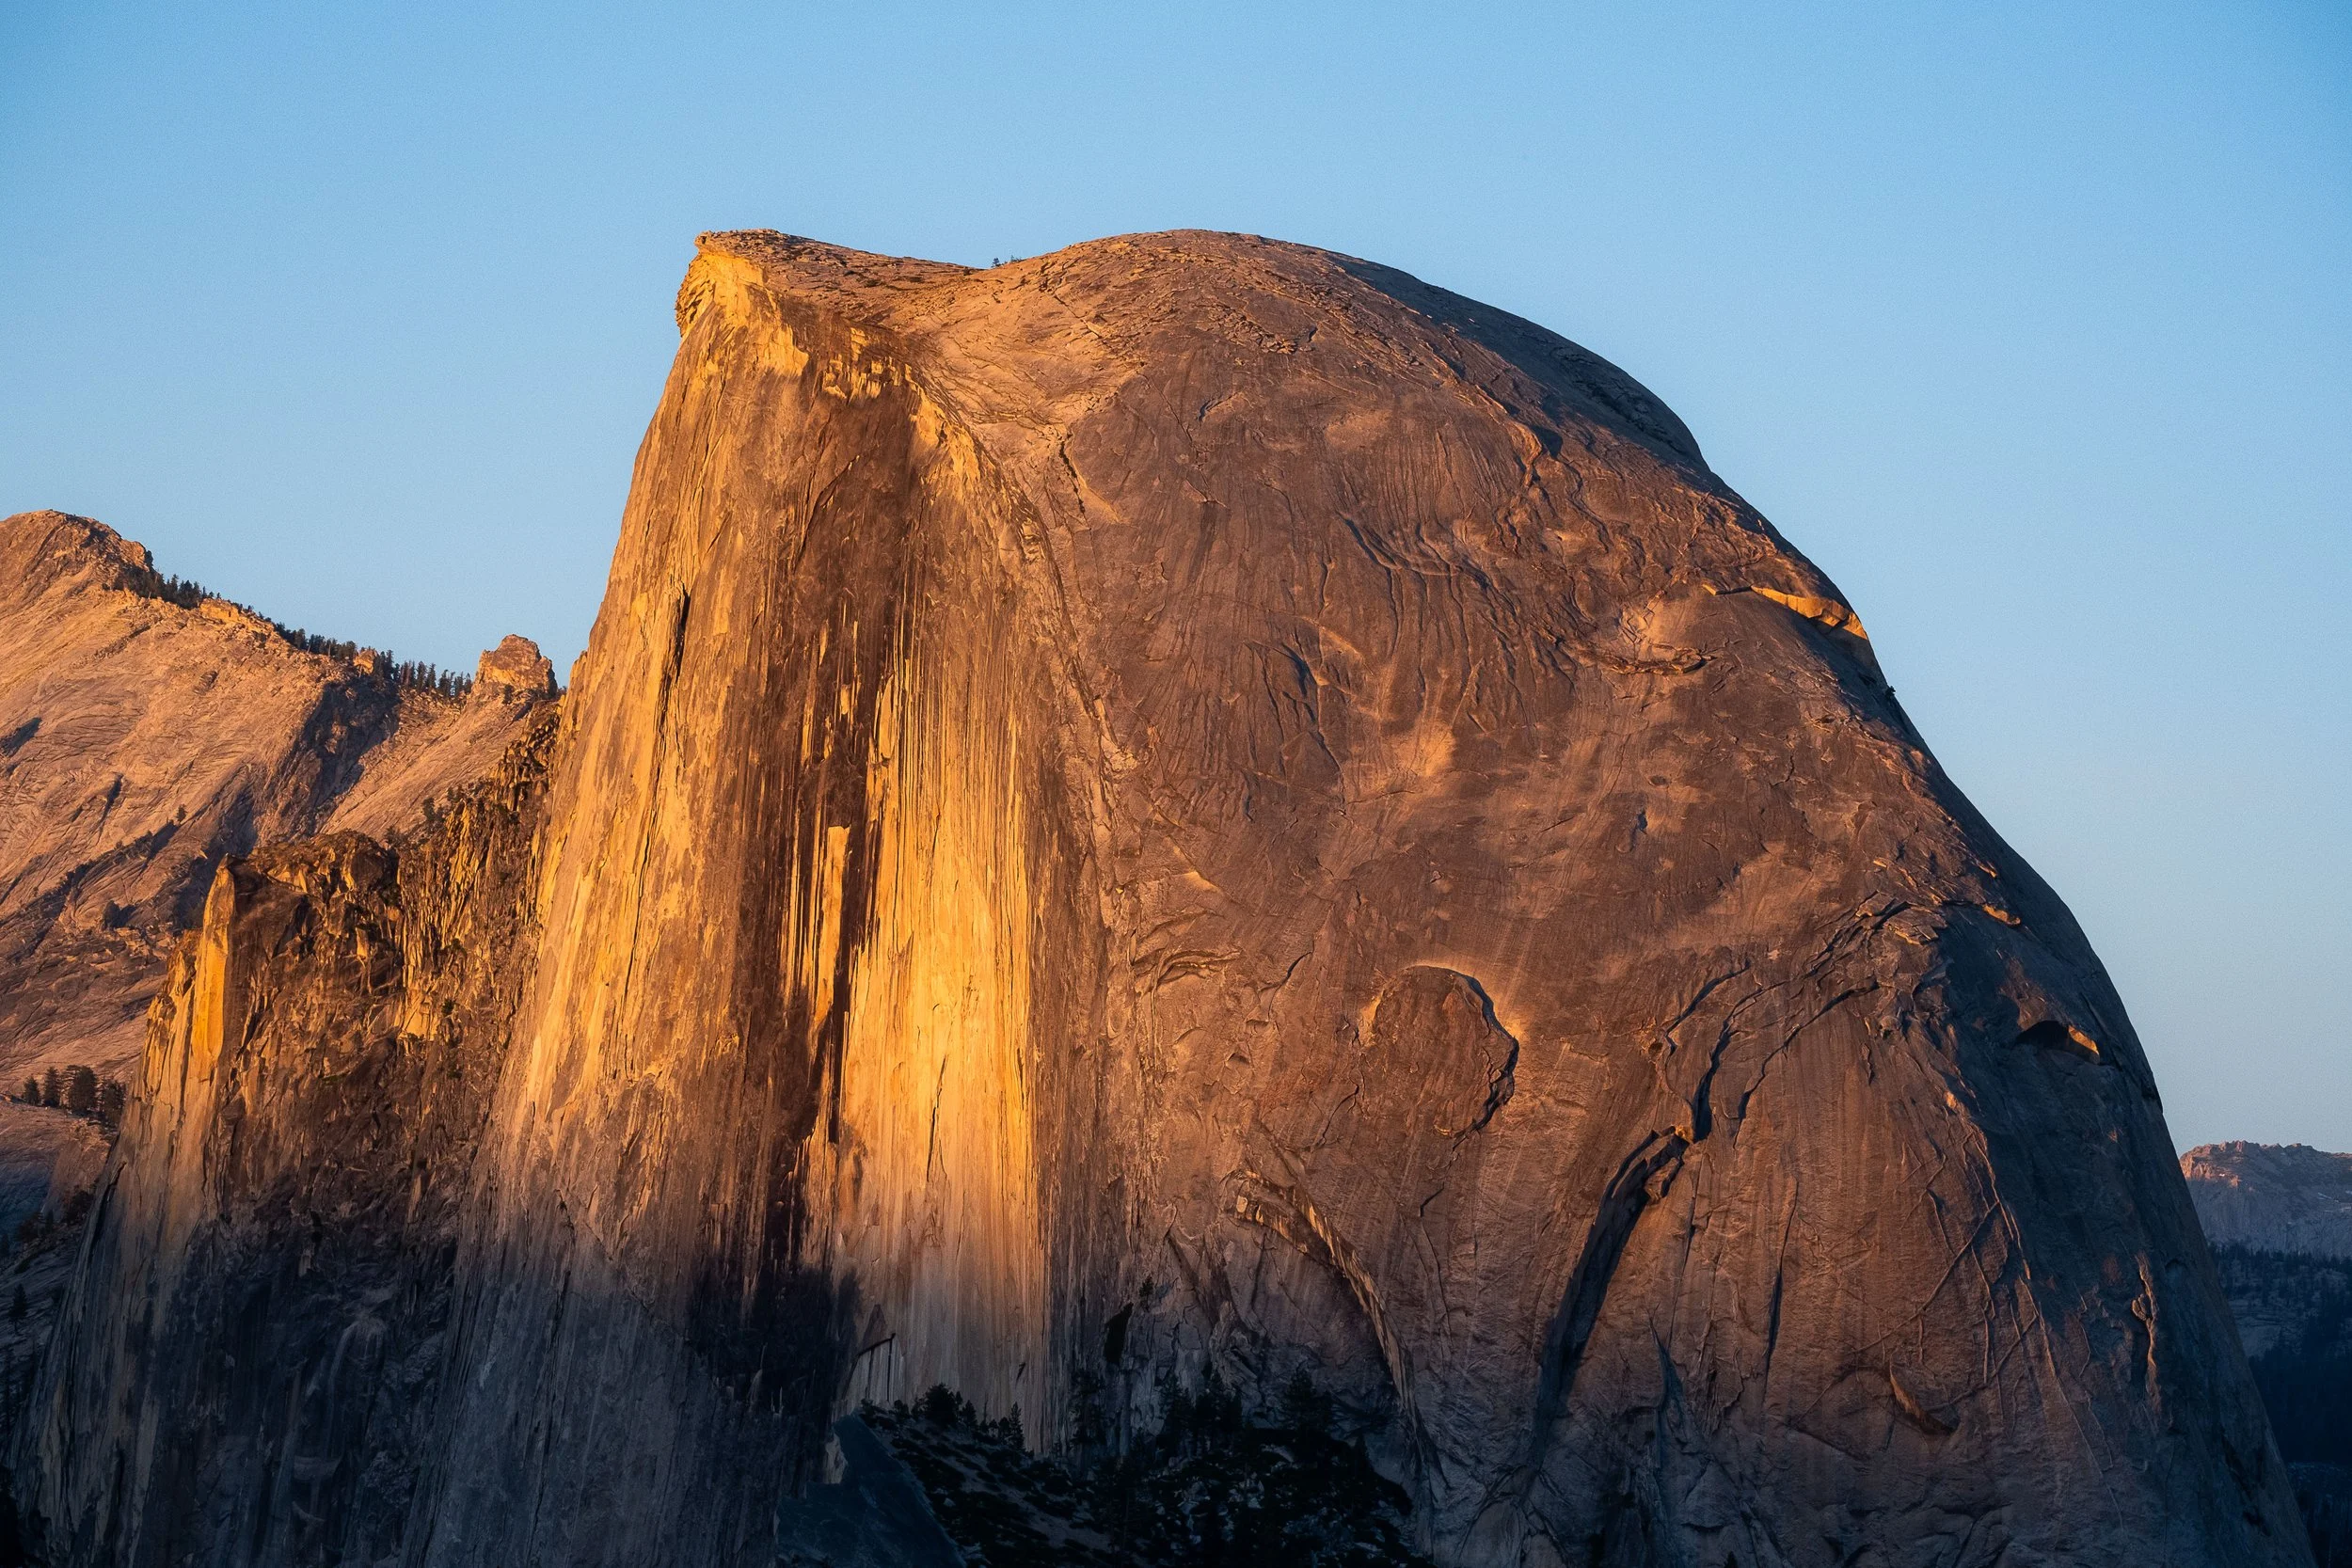
After a four-hour drive from San Francisco, plus another hour winding through the park, I got checked in and headed straight to Glacier Point for golden hour. The drive up is worth it on its own. From the overlook you get an unobstructed view of Half Dome and the full sweep of Yosemite Valley as the light goes warm. I shot from about 6:30 to 8:30 PM and came back with some of my favorite images of the trip.
What to bring: Tripod, wide-angle lens, and patience. The light changes fast.

Day 2: Taft Point at Sunrise, Then a Full Day in the Valley
4:30 AM: Taft Point This was the highlight of the trip. Taft Point is about a mile hike from the parking lot, and being out there alone in the dark and then watching the light hit El Capitan at sunrise was one of those moments that reminds you why you haul yourself out of a warm sleeping bag at 4 AM. Bring a headlamp and dress warm.
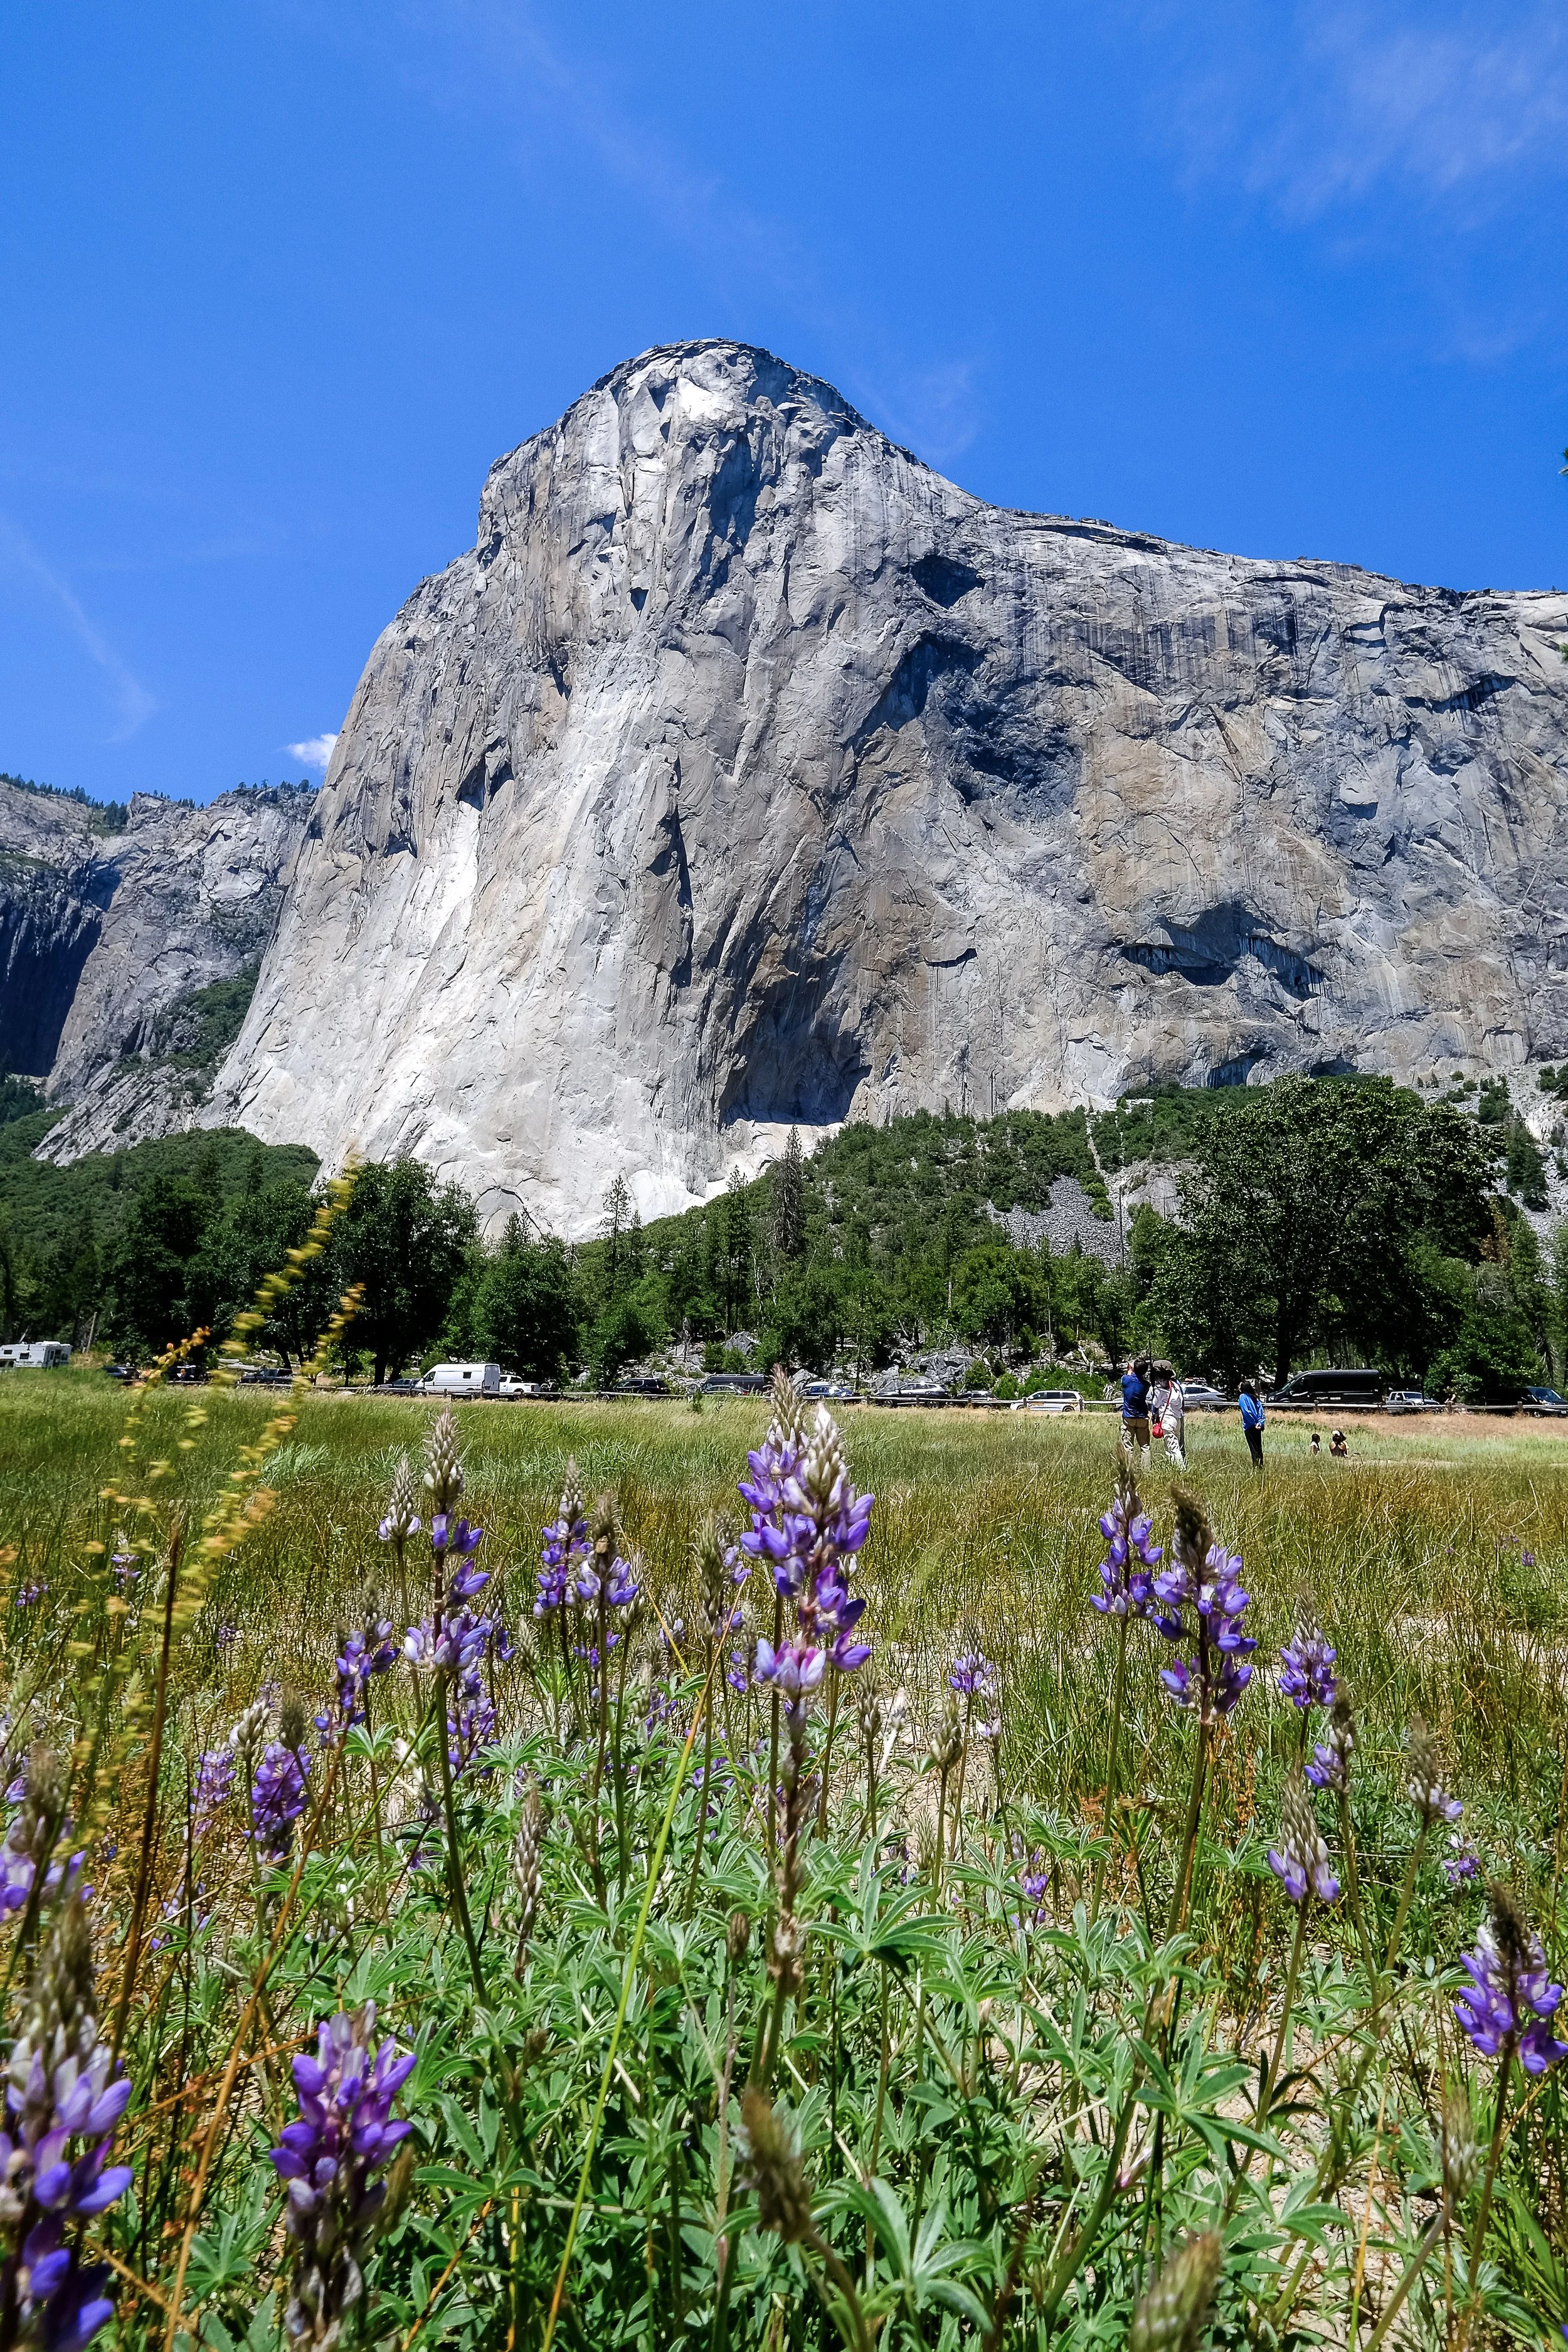
9:00 AM: Cycling the Valley Floor After breakfast at the Curry Village Coffee Corner, I rented a bike and spent the morning rolling through the valley, stopping to shoot El Capitan, Bridalveil Fall, and Yosemite Falls. The X-T3 with the 10-24mm lens is a great combo for this because you can shoot wide and fast without slowing down too much.
6:30 PM: Tunnel View at Sunset There was some wildfire smoke in the air, which softened the light in an interesting way. I also stopped along the road to shoot Bridalveil Falls on the way. Tunnel View at blue hour is worth sticking around for after the main sunset fades. Just bring your mosquito repellant.


Day 3: Shooting on the Way Out
After breakfast I packed up and took my time driving out of the park, stopping for a few last shots including the Three Brothers formation. Don't be in a rush to leave. The light in the morning is good and there are pullouts worth using.


Gear I Used
Fujifilm X-T3 — primary body
Fujifilm X-S20 — second body and video
XF 10-24mm f/4 R OIS WR — wide landscapes and valley floor shots
XF 70-300mm f/4-5.6 R LM OIS WR — detail and compression shots
Tripod — essential for sunrise and sunset work
Resource I'd Recommend
Michael Frye's Yosemite Photo Guide is genuinely useful for understanding the best locations and the times of year and day when the light works best at each one. I used it throughout the trip and it paid off every time.
Yosemite rewards preparation but it also rewards just showing up and being willing to get up early. I'm already planning a return trip to visit some of the spots I missed.